
Quick Answer: Which Sticker Type Should You Choose?
Choosing the right piano key stickers for your 61-key keyboard depends on your long-term musical goals, your current playing experience, and the specific material of your instrument. For most beginners, children, and casual students, removable stickers are the ideal choice. These temporary learning aids allow you to build visual associations with notes and staff positions, with the ultimate goal of peeling them off once you memorize the keyboard layout.
Permanent stickers, on the other hand, are best suited for advanced players who require permanent custom labeling, individuals with specific accessibility or color-coding needs, or those using keyboards in dedicated instructional settings where the labels will never need to be removed.
Before making a purchase, always verify your keyboard’s key dimensions and surface finish. While most 61-key keyboards share standard key widths, some budget, compact, or specialized models feature narrower keys that may cause standard stickers to overlap or overhang. Additionally, check your keyboard manufacturer’s care instructions to ensure that applying adhesives will not damage the key surfaces or void your warranty.
Products mentioned in this guide

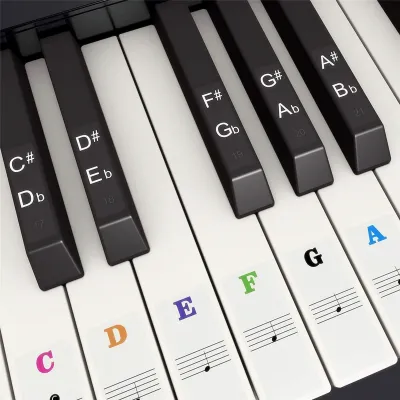

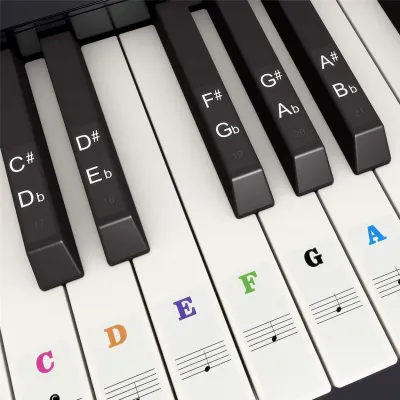
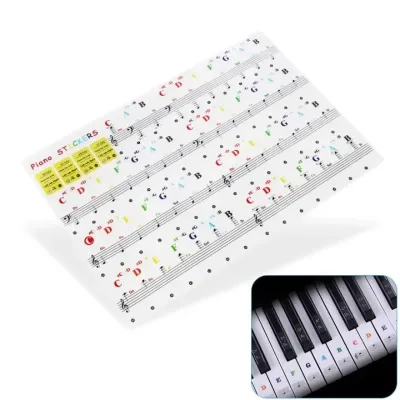

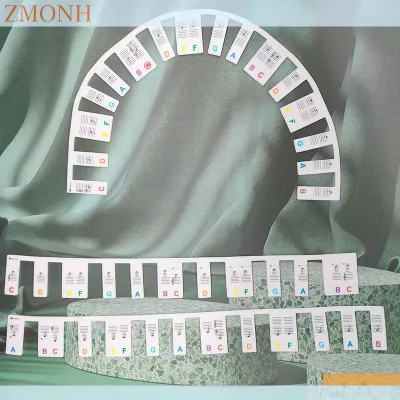
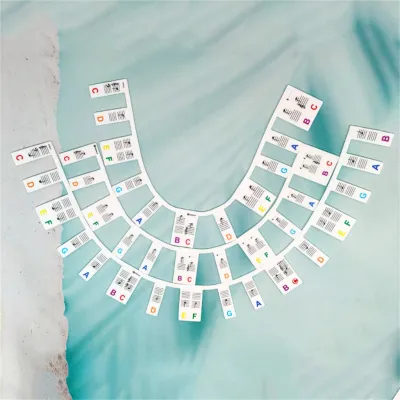
Prices are valid at publication and may change. Please refer to the product page for the latest price.
Removable vs. Permanent Piano Stickers Compared
When shopping for a piano sticker 61 keys set, you will generally choose between two primary categories: removable (often made of low-tack vinyl, silicone, or static-cling materials) and permanent (typically utilizing strong acrylic adhesives on thin plastic or coated paper). Understanding how these two types differ across key performance areas will help you select the option that best preserves your instrument while supporting your learning journey.

In the tropical climate of the Philippines, environmental factors like high humidity and ambient warmth play a significant role in how adhesives behave over time. High humidity can cause low-quality adhesives to slide or lift, while intense heat can make permanent adhesives more gummy and difficult to clean.
The table below outlines the fundamental differences between these two sticker types based on stable, observable product characteristics.
| Feature | Removable Stickers | Permanent Stickers |
|---|---|---|
| Adhesive Type | Low-tack acrylic, silicone, or static cling | Strong solvent-based or permanent acrylic |
| Tactile Feel / Thickness | Extremely thin (often under 0.1mm); flush with key | Variable; can range from thin vinyl to thicker coated paper |
| Expected Lifespan | 6 to 18 months (highly dependent on humidity) | Multi-year durability; highly resistant to wear |
| Residue Risk | Very low; peels off cleanly without solvents | High; requires specialized cleaning upon removal |
| Ideal User Profile | Beginners, students, rented/borrowed keyboards | Accessibility users, permanent teaching labs |
Material, Thickness, and Tactile Feel
The physical composition of a key sticker directly influences how your fingers interact with the keyboard. Most piano stickers are manufactured from vinyl, polyethylene terephthalate (PET), or coated paper. Each material presents a distinct profile in terms of thickness, texture, and flexibility, which can alter the tactile feedback of your 61-key keyboard.
Vinyl is the most common material for removable stickers due to its flexibility and smooth texture. High-quality vinyl stickers are engineered to be exceptionally thin, often measuring less than 0.1 millimeters. This ultra-thin profile allows the sticker to blend seamlessly with the key surface, preserving the original tactile response of the keyboard. For sensitive players, especially those practicing fast passages or scales, keeping the key surface as flat and uniform as possible is essential to prevent finger fatigue and maintain playing accuracy.
In contrast, permanent stickers—particularly those made of coated paper or thicker laminated plastics—can create a noticeable physical ridge at the edge of the sticker. This raised edge can be distracting or uncomfortable when your fingers slide across the keys. Over time, these raised borders can also collect dust, skin oils, and lint, which further compromises the tactile experience and aesthetic of your instrument.
If tactile sensitivity is a priority for your daily practice, always check the product specifications for exact thickness measurements. Opting for materials like PET or ultra-thin cast vinyl will help ensure that your visual aids do not interfere with your physical connection to the keys.
Durability, Adhesive Strength, and Residue Risk
The longevity of your key labels is directly tied to the type of adhesive used. Permanent stickers are formulated with high-strength acrylic or solvent-based adhesives designed to withstand heavy, daily playing. These adhesives resist the natural oils on your fingertips, sweat, and regular cleaning routines, making them incredibly durable over years of continuous use.
However, this exceptional durability comes with a significant trade-off: a high risk of surface damage and stubborn residue upon removal. When you attempt to peel off a permanent sticker, the strong adhesive bond can strip away the glossy protective coating of plastic keys, fade printed brand labels, or leave behind a thick, sticky residue that attracts dirt. On older keyboards or budget models with softer ABS plastic keys, removing permanent adhesives can cause permanent discoloration or physical scarring to the key tops.
Removable stickers utilize low-tack, pressure-sensitive adhesives or static-cling technology. These formulations are designed to hold the sticker securely in place under normal vertical playing pressure while allowing you to peel them off effortlessly from a corner.
The primary limitation of removable stickers is their vulnerability to environmental conditions and aggressive playing styles. In warm, humid environments common in tropical regions, the low-tack adhesive can gradually degrade, causing the edges of the stickers to curl, lift, or slide sideways during intense practice sessions. If you choose removable stickers, keeping your keyboard in a temperature-controlled room and wiping your hands dry before playing will help maximize their lifespan.
Application, Alignment, and Re-positioning
Applying stickers to a 61-key layout requires precision to ensure a clean, professional look that aligns perfectly with your visual field. A standard 61-key keyboard consists of 36 white keys and 25 black keys, spanning five full octaves. Misaligned stickers not only look untidy but can also distort your spatial awareness of the notes.
Removable stickers offer a forgiving application process. If you place a sticker slightly crooked or off-center, you can easily peel it up, realign it, and press it back down without compromising the adhesive integrity. This adjustability is highly beneficial for beginners who may not have a steady hand or who are applying stickers for the first time.
Permanent stickers, conversely, demand a precise, one-time application. Once the strong adhesive contacts the key surface, attempting to lift and reposition the sticker will often stretch the material, warp the edges, or ruin the adhesive backing entirely. This leaves you with a distorted label that is difficult to read and prone to early peeling.
Regardless of the sticker type you choose, the universal first step is thorough surface preparation. Before applying any sticker, check your keyboard’s manual for approved cleaning methods. If permitted, cleaning the keys with a microfiber cloth slightly dampened with isopropyl alcohol or mild soapy water will remove oils and dust, ensuring a secure and lasting bond.
How to Choose the Right Sticker for Your 61-Key Keyboard
To determine the best sticker type for your specific setup, evaluate your learning objectives, ownership status, and the physical characteristics of your instrument. Use the structured decision framework below to guide your choice.
Choose Removable Stickers If:
- You are a beginner or intermediate student: Your primary goal should be to transition away from visual aids as your muscle memory and sheet-music reading skills develop. Removable stickers can be taken off gradually (for example, removing the C and G stickers first) to test your progress.
- You are teaching young children: Kids benefit greatly from colorful visual cues, but their learning needs change rapidly. Removable stickers allow you to adapt the keyboard as they grow.
- The keyboard is rented, borrowed, or shared: If you do not own the instrument, or if you plan to resell it in the future to upgrade to an 88-key weighted digital piano, preserving the pristine condition of the keys is paramount.
- You want a low-stress installation: The ability to reposition stickers during application ensures a clean, perfectly aligned layout without the fear of ruining the sticker sheet.
Choose Permanent Stickers If:
- You require long-term accessibility modifications: For players with visual impairments or cognitive learning differences, permanent color-coded or high-contrast labels provide an essential, permanent interface for playing.
- The keyboard is in a public or institutional setting: In school music labs, community centers, or therapy clinics, keyboards experience heavy, unsupervised use where removable stickers might be peeled off or damaged by curious hands.
- You are using custom layouts for specific genres: If you use your 61-key keyboard primarily as a MIDI controller for complex synthesizer patches, custom chord shapes, or non-standard tunings, permanent labels can serve as a reliable, long-term reference.
Verify Your Keyboard Specifications First
Before purchasing any sticker set, inspect the surface of your keys. Some modern digital keyboards feature textured keytops designed to mimic the feel of natural ivory or ebony. These matte or textured surfaces do not bond well with standard low-tack adhesives, meaning removable stickers may lift prematurely. Conversely, applying strong permanent adhesives to these specialized coatings can permanently ruin the textured finish.
Always consult your keyboard’s user manual or contact the manufacturer to verify if the key material is compatible with adhesive products. Additionally, count your keys to confirm the layout. A standard 61-key keyboard starts on a C note and ends on a C note. Ensure the sticker pack you select is explicitly designed for a 61-key configuration, containing the correct sequence of notes and octave markers to prevent confusion during installation.
Best Practices for Applying and Removing Key Stickers
Proper application and removal techniques are critical to protecting your keyboard’s aesthetic and mechanical integrity. Follow these step-by-step guidelines to ensure a clean installation and damage-free removal.
Step 1: Preparation and Cleaning
Before applying any adhesive product, check the keyboard manufacturer’s manual and the sticker product label. If instructions conflict, or if your keyboard has a specialized key coating, stop and consult the manufacturer or a qualified instrument technician.
To clean the keys safely:
- Power off and unplug your electronic keyboard to prevent electrical issues or accidental setting changes.
- Wipe down the keys with a dry, clean microfiber cloth to remove loose dust and debris.
- If approved by the manufacturer, moisten a microfiber cloth with a small amount of isopropyl alcohol (70% concentration or lower) or a highly diluted mixture of warm water and mild dish soap. Never spray liquids directly onto the keyboard, as moisture can seep between the keys and damage the internal contact strips.
- Gently wipe each key from back to front. Avoid scrubbing side-to-side, which can push dirt into the key gaps.
- Allow the keyboard to dry completely for at least 15 to 20 minutes before proceeding to the application step.
Step 2: Application Techniques
To achieve a symmetrical, professional look on your 61-key keyboard, use a systematic approach to placement:
- Identify Middle C: On a 61-key keyboard, Middle C (C4) is the third C note from the left side of the keyboard. Use this key as your primary anchor point.
- Use Tweezers: Avoid touching the adhesive backing of the stickers with your fingers. Skin oils will weaken the adhesive, especially at the corners. Use a pair of plastic or blunt metal tweezers to hold the edge of each sticker.
- Align and Press: Align the bottom edge of the sticker parallel to the bottom edge of the white key, leaving a tiny margin (about 1 to 2 millimeters) from the very edge. This small gap prevents your fingers from catching and lifting the sticker during downward key strokes. Once aligned, press down firmly from the center outward to smooth out any air bubbles.
- Apply Black Keys Last: If your sticker set includes labels for the sharp and flat keys, apply them after the white keys are complete, ensuring they sit centered on the raised black key surfaces.
Step 3: Safe Removal
When it is time to remove your stickers, patience is key to preventing damage to the plastic keys:
- Start at a corner of the sticker using your fingernail or a thin plastic card (like an old guitar pick or loyalty card). Never use sharp metal tools, utility knives, or razor blades, which will permanently scratch the plastic keys.
- Peel the sticker back slowly at a very low angle (almost flat against the key) rather than pulling straight up. This reduces the upward tension on the key mechanism and minimizes the risk of lifting the key cap.
- Work slowly, key by key, to ensure the adhesive backing stays attached to the sticker material rather than tearing and leaving patches behind.
Step 4: Residue Management
If you are removing permanent stickers or if your removable stickers have left behind a sticky residue:
- Dampen a clean microfiber cloth with warm, soapy water. Gently rub the residue in a circular motion.
- For stubborn adhesive, use a mild, plastic-safe adhesive remover. Always test the solution on a single, inconspicuous key first (such as the highest or lowest note on the keyboard) to ensure it does not cloud, melt, or discolor the plastic.
- Avoid using harsh household solvents like acetone, paint thinner, or nail polish remover, as these chemicals will instantly dissolve ABS plastic and ruin your keyboard.
- Once the residue is gone, wipe the keys down with a damp cloth to remove any remaining cleaning solution, and dry them thoroughly with a clean towel.
Frequently Asked Questions (FAQ)
Will piano key stickers damage my keyboard keys?
High-quality removable stickers designed specifically for musical instruments are generally safe for most standard plastic keyboard finishes and will not cause damage if applied and removed correctly. However, permanent stickers, or any low-quality stickers left on keys for several years in high-humidity environments, carry a high risk of leaving stubborn residue. Damage typically occurs during improper removal—such as using sharp metal scrapers, applying excessive heat from a hair dryer (which can warp plastic keys), or using harsh chemical solvents like acetone that melt the key surfaces. Always follow the manufacturer’s care instructions and test cleaning solutions on an inconspicuous key first.
Do I need a specific sticker size for a 61-key keyboard?
Yes, verifying the dimensions of your keys before purchasing is highly recommended. While the vast majority of standard 61-key electronic keyboards feature standard-width white keys (typically measuring between 22mm and 24mm wide), some budget, portable, or children’s keyboards feature mini-keys or narrow-profile keys. If you apply standard-sized stickers to narrow keys, the stickers will overlap the edges, causing them to peel quickly and feel uncomfortable under your fingers. Measure the width and length of your white keys and compare those measurements against the sticker dimensions listed on the product packaging to ensure a perfect fit.

Community discussion
Share your experience or ask a question. Comments are reviewed before publication.