
Choosing the right replacement bass guitar tuning pegs is a precise task that requires careful physical measurement and configuration matching rather than simply picking a style you like. If your instrument is slipping out of tune, or if you are upgrading an older bass, the key to a successful installation lies in verifying your headstock’s exact dimensions and layout. By taking accurate measurements of your peg holes, identifying your mounting screw pattern, and understanding your headstock configuration, you can find a drop-in replacement that restores tuning stability without requiring permanent, risky modifications to your instrument’s wood.
Diagnose Your Current Tuners and Replacement Needs
Before spending money on new hardware, it is essential to determine whether your tuning pegs are actually the source of your tuning instability. Mechanical wear is a common culprit on older or heavily played instruments. Over time, the gears inside the machine heads can wear down, leading to stripped teeth, excessive backlash (where the tuning key turns slightly before engaging the gear), or shafts that slip under the high tension of bass strings. You can inspect for this by turning the keys slowly without strings attached to feel for any catching, grinding, or loose play in the mechanism.
Environmental factors also play a significant role in hardware degradation, especially in warm, humid tropical climates. High relative humidity can accelerate rust and corrosion on metal components, leading to seized gears or stiff tuning keys that refuse to turn smoothly. If basic lubrication with a dry lubricant or specialized gear grease does not restore smooth rotation, the internal metal-on-metal contact points may be permanently pitted or damaged, necessitating a complete replacement.
Products mentioned in this guide
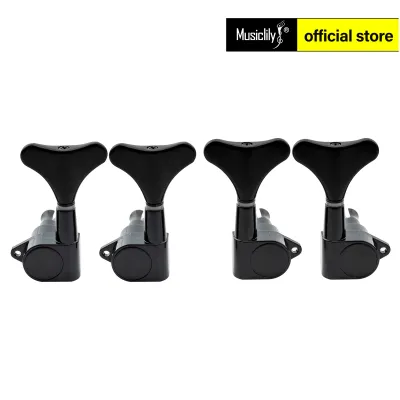
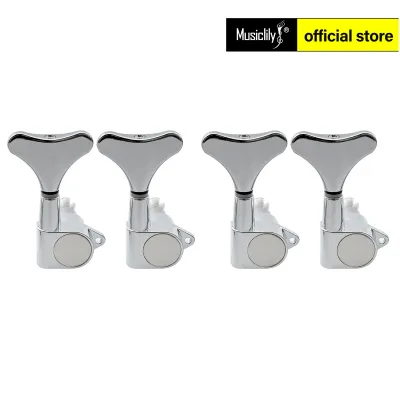
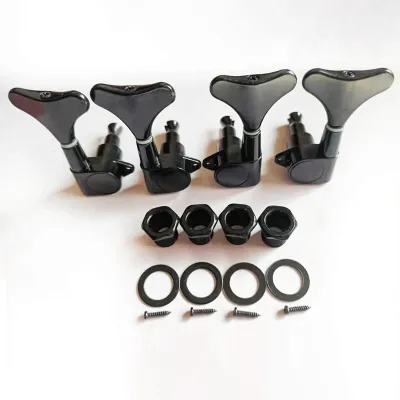

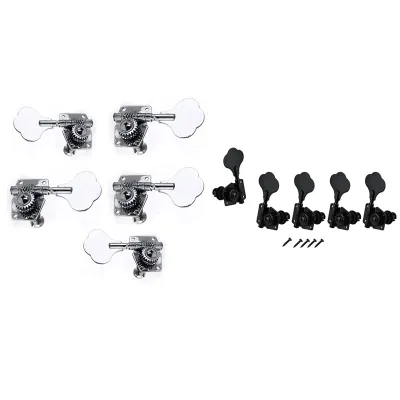
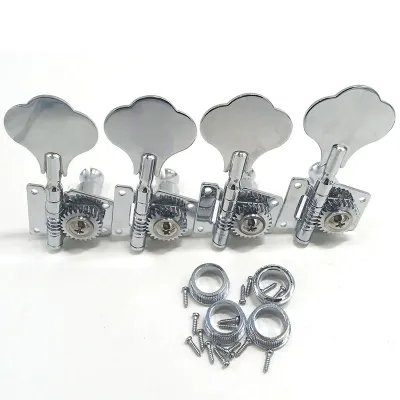
![[ammoon]1PCS Right Bass Tuner Peg Guitar Tuning Pegs](https://img.lazcdn.com/g/p/3bf44b85b8511ec3e424c52e96082248.jpg_400x400q80.jpg_.webp)
Prices are valid at publication and may change. Please refer to the product page for the latest price.
However, you must carefully differentiate actual tuner failure from common setup issues before purchasing new parts. Often, what feels like a slipping tuner is actually a string binding in the nut slots, which prevents the string from sliding smoothly when you turn the peg. Improper string winding—such as having too few wraps around the post or overlapping wraps that slip—can also cause sudden drops in pitch. Check your nut slots for friction, ensure your strings are wound neatly down the post, and verify your bridge setup before concluding that your machine heads are faulty.
Identify Your Bass Headstock Configuration
Once you establish that a replacement is necessary, the next step is identifying your bass guitar’s specific headstock configuration. Basses come in various string counts, ranging from standard four-string models to extended-range five-string and six-string instruments. You must purchase a set of tuning pegs that matches your exact string count, as buying a generic set might leave you short or with unnecessary extra hardware.

The physical layout of the tuners on your headstock dictates the orientation of the pegs you need to buy. The two most common layouts are inline (where all tuning keys are mounted on a single side of the headstock, such as a classic 4-in-line setup) and per-side (where the tuners are split, such as a 2×2 or 3×2 configuration). Tuning pegs are manufactured specifically for either the left or right side of the headstock; a tuner designed for the bass side of a 2×2 headstock cannot simply be flipped to work on the treble side because the gear mechanism and tuning button would face the wrong direction.
Instrument orientation is another critical factor to verify. If you play a left-handed bass, your headstock configuration will be the mirror image of a standard right-handed instrument. Always double-check whether the replacement set is labeled for right-handed, left-handed, or specific split configurations to ensure that the tuning buttons turn in the intuitive direction and align correctly with the headstock’s edge.
Check Mounting Styles and Peg Hole Sizes
To avoid irreversible woodworking modifications to your headstock, you must match the mounting style and physical dimensions of your existing tuners. The first detail to check is the bushing type, which is the sleeve that sits inside the peg hole to support the tuning shaft. Basses typically use either press-in bushings or screw-in bushings. Press-in bushings are smooth on the outside and rely on a tight friction fit within the wood, whereas screw-in bushings feature a threaded exterior that secures to the tuner body via a nut and washer on the front of the headstock.
Measuring the existing peg hole diameter is the most critical step in this process. Because manufacturers use different standards, peg holes can vary significantly—common sizes include 14mm, 17mm, or 18mm, though older or vintage-style instruments may use unique imperial measurements. To get an accurate reading, remove one of your current tuners and use a digital caliper to measure the inner diameter of the bare wood hole. Relying on visual estimates or generic product descriptions often leads to purchasing pegs with shafts that are either too thick to fit or too loose to sit securely.
Additionally, examine the rear screw hole configuration on the back of the headstock. Tuning machine bodies are held in place by small retaining screws to prevent them from rotating under string tension. These screws can be arranged in several patterns, such as a single screw at a 45-degree angle, dual screws on either side, or even hidden indexing pins that require no external screws. Matching this pattern precisely allows you to install the new tuners using the existing screw holes, preserving the structural integrity and aesthetic value of your instrument.
Evaluate Gear Ratios and String Post Designs
Selecting the right mechanical specifications ensures that your new tuning pegs feel comfortable and perform reliably under your specific playing style. The gear ratio of a tuner determines how many times you must turn the tuning button to rotate the string post one full turn. For example, a 20:1 gear ratio offers finer, more precise tuning control than a 14:1 ratio because each turn of the button makes a smaller adjustment to the string tension. While higher ratios make fine-tuning easier, they also require more turns when winding a fresh set of strings.
You must also choose between open-gear and sealed-gear designs. Open-gear tuners feature exposed gears on the back of the headstock, offering a classic, vintage aesthetic and a lighter weight that can help prevent headstock dive. However, because the gears are exposed, they require periodic cleaning and lubrication to prevent dust and sweat from causing wear. Sealed-gear tuners enclose the mechanism in a lubricated housing, protecting the gears from environmental debris and humidity, making them virtually maintenance-free, though they are generally heavier.
Finally, match the string post design to your string gauges. Standard cylindrical posts require you to thread the string through a hole and wind it around the shaft. Slotted or tapered posts allow you to cut the string to length, insert the tip down into a central hole, and bend it before winding. This design is highly effective at securing thick bass strings and preventing the sharp ends from snagging on gig bags or clothing. Ensure the post diameter and slot width can comfortably accommodate your preferred string gauges, especially if you use heavy-gauge strings for drop tunings.
Build Your Pre-Purchase Compatibility Checklist
Before finalizing your purchase on any online marketplace or at a local music store, consolidate your measurements and specifications into a clear checklist. Having these details written down prevents impulse buys that result in costly return shipping or frustrating installation delays. Your checklist should include the exact peg hole diameter, the distance between mounting screw holes, the shaft length, and the required bushing style.
Whenever possible, cross-reference your measurements with the official manufacturer specifications or user manuals for your specific bass model. Many hardware manufacturers provide detailed technical drawings with exact millimeter dimensions on their websites. Comparing your physical measurements to these diagrams is the most reliable way to guarantee a drop-in fit.
Lastly, verify the exact contents of the replacement set you are ordering. Ensure the package includes all the necessary mounting hardware, such as the correct number of screws, bushings, and washers. Some aftermarket tuners are sold individually, while others are sold in pre-configured sets of four, five, or six. Confirming these details beforehand ensures that you have everything required to complete the installation smoothly and get your bass back in perfect playing condition.
Frequently Asked Questions (FAQ)
Can I Use Standard Guitar Tuning Pegs on a Bass Guitar?
No, you should not use standard guitar tuning pegs on a bass guitar. Bass strings are significantly thicker and exert much higher tension than guitar strings, requiring robust hardware to maintain stability. Bass tuning pegs are engineered with thicker shafts, larger string holes, and heavy-duty gear mechanisms designed to withstand this extreme tension. Standard guitar tuners lack the physical space to accommodate thick bass strings and their gears will quickly slip, strip, or fail under the load, potentially damaging your instrument’s headstock.
Will Upgrading Bass Tuners Require Drilling New Holes?
Upgrading your bass tuners does not necessarily require drilling new holes if you carefully match the mounting screw pattern and peg hole diameter of your original hardware. Many manufacturers produce direct drop-in replacements designed to fit standard factory specifications. However, if you choose a different style or brand of tuner, the screw holes on the back of the headstock may not align perfectly. In such cases, you may need to fill the old holes with wood dowels and glue before carefully drilling new pilot holes. If you are uncomfortable performing this woodwork, it is highly recommended to consult a professional luthier to avoid cracking the headstock.

Community discussion
Share your experience or ask a question. Comments are reviewed before publication.