
Upgrading your beginner guitar with Fender noiseless pickups is one of the most effective ways to eliminate the frustrating 60-cycle hum that plagues standard single-coil pickups. However, finding the right set for your instrument is not as simple as purchasing the most popular model online. Because physical dimensions, electrical requirements, and installation complexity vary significantly across different Fender noiseless generations, the ideal choice depends entirely on your specific guitar’s routing, your soldering experience, and your budget.
In tropical climates like the Philippines, high humidity and ambient moisture can accelerate the oxidation of cheap factory electronics, while ungrounded electrical wiring and overhead ceiling fans often worsen electromagnetic interference. Upgrading to a noiseless system not only cleans up your signal but also provides an opportunity to refresh your guitar’s internal components. By taking a structured approach to evaluating compatibility and installation requirements, you can ensure a successful upgrade that fits your skill level and playing environment.
Understanding Fender Noiseless Pickup Formats and Generations
Fender has produced several generations of noiseless pickups over the years, each designed with distinct magnetic structures and physical profiles. When browsing options, you will encounter names like Vintage Noiseless, Hot Noiseless, Gen 4 Noiseless, and Ultra Noiseless. Understanding these official naming conventions and generation markers is crucial because they indicate different tonal designs and physical dimensions. You can find these details on official Fender packaging, product documentation, or by cross-referencing the manufacturer part numbers.
Products mentioned in this guide
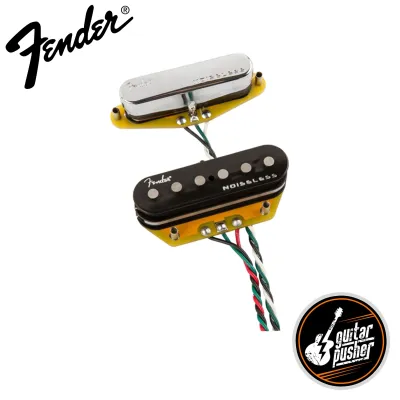

Prices are valid at publication and may change. Please refer to the product page for the latest price.
The primary physical distinction you must understand is the difference between a standard single-coil footprint and a stacked humbucker design. Traditional single-coil pickups use a single bobbin wrapped in copper wire. Noiseless pickups, however, are actually stacked humbuckers; they feature two coils positioned on top of one another rather than side-by-side. This stacked configuration allows them to cancel hum while maintaining a narrow footprint, but it also makes the pickup significantly taller than a standard single-coil.
Because of this added height, you cannot rely on visual estimates or unofficial forum claims when choosing a model. You must consult the manufacturer’s official specification sheets to verify the exact physical dimensions and magnetic structures of the pickups. For instance, some generations use Alnico V magnets for a brighter, more modern response, while others utilize Alnico II or Samarium Cobalt magnets for a softer, warmer character. Checking these specifications beforehand ensures you select a model that aligns with your tonal preferences and fits your guitar’s physical limits.
Checking Guitar Compatibility Before You Buy
Before purchasing any noiseless pickup set, you must perform a thorough physical and electrical audit of your current guitar. The most critical step is measuring your guitar’s pickup cavity depth and width. Because stacked noiseless pickups are taller than standard single-coils, they require deeper routing. If your guitar has a shallow body cavity—common in many entry-level or budget instruments—a stacked pickup may bottom out against the wood, preventing you from adjusting the pickup height correctly or even preventing the pickguard from sitting flush.

In addition to cavity depth, you must verify your pickguard routing, screw hole alignment, and pickup cover dimensions. While many Fender-style guitars share similar layouts, minor variations in manufacturing tolerances can prevent a new pickup from fitting through your existing pickguard slots. Measuring the length and width of the pickguard openings and comparing them to the dimensions on the pickup specification sheet will save you from the frustration of having to file down your pickguard during installation.
Electrical compatibility is another vital factor that beginners often overlook. Standard single-coil pickups typically use 250k-ohm potentiometers (pots) to control volume and tone. However, because noiseless pickups are technically humbuckers, some models require 500k-ohm pots to prevent unintended high-frequency tone loss. Installing a pickup designed for 500k pots into a guitar with stock 250k pots can result in a muddy, dark sound. Always check the manufacturer’s wiring diagrams to see if you need to purchase matching potentiometers alongside your new pickups.
Evaluating Installation Difficulty for Beginners
Upgrading your guitar’s pickups can be a rewarding DIY project, but you must realistically assess your technical skills and tool availability before starting. A standard pickup replacement requires direct soldering, where you desolder the old pickup leads from the pots and switch, and solder the new leads in their place. If your guitar’s cavities are already deep enough and the pickguard matches perfectly, this is a straightforward process that requires only basic soldering skills.
However, if your guitar requires physical modifications, the difficulty level increases dramatically. If the pickup cavities are too shallow, you may need to route or chisel away wood from the guitar body. If the pickguard holes do not align, you might have to drill new holes or modify the plastic. These permanent modifications require specialized woodworking tools and carry a high risk of damaging your instrument’s finish or structural integrity.
To ensure a safe and successful upgrade, establish clear stop conditions before you begin. If you open your guitar and find that the cavity is too shallow, the wiring diagram is overly complex (such as systems involving S-1 switching or coil-splitting), or you feel uncomfortable handling a hot soldering iron, halt the DIY process immediately. In these scenarios, taking your guitar and the new pickups to a qualified local guitar technician is the safest path. A professional installation ensures proper grounding, clean solder joints, and optimal pickup height adjustment without risking damage to your gear.
Balancing Budget and Value for Your First Upgrade
When planning your first pickup upgrade, you must balance the cost of the parts with the overall value they bring to your instrument. For beginners, pre-wired pickguard assemblies are often an excellent alternative to individual pickup sets. A pre-wired pickguard comes with the pickups, potentiometers, switch, and jack already soldered onto a new pickguard. While this option may carry a higher upfront cost, it drastically simplifies the installation process, reduces the risk of soldering errors, and allows you to easily reverse the upgrade if you decide to sell the guitar later.
Your budget allocation should also reflect your actual playing needs and practice environments. If you primarily practice at home in a room with high electromagnetic interference—such as near computers, fluorescent lights, or air conditioning units—the hum-canceling benefits of noiseless pickups will provide immediate, noticeable value. However, if you practice in a quiet, well-shielded environment, you might not need to invest in premium, professional-tier pickup models right away; a mid-range noiseless set or improved cavity shielding might suffice.
Finally, protect your investment by being cautious when purchasing your pickups. Because Fender noiseless pickups are highly sought after, counterfeit units are common on online marketplaces and second-hand forums. When budgeting ₱ for your upgrade, ensure you buy from authorized dealers or reputable music stores in the Philippines. This ensures you receive genuine products backed by a manufacturer warranty, protecting you from defective or counterfeit electronics.
Your Pre-Purchase Verification Checklist
To ensure a smooth upgrade process, execute this checklist before finalizing your purchase:
- Measure and record your guitar's pickup cavity depth, width, and pickguard slot dimensions using a digital caliper or precise ruler.
- Cross-reference your measurements with the official Fender specification sheet for your chosen noiseless pickup model to confirm physical clearance.
- Check the recommended potentiometer values (250k vs. 500k) for the pickup model and verify the values of the pots currently installed in your guitar.
- Confirm you have all necessary tools on hand, including a soldering iron (preferably 30W to 40W), high-quality solder, wire cutters, safety glasses, and copper shielding tape.
- Review the retailer's return policy to ensure they accept returns on opened electronic components in case you encounter unexpected physical compatibility issues.
Frequently Asked Questions (FAQ)
Do Fender noiseless pickups require special potentiometers?
Yes, some Fender noiseless pickup models require specific potentiometer values to perform optimally. While traditional single-coils use 250k pots, some stacked noiseless designs are voiced to work best with 500k pots to maintain brightness and prevent a muddy tone. Always consult the official wiring diagram for your specific pickup model to determine if you need to upgrade your pots.
Can I install stacked noiseless pickups in any standard Stratocaster?
Not always. Because stacked noiseless pickups feature two coils stacked vertically, they are taller than standard single-coils. While most modern Fender Stratocasters have cavities deep enough to accommodate them, some vintage-reissue models, budget import brands, or thinner-bodied guitars may have shallow routing that prevents a proper fit without professional woodworking.

Community discussion
Share your experience or ask a question. Comments are reviewed before publication.