
Selecting the right piano stickers for a 61-key keyboard in the Philippines requires balancing visual clarity, adhesive durability, and physical compatibility. Because the local climate features high humidity and warm temperatures, choosing stickers with high-quality, residue-free adhesives is essential to prevent the labels from sliding or leaving a sticky mess on your keys. By focusing on precise measurements, clear notation styles, and durable materials, you can find an affordable learning aid that supports your musical journey without risking damage to your instrument.
Understanding 61-Key Keyboard Layouts and Sticker Compatibility
To ensure a successful purchase, you must first understand the physical layout and note range of your specific 61-key keyboard. A standard 61-key keyboard spans exactly five full octaves plus one extra note at the very top of the register. This layout consists of 36 white keys and 25 black keys, typically starting on a C2 note in the bass register and ending on a C7 note in the treble register. Knowing this range is vital because purchasing a set designed for a different layout can lead to confusion during application.
Beyond the note range, the physical dimensions of the keys themselves are the most common source of compatibility issues. Standard piano keys are approximately 22mm to 24mm wide. However, many portable electronic keyboards, especially budget-friendly models or those designed specifically for children, feature mini-keys that measure between 16mm and 19mm in width. If you purchase standard-sized stickers for a mini-key keyboard, the stickers will overlap, overhang, or peel off almost immediately. Always use a physical ruler or caliper to measure the width of your white keys before placing an order.
Products mentioned in this guide
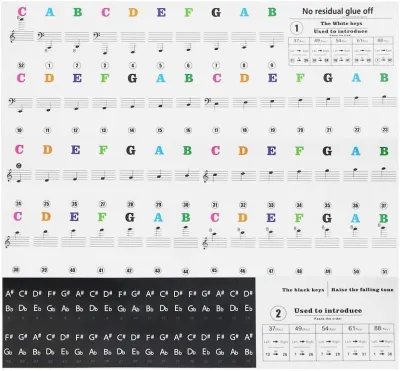
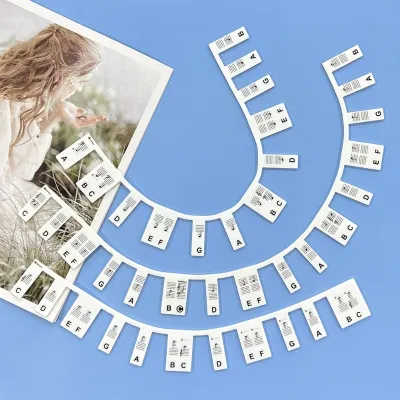
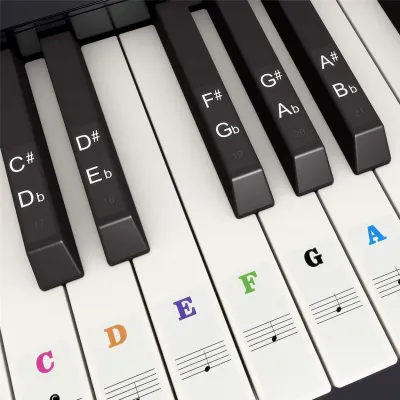
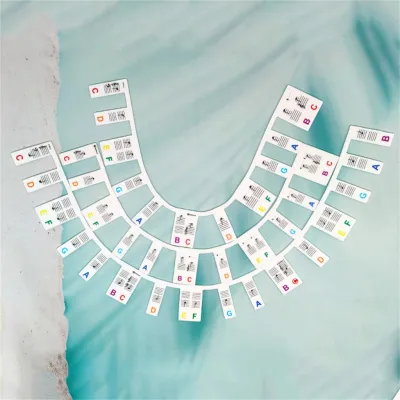
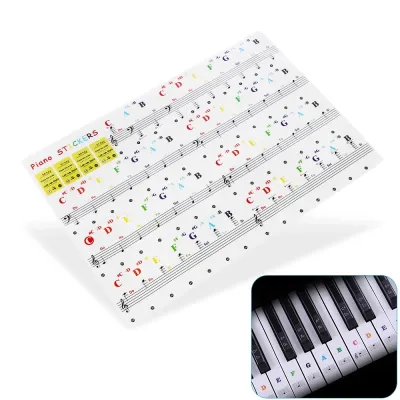
Prices are valid at publication and may change. Please refer to the product page for the latest price.
Before finalizing your selection, use this quick checklist to verify the starting and ending notes of the sticker sheet. Look closely at the product images to confirm that the labels are grouped in octaves that match your keyboard’s exact sequence. A standard 61-key layout starts with a group of two black keys, with the first white key on the far left being C. If your keyboard has a non-standard starting note, you will need to adjust the sticker placement accordingly, which makes verifying the sheet’s starting note a critical step.
Key Features to Evaluate When Selecting Piano Stickers
When evaluating different sticker options, the background material is one of the most important decisions you will make. Transparent stickers are generally preferred because they blend seamlessly with the white and black keys, preserving the clean, professional aesthetic of your instrument. They reduce visual clutter, allowing the student to focus on the printed notes rather than a solid block of color. Opaque stickers, which are often solid white or bright colors, can be useful for high-contrast needs but tend to look messy over time as dust and dirt collect along their edges.

The print content on the stickers should align directly with the learner’s current curriculum. Standard letter notation (C-D-E-F-G-A-B) is the most common and matches most modern pop, rock, and classical beginner books. However, if your music teacher or online course uses solfège (Do-Re-Mi-Fa-Sol-La-Si), look for dual-notation stickers that display both systems. Additionally, stickers that include a small musical staff showing the corresponding note placement help beginners bridge the gap between looking at their hands and reading sheet music.
The durability of the print is another factor that is often overlooked. Look for stickers that feature a double-layer coating or a laminated top layer. This protective barrier prevents the printed letters and staff lines from fading or smudging under the constant friction of practicing fingers. Without this protection, the ink can quickly wear away, leaving you with blank plastic strips on your keys within a few weeks of regular use.
Finally, the adhesive properties must be carefully assessed, especially given the tropical climate of the Philippines. High humidity and ambient heat can cause cheap glues to liquefy, slip, or bake permanently onto plastic and acrylic key surfaces. Look for stickers explicitly labeled as “removable,” “residue-free,” or “silicone-based self-adhesive.” These types rely on static cling or low-tack adhesives that can be peeled off cleanly even after months of daily practice in warm environments.
How to Evaluate and Shortlist Sticker Sets Online
When browsing online marketplaces in the Philippines, using highly specific search queries will help you filter out irrelevant products. Phrases like “61 keys piano stickers transparent removable,” “silicone piano key strip 61 keys,” or “residue-free keyboard note labels” will yield the most accurate results. Avoid broad terms like “piano accessories,” which bring up unrelated items and make it harder to find high-quality options.
Do not rely solely on the seller’s digital renderings, which often show perfectly aligned, computer-generated graphics. Scroll down to the customer review section and look for user-uploaded photos and videos. Check if local buyers complain about the stickers peeling at the corners due to humidity, or if the print smudges easily under sweaty fingers. Pay attention to photos showing the stickers applied to actual 61-key keyboards to verify the scale, transparency, and overall quality.
Consider the shipping origin of the product when making your decision. Many items on local e-commerce platforms are shipped from overseas, which means they may spend days or weeks in transit inside hot cargo containers. This exposure to extreme heat can sometimes degrade the adhesive backing before the product even arrives at your doorstep. Opting for local sellers or those with climate-controlled storage can reduce the risk of receiving damaged or dried-out stickers.
Many sticker sets are sold as part of a kit, which can offer excellent value. Look for listings that include a small wooden or plastic application stick (or tweezers) and a microfiber cleaning cloth. These tools are incredibly helpful for positioning the stickers without touching the adhesive backing with your fingers, which transfers skin oils and reduces stickiness. Compare the total cost of these bundles in ₱ against standalone sheets to ensure you are getting genuine value.
Best Practices for Application and Long-Term Maintenance
Before applying any stickers, you must prepare the key surfaces thoroughly. Dust, skin oils, and humidity will prevent proper adhesion and cause the corners of the stickers to curl up. Wipe down each key using a slightly damp microfiber cloth. Avoid using rubbing alcohol or harsh household cleaners, as these can dry out, discolor, or crack plastic keys over time. Allow the keyboard to dry completely in a well-ventilated room before proceeding with the application.
To achieve a clean, professional look, align each sticker consistently across the keyboard. A great technique is to anchor the bottom edge of the sticker to the very bottom edge of the white key. This keeps the labels uniform and prevents them from interfering with the black keys or your fingers during complex chord shapes. Use a small tool, like tweezers or the edge of a plastic card, to smooth out air bubbles from the center outward, ensuring a firm bond.
Apply the stickers systematically, starting from the lowest note on the left (usually C2) and working your way up to the highest note on the right (usually C7). Take your time with each key, double-checking your progress against a note chart to ensure you do not accidentally skip a key or place a note in the wrong octave. If you make a mistake, peel the sticker off immediately and gently reapply it; waiting too long can make repositioning much more difficult.
When it is time to remove the stickers—either because the student has memorized the notes or because the labels have worn out—peel them off slowly at a 45-degree angle. If you encounter resistance, do not use metal scrapers or abrasive pads, which will permanently scratch the keys. Instead, use a tiny amount of mild soapy water on a cloth to gently rub away any remaining low-tack residue. Never use acetone or nail polish remover, as these chemicals will melt plastic keyboard keys instantly.
Frequently Asked Questions (FAQ)
Can I use 88-key stickers on a 61-key keyboard?
Yes, you can use an 88-key sticker set on a 61-key keyboard, but you must identify the correct starting note to avoid mislabeling your keys. An 88-key piano starts on an A note (A0), whereas a standard 61-key keyboard starts on a C note (C2). You will need to discard the first few stickers of the 88-key set and begin applying them from the sticker labeled C2. While cutting down a larger sheet is possible, it requires precise scissor work to avoid frayed edges that can easily catch on your fingers and peel up over time.
Will removing the stickers damage my keyboard keys?
High-quality, removable stickers designed specifically for musical instruments will not damage plastic or acrylic keys if removed correctly. However, damage can occur if the keyboard is left in direct sunlight or in a hot, unventilated room, which can bake the adhesive into the plastic. To prevent damage, always choose silicone-based or low-tack adhesives, avoid exposing the instrument to extreme heat, and never use harsh chemical solvents like acetone or paint thinner to clean up leftover residue.
Are transparent stickers better than opaque ones for beginners?
Transparent stickers are generally better for most beginners because they keep the keyboard looking natural and prevent the student from becoming overly dependent on solid color blocks. They allow the black and white keys to remain the primary visual focus, making the eventual transition to playing without stickers much smoother. Opaque, highly colorful stickers can be helpful for very young children or individuals with visual impairments who require high-contrast guides, but they should be replaced with transparent options or removed entirely as the player progresses.

Community discussion
Share your experience or ask a question. Comments are reviewed before publication.