
Starting your drumming journey is an incredibly rewarding pursuit, but for many beginners in the Philippines, the sheer volume and physical footprint of a traditional acoustic drum kit present significant hurdles. Urban living spaces, close-proximity housing, and the tropical climate all influence how and where you can practice. Electronic percussion instruments offer a practical, modern solution, allowing you to practice silently with headphones while enjoying a wide variety of built-in sounds. Among the brands available locally, NUX has become a prominent choice for budget-conscious beginners seeking reliable digital drum gear.
Choosing the right NUX drum pad model requires a clear understanding of your personal goals, your living environment, and the specific features that will support your skill development. Rather than simply picking the most expensive option, a beginner should focus on how well a model’s interface, pad responsiveness, and connectivity align with their daily routine. By evaluating these factors carefully, you can make an informed investment that keeps you motivated and helps you build solid musical foundations without disturbing your household or neighbors.
Understanding NUX Electronic Drum Options for Beginners
Before diving into specific models, it is essential to understand the different form factors of electronic percussion equipment available from NUX. The brand offers a range of products, from highly compact multi-pads to full-sized electronic drum kits. For a beginner, distinguishing between these formats is the first step in narrowing down your choices to the device that best fits your lifestyle and learning style.
Products mentioned in this guide
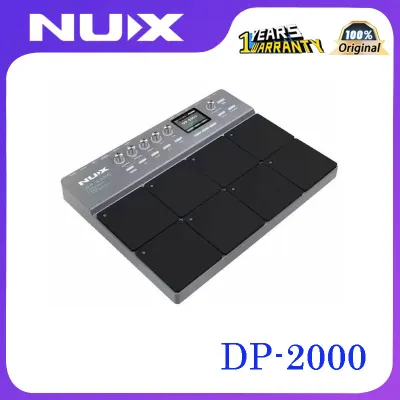
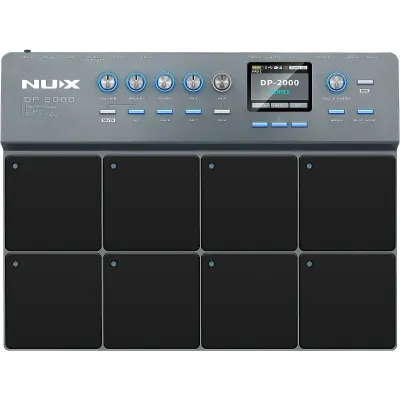
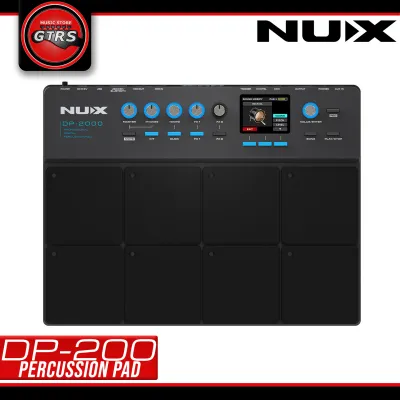
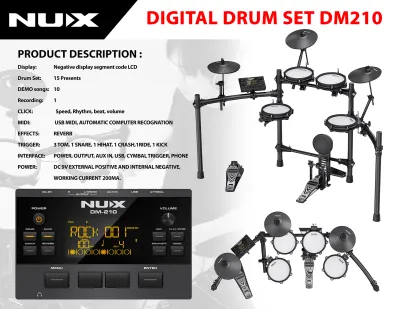
Prices are valid at publication and may change. Please refer to the product page for the latest price.
A compact multi-pad is a self-contained unit featuring several strike zones or rubber pads integrated into a single tabletop console. These devices are designed to be highly space-efficient, often measuring no larger than a laptop, and can be mounted on a standard snare stand or placed directly on a desk. Multi-pads are excellent for beginners who want to learn basic rhythms, practice hand rudiments, or experiment with a wide array of percussion sounds without committing to the physical footprint of a full kit. They are also highly versatile, serving as portable practice stations that can easily be tucked away in a closet when not in use.
In contrast, a full electronic drum kit consists of separate pads for the snare, toms, cymbals, and bass drum, all mounted on a metal rack system. While a full kit provides a more realistic physical layout that mimics an acoustic drum set, it requires a dedicated floor space of at least one to two square meters. For beginners living in compact condominiums or shared boarding houses in busy metropolitan areas, finding this much dedicated space can be a major challenge. Additionally, full kits are more complex to assemble, transport, and maintain compared to a single, streamlined multi-pad.
When evaluating beginner packages, pay close attention to what is included in the box versus what must be purchased separately. Some entry-level NUX packages are sold as standalone units, meaning you will need to source your own drumsticks, headphones, and mounting hardware. Other bundles may include basic accessories like a pair of sticks, a simple sustain pedal to act as a hi-hat or bass drum trigger, and a power adapter. Understanding these packaging differences ensures you do not face unexpected surprises when your new instrument arrives, allowing you to budget accurately for any necessary add-ons.
Core Features to Evaluate for Skill Development
As a beginner, the technical specifications of an electronic drum pad are not just numbers on a box; they directly impact how quickly and correctly you develop your playing technique. Investing in a pad with the right core features ensures that your practice sessions translate effectively to real-world drumming scenarios.

The most critical technical aspect to evaluate is pad responsiveness and velocity sensitivity. Velocity sensitivity refers to the pad’s ability to detect how hard or soft you strike the surface and adjust the volume of the output sound accordingly. A high-quality pad should allow you to play subtle, quiet strokes (known as ghost notes) as well as powerful, loud accents. If a drum pad lacks proper sensitivity, you may find yourself striking the pad excessively hard just to get an audible sound, which can lead to poor wrist mechanics, muscle tension, and even physical strain over time. When researching models, look for units that allow you to customize the velocity curves and trigger sensitivity within the system settings.
Another indispensable feature for skill development is the inclusion of built-in coaching functions and a robust metronome. Developing a strong sense of timing is the foundation of all good drumming, and practicing with a steady click track is non-negotiable. Many NUX modules go beyond a simple metronome by offering interactive coaching modes. These programs can analyze your strikes in real-time, showing you visual feedback on whether you are playing ahead of the beat, behind the beat, or perfectly on time. Some modules also include built-in play-along tracks across various musical genres, allowing you to apply your rudiments to real musical contexts, which keeps daily practice engaging and fun.
Finally, robust connectivity options are essential for modern learning workflows. At a minimum, your drum pad must feature a dedicated headphone jack (either 3.5mm or 6.35mm) to enable silent practice at any hour of the day or night. An auxiliary input (Aux In) or wireless Bluetooth connectivity is also highly beneficial, as it allows you to stream audio from your smartphone, tablet, or laptop directly through the drum module. This enables you to play along with instructional videos, drum-less backing tracks, or music streaming apps. For those interested in digital music production, a USB-MIDI port is a must-have, allowing you to connect the pad to a computer and use it as a MIDI controller to trigger high-quality drum library software.
Matching the Equipment to Your Practice Environment
Your physical surroundings play a massive role in determining which drum pad model is most suitable for your needs. In the Philippines, residential environments can vary widely, from dense urban apartments and high-rise condominiums to shared family homes. Selecting a drum pad that respects your living situation is key to maintaining a peaceful household and ensuring you can practice consistently.
While electronic drum pads are significantly quieter than acoustic drums, they are not completely silent. The physical impact of a wooden drumstick hitting a dense rubber pad produces an audible, dull thudding sound. Furthermore, if you use a physical bass drum pedal with a trigger pad, the downward striking motion can send low-frequency vibrations directly through the floorboards. In typical concrete or wooden-framed buildings, these structural vibrations can easily travel to the rooms below or adjacent to you. If you live in a shared apartment or condo, look for models that utilize quieter mesh heads or softer rubber compounds, and consider placing a thick, shock-absorbing drum mat or interlocking foam tiles beneath your setup to dampen the physical impact.
Portability is another crucial factor, especially for students, teachers, or active musicians who need to transport their gear regularly. If you plan to take your drum pad to music lessons, school band practices, or weekend jam sessions, you must consider how easily the unit can be packed and carried. A compact multi-pad is highly advantageous in this regard, as it can easily fit into a padded backpack or a medium-sized gig bag. Navigating public transportation, such as jeepneys, buses, or light rail transits, is significantly easier with a single, lightweight multi-pad than with a bulky, multi-piece electronic kit that requires multiple trips to transport.
Power options are also worth considering, particularly in regions that experience occasional power fluctuations or for players who want the freedom to practice outdoors. Some compact NUX percussion pads offer dual power options, allowing them to run on standard AA batteries or a portable power bank via USB, in addition to the standard AC wall adapter. This battery-operated capability is incredibly useful for outdoor busking, beachside gatherings, or simply practicing in a garden or park where wall outlets are unavailable. If you do rely primarily on an AC adapter at home, it is highly recommended to plug your drum module into a reliable surge protector to safeguard its delicate digital microprocessors from sudden voltage spikes or power interruptions.
Navigating Local Availability and Purchasing Channels
Acquiring your NUX drum pad safely in the Philippine market requires a strategic approach to ensure you receive an authentic product backed by reliable customer support. With the rise of online shopping, it is easier than ever to find musical instruments, but buyers must remain vigilant against counterfeit goods, unauthorized parallel imports, and misleading listings.
To protect your investment, always prioritize purchasing from authorized local distributors or official brand stores on major e-commerce platforms. Authorized dealers are vetted by the manufacturer and are guaranteed to supply genuine products designed for the local voltage standards (typically 220V in the Philippines). When browsing online marketplaces, look for official mall badges, high seller ratings, and positive customer reviews that include real photos of the packaging and product. Avoid buying from unverified third-party sellers who offer prices that seem too good to be true, as these items may be grey-market imports that do not qualify for local warranty services.
Before finalizing your purchase, carefully review the warranty terms and after-sales support policies. A reputable local dealer should provide a clear, written warranty period—usually ranging from six months to a year—covering manufacturing defects and electronic failures. Confirm whether the warranty is handled locally in the Philippines or if the unit would need to be shipped back to an overseas service center, which can result in lengthy delays and high shipping costs. Additionally, inquire about the seller’s return policy for items that arrive damaged or defective, ensuring you have a clear path to a replacement or refund if any issues arise during unboxing.
Finally, be sure to calculate the total cost of ownership rather than focusing solely on the sticker price of the drum pad. Bulky and heavy items like drum stands, thrones, and electronic drum modules can incur significant shipping fees, especially if you live outside major metropolitan hubs like Metro Manila, Metro Cebu, or Metro Davao. Furthermore, remember to budget in Philippine Pesos (₱) for essential accessories that may not be included in the base package. A complete beginner setup typically requires a sturdy stand (₱1,500 to ₱3,000), a comfortable drum throne (₱1,200 to ₱2,500), a pair of quality drumsticks (₱300 to ₱800), and a pair of reliable closed-back headphones (₱1,000 to ₱3,000). Factoring these costs into your initial budget prevents financial strain and ensures you have everything you need to start playing immediately.
Essential Setup and First-Week Practice Routine
Once your new NUX drum pad arrives, setting it up correctly and establishing a structured practice routine will set you up for long-term success. Proper physical ergonomics and a consistent daily schedule are far more important for your progress than the specific model of pad you own.
Begin by focusing on the physical ergonomics of your setup to prevent muscle strain and build efficient playing habits. Position your drum throne or chair so that your thighs are parallel to the ground or angled slightly downward, allowing your feet to rest flat on the floor or on your pedals. Mount your drum pad at a height where your forearms are roughly parallel to the floor when your stick tips are resting on the center of the pad. Your shoulders should remain relaxed, your elbows should hang naturally at your sides, and your wrists should do the majority of the work when striking. Avoid placing the pad too low, which causes slouching, or too high, which forces you to raise your shoulders and leads to rapid fatigue.
Next, take a few minutes to configure the internal settings of your drum module to match your playing style. Turn on the unit and navigate to the trigger settings menu. Adjust the sensitivity of each pad zone so that a normal, comfortable strike registers at a moderate volume, leaving room for louder accents when you strike harder. If you notice that hitting one pad causes a neighboring pad to trigger a faint, unwanted sound, look for the crosstalk (or “xtalk”) setting and gradually increase its value until the false triggers stop. Taking the time to fine-tune these parameters ensures that the instrument responds naturally to your touch, making your practice sessions feel much more realistic.
With your equipment properly configured, establish a simple, sustainable daily practice routine for your first week. Consistency is key; practicing for 20 minutes every single day is far more effective than practicing for two hours once a week. Dedicate the first five minutes of your session to a gentle warm-up, playing slow, steady single strokes on the pad to loosen up your wrists and fingers. Spend the next ten minutes working on basic rudiments—such as single-stroke rolls, double-stroke rolls, and paradiddles—with the built-in metronome set to a slow, manageable tempo like 70 BPM. Use the final five minutes of your practice time to play along with a simple backing track or use the module’s built-in coaching games, keeping the experience rewarding and reminding you of the joy of making music.
Frequently Asked Questions (FAQ)
Do I need an external amplifier for a NUX drum pad?
No, you do not need an external amplifier to use a NUX drum pad, as these devices are designed primarily for silent practice using headphones. Plugging a pair of standard headphones into the dedicated headphone jack allows you to hear the high-quality drum samples clearly without disturbing others. However, if you want to perform for an audience, jam with other musicians, or practice out loud, you will need to connect the pad’s line output to an external amplifier. For the best sound quality, use a dedicated electronic drum amplifier or a keyboard amplifier, as standard guitar amplifiers are not designed to handle the deep low-end frequencies of a bass drum or the sharp high-end transients of cymbals.
Can I connect my NUX drum pad to a computer for recording?
Yes, most modern NUX drum pads feature a USB-MIDI port that allows you to connect the device directly to a computer or laptop. Once connected, the drum pad acts as a MIDI controller, sending digital trigger signals to your computer rather than actual audio. You can use this connection to trigger high-quality drum library software within a Digital Audio Workstation (DAW) such as Reaper, GarageBand, or Ableton Live. This setup is excellent for recording your practice sessions, producing your own music, or accessing a virtually limitless library of realistic drum sounds. Check the manufacturer’s website to see if you need to download specific USB drivers for your operating system before connecting the device.
Are electronic drum pads completely silent for apartment living?
While electronic drum pads are vastly quieter than acoustic drums, they are not completely silent. Striking a rubber or mesh pad with a wooden drumstick still produces an audible, physical tapping sound that can be heard in the same room or through thin walls. Additionally, the physical impact of using a foot pedal can transmit low-frequency vibrations down through the floor, which can be highly distracting to neighbors living directly below you. To minimize this issue in apartment settings, consider placing a thick, non-slip drum mat or interlocking foam gym tiles under your stand and pedals to absorb the physical impact. Using lighter drumsticks or sticks with nylon tips can also help reduce the volume of the physical strikes.

Community discussion
Share your experience or ask a question. Comments are reviewed before publication.