
Learning to play the piano requires mastering both finger placement and sheet music notation simultaneously. For many beginners, a piano keyboard sticker serves as a temporary visual bridge, helping to connect the notes on a page to the physical keys under their fingers. However, selecting the wrong type of sticker can lead to sticky residue, damaged key surfaces, or a cluttered layout that hinders rather than helps your practice.
Finding the right fit involves matching the sticker pack to your specific instrument’s dimensions, material, and your current learning stage. Whether you are outfitting a compact 61-key arranger keyboard or a full 88-key digital piano, understanding the differences in size compatibility, adhesive types, and visual layouts will help you choose a product that aids your practice safely. This guide compares the available options to help you make an informed decision.
Matching Sticker Packs to Your Keyboard Size
Before purchasing any keyboard stickers, you must verify the exact key configuration of your instrument. The most common sizes are 61-key, 76-key, and 88-key layouts. You can easily identify your keyboard size by counting the white keys or referring to your instrument’s user manual.
Products mentioned in this guide
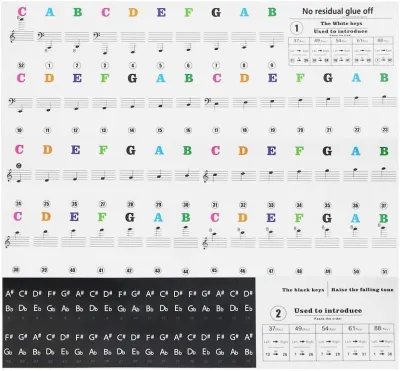
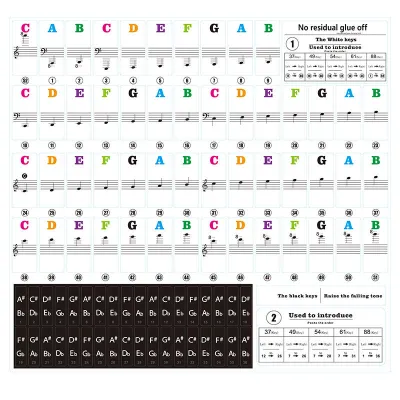


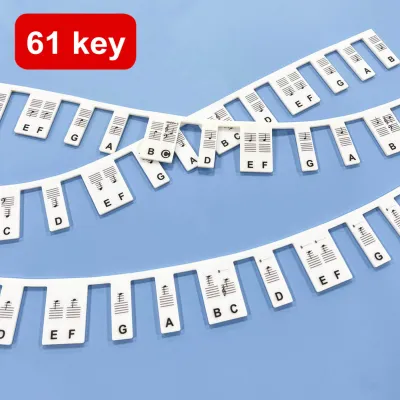
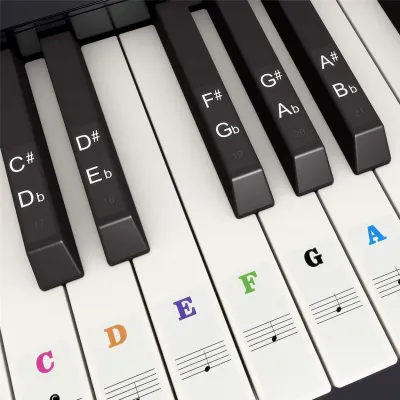
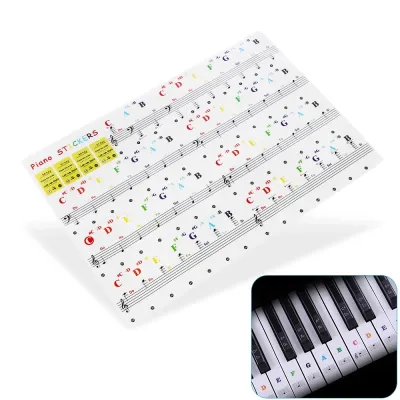
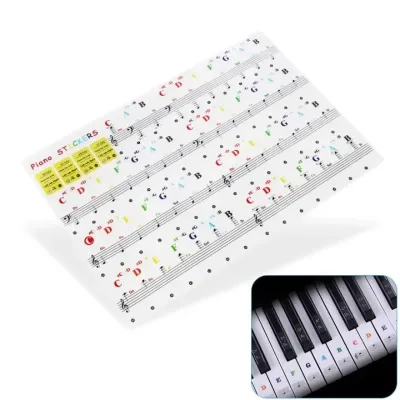
Prices are valid at publication and may change. Please refer to the product page for the latest price.
An 88-key piano is the standard size for acoustic pianos and full-sized digital pianos, consisting of 52 white keys and 36 black keys. A 76-key keyboard is slightly smaller, typically featuring 45 white keys and 31 black keys. A 61-key keyboard, common among portable arrangers and entry-level synthesizers, features 36 white keys and 25 black keys.
When shopping, check if the sticker pack is designed specifically for your key count or if it is a universal pack. Universal packs usually contain enough stickers for an 88-key piano but include instructions on which stickers to discard or skip for smaller layouts. For example, a 61-key keyboard usually starts on a C note and ends on a C note, whereas an 88-key piano starts on an A note and ends on a C note.
Applying stickers without verifying the starting note of your keyboard can lead to a completely mislabeled instrument. Always locate “Middle C” on your keyboard first to anchor your placement. If you are using a compact or arranger keyboard with mini-keys, standard-sized stickers will be too wide and will overlap, so you must look for packs explicitly labeled for mini-key dimensions.
Comparing Sticker Materials and Adhesive Types
The material and adhesive type of your keyboard stickers directly affect their durability, tactile feel, and how easily they can be removed when you no longer need them. Choosing the wrong material can result in peeling edges or a slippery surface that disrupts your playing.

Transparent vinyl stickers are highly popular because they allow the natural color of the white and black keys to show through, keeping the keyboard looking clean and professional. Opaque or colored vinyl options, on the other hand, offer high contrast and are excellent for younger learners who benefit from bright, color-coded visual cues. However, opaque stickers can make a premium digital piano look cluttered.
The finish of the sticker is another crucial factor to consider. Glossy finishes can reflect overhead room lights or stage lights, creating a harsh glare that makes the notes difficult to read from a sitting position. Matte finishes are generally preferred because they reduce glare and offer a textured surface that feels closer to the natural grip of a clean piano key.
Adhesive properties are especially important in warm, humid tropical climates like the Philippines. High humidity can cause low-quality adhesives to degrade quickly, turning into a sticky, gummy residue that slides around the key and attracts dust. To avoid this, look for high-quality, low-tack removable vinyl stickers, or opt for modern silicone helper strips.
Silicone keyboard strips are a popular alternative to traditional adhesive stickers. These flexible strips lay flat across the top of the keys without any adhesive at all, held in place by gravity and the shape of the black keys. They can be placed on the keyboard and removed in seconds, making them an excellent choice for shared instruments or players who want to practice without visual aids periodically.
Selecting the Right Layout and Note Display
Keyboard stickers come in several visual formats, and the best choice depends entirely on your learning goals and preferred teaching method. Some layouts focus purely on letters, while others incorporate traditional music notation to help you transition to reading sheet music.
Standard alphabetical stickers display the letter names of the notes (A, B, C, D, E, F, G). This is the most straightforward system for absolute beginners who want to play simple melodies quickly. Other packs use the solfège system (Do, Re, Mi), which is widely taught in various music curricula and preferred in specific regional training programs.
For those aiming to read sheet music, look for stickers that display both the letter name and the corresponding note on the musical staff, including treble and bass clef symbols. This dual display helps your brain associate the physical key with its position on a sheet of music. Color-coded learning systems assign a unique color to each note or octave, which is highly effective for children but may become a crutch if used for too long.
Consider the placement of the print on the sticker itself. Stickers designed to be placed at the very top of the keys (closest to the fallboard) are highly recommended. This placement keeps the visual aid fully visible even when your fingers are actively pressing the keys, and it prevents the printed ink from wearing off due to the friction and natural oils of your fingertips.
Application and Removal Best Practices
Proper application ensures that your stickers remain securely in place and do not interfere with your playing technique. Before applying any stickers, consult your instrument’s manual for approved cleaning methods. Dust, oils, and moisture on the keys will prevent proper adhesion and cause the edges to curl.
To clean the keys safely, use a dry or slightly damp microfiber cloth. Avoid using rubbing alcohol, household glass cleaners, or harsh chemical solvents, as these can strip the protective coating off plastic keys or cause hairline cracks in the material. Allow the keys to dry completely before beginning the application process.
Use a small tool, such as a flat plastic card or the wooden craft stick often included in sticker packs, to handle the adhesive side of the stickers. Touching the adhesive with your bare fingers transfers skin oils, which weakens the bond. Align each sticker carefully at the top of the key, pressing firmly from the center outward to eliminate air bubbles.
When it is time to remove the stickers, peel them back slowly and flatly rather than pulling straight up, which minimizes stress on the key joints. If you encounter high resistance or if the stickers have been on the keyboard for years, stop immediately. You can use a tiny amount of mild, soapy water on a damp cloth to help loosen stubborn residue, but never scrape the keys with metal tools or abrasive pads.
Decision Framework: Choosing Your Ideal Sticker Pack
To simplify your buying decision, match your specific instrument type and learning goals to the following scenarios:
- Choose transparent, center-octave stickers if you are an adult beginner practicing on a standard 88-key digital piano. This setup provides essential guidance around Middle C while maintaining a clean, professional aesthetic and encouraging you to look up at your sheet music.
- Choose color-coded, full-coverage stickers if you are teaching young children on a 61-key portable keyboard. The bright colors and complete coverage keep young learners engaged and help them quickly grasp the repeating patterns of the octave ranges.
- Choose silicone, non-adhesive keyboard strips if you share your piano with advanced players who do not want stickers on the keys, or if you want the flexibility to practice with visual aids one day and play without them the next.
- Verify the adhesive specifications first if you are applying stickers to a high-end acoustic piano with synthetic ivory or wooden keys. These porous materials are highly sensitive to adhesives and require specialized, residue-free products to prevent permanent staining.
Frequently Asked Questions (FAQ)
Will stickers damage my piano keys when removed?
The risk of damage depends heavily on the sticker’s adhesive quality and your keyboard’s key material. Standard plastic keys on budget digital keyboards are highly resilient but can still hold onto sticky residue if low-quality adhesives degrade over time. Acoustic pianos with synthetic ivory or natural wooden keys are porous and can be permanently discolored or warped by strong adhesives. Always check your keyboard manufacturer’s care instructions and test a single sticker on the lowest or highest key of the instrument before fully applying the entire pack.
Do I need different stickers for acoustic pianos and digital keyboards?
While the physical width of standard keys is generally identical on both acoustic pianos and full-sized digital keyboards, the surface materials can differ significantly. Acoustic pianos often feature textured keytops designed to absorb finger moisture, which can react poorly with standard adhesives. Digital keyboards typically feature smooth, non-porous plastic keys that tolerate removable vinyl adhesives much better. If you are outfitting an acoustic piano, look for non-adhesive silicone strips or stickers specifically certified as safe for delicate, textured key surfaces.
Can I use standard stickers on a 49-key or 32-key keyboard?
Yes, you can use standard 61-key or 88-key sticker packs on smaller, non-standard keyboards like 49-key or 32-key MIDI controllers. You will simply have leftover stickers, which you can save as replacements for the keys that receive the most wear. Before applying them, count your keys and identify the starting note of your keyboard to ensure you align the alphabetical notes correctly, as smaller keyboards often start on notes other than the standard low A of an 88-key piano.

Community discussion
Share your experience or ask a question. Comments are reviewed before publication.