
A lifting or separating guitar bridge is a common headache for guitarists in the Philippines, where high tropical humidity and temperature fluctuations can weaken the adhesive holding the bridge to the soundboard. To repair this structural issue safely, a specialized guitar bridge clamp is an indispensable tool. Unlike general-purpose hardware clamps, a dedicated luthier clamp is engineered to apply precise, even pressure across the bridge without crushing the delicate internal bracing or marring the polished finish of your instrument. Selecting the right clamp requires a clear understanding of your guitar’s construction, the specific repair task at hand, and the physical dimensions of the tool itself.
Investing in the correct tool can save you from costly professional repairs or permanent damage to your instrument. When a bridge begins to lift, string tension pulls the wood upward, warping the soundboard and ruining the guitar’s intonation. By choosing a clamp designed specifically for instrument repair, you can execute a precise reglue that restores the structural integrity and acoustic resonance of your guitar.
Identifying Your Guitar Bridge Type and Maintenance Goals
Before browsing online marketplaces or local music shops, you must identify the exact style of your guitar’s bridge and define your maintenance objectives. Acoustic and classical guitars feature fixed wooden bridges that are glued directly to the soundboard. Over time, the constant tension of the strings combined with tropical moisture can cause these bridges to lift at the corners or detach entirely. For these instruments, your primary goal is typically a complete bridge reglue, which demands a clamp capable of reaching deep inside the soundhole to secure the bridge from both sides of the top wood.
Products mentioned in this guide
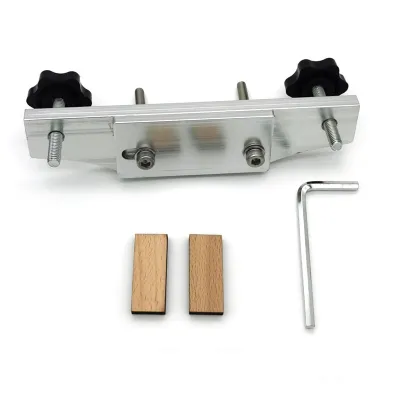
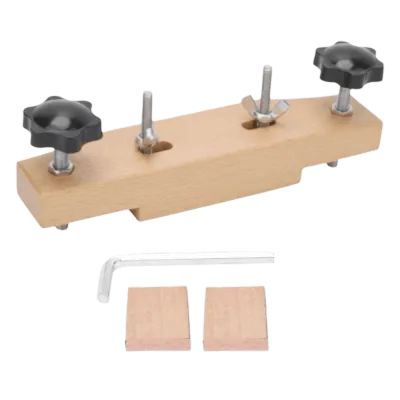
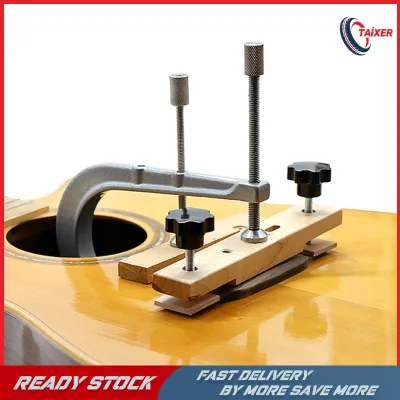
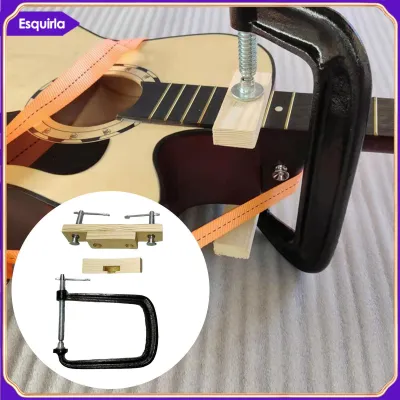
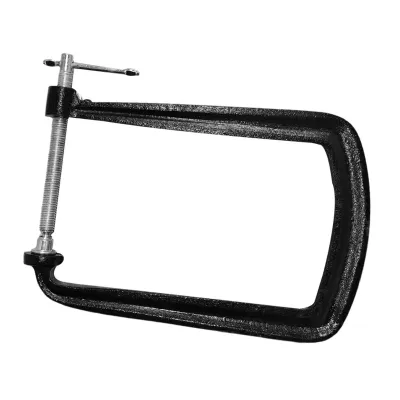
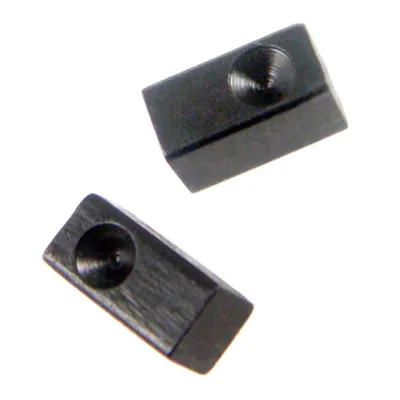
Prices are valid at publication and may change. Please refer to the product page for the latest price.
In contrast, electric guitars generally utilize metal bridges that are screwed or bolted into the body, such as fixed hardtails or floating tremolo systems. Maintenance for these electric setups rarely involves gluing; instead, it focuses on saddle adjustments, intonation alignment, or stabilizing the bridge during string changes. If you are working on an electric guitar with a tremolo system, a standard gluing clamp is unnecessary. Instead, you will need specialized blocks or stabilizing tools designed to hold the spring-loaded bridge level while you adjust the tension.
Understanding the physical limits of your instrument is crucial when planning a repair. You must assess the body thickness and the height of the bridge profile to determine the required throat depth and jaw opening of the clamp. An acoustic guitar with a deep body requires a clamp with a long reach to clear the distance from the soundhole to the back edge of the bridge. Attempting to use a tool with insufficient reach will result in uneven pressure, potentially warping the soundboard or failing to create a secure bond during a reglue.
Essential Specifications to Check in a Bridge Clamp
When evaluating different guitar bridge clamps, the physical dimensions are the most critical specifications to verify. The throat depth—the distance from the clamping screw to the inner frame—determines how far the clamp can reach across the guitar’s face. For a standard acoustic guitar, you generally need a throat depth that matches or exceeds the distance from the edge of the soundhole to the rear edge of the bridge. Measure your guitar carefully with a ruler before purchasing, as a clamp that is even a few millimeters too short will be completely unusable for a regluing project.

The jaw width and opening capacity must also accommodate the combined thickness of the guitar top, the bridge itself, and any protective cauls you place inside and outside the instrument. A clamp with an adjustable jaw opening allows you to work on various instrument types, from thin-bodied classical guitars to deeper dreadnought models. Look for models that specify their maximum opening capacity to ensure they can comfortably span this combined thickness without forcing the mechanism.
The clamping mechanism itself dictates how much control you have over the pressure applied to the delicate spruce or cedar top. Screw-driven clamps offer high precision, allowing you to slowly increase the tension and feel the resistance, which is vital for avoiding structural cracks. Quick-release trigger clamps, while convenient for rapid adjustments, can sometimes apply sudden, uneven force that risks damaging soft tonewoods. For delicate gluing operations, a fine-threaded screw mechanism is generally preferred by experienced repairers.
Additionally, look for clamps featuring swivel pads and protective padding. A swivel pad at the end of the clamping screw adjusts to the slight angles of contoured bridges or arched tops, ensuring the force is directed perpendicular to the glue joint. Non-marring silicone pads, cork inserts, or custom-shaped wooden cauls are essential safety features. They act as a barrier between the hard metal or plastic of the clamp and the soft wood of your guitar, preventing unsightly dents, scratches, or finish reactions during the hours required for glue to cure.
Matching Clamp Designs to Acoustic and Electric Guitars
Different instrument families require distinct clamping strategies to ensure a successful repair without causing secondary damage. For acoustic and classical guitars, the gold standard is a deep-reach U-shaped clamp or a specialized three-screw bridge clamp. These designs are engineered specifically to span the distance from the soundhole to the bridge. They often utilize an internal caul—a shaped block of wood or plastic—that fits inside the guitar body, carefully avoiding the delicate spruce bracing glued to the underside of the soundboard. Without a properly positioned internal caul, the pressure of the clamp can easily crush these structural braces, ruining the guitar’s acoustic projection.
Electric guitars with fixed bridges present a different set of requirements. Because the bridge is anchored mechanically to a solid or semi-hollow body, you do not need the deep-reach capabilities required for acoustic soundholes. Instead, standard, compact C-clamps or specialized alignment jigs are used to hold components in place during saddle modifications or string-through-body alignments. When using any clamp on a solid-body electric, protecting the polyurethane or nitrocellulose finish is the primary concern, requiring thick rubber or felt barriers to prevent metal-on-finish contact.
For electric guitars equipped with tremolo systems, such as Floyd Rose or vintage-style synchronized bridges, traditional gluing clamps are entirely unsuitable. These floating systems rely on a delicate balance between string tension and rear tremolo springs. To perform setups, intonation adjustments, or string changes efficiently, you should look for specialized tremolo blocks or stabilizing clamps. These tools wedge into the tremolo cavity or lock the bridge tailpiece in place, preventing the bridge from collapsing into the body when strings are removed.
If you are working on smaller stringed instruments like ukuleles, mandolins, or travel guitars, standard guitar clamps will be far too heavy and bulky. A heavy clamp can cause a lightweight ukulele to tip over or apply excessive pressure that cracks the thin soundboard. For these instruments, seek out compact, lightweight clamps with reduced pressure thresholds. Many luthiers prefer light spring clamps or miniature brass C-clamps paired with custom-cut cork pads to handle the delicate scale of these smaller instruments.
Evaluating Build Quality and Instrument Safety Features
The materials used to construct a bridge clamp directly impact its durability, weight, and safety. Heavy-duty steel frames offer maximum rigidity and will not flex under pressure, ensuring that the force you apply is transferred directly to the glue joint. However, steel clamps can be heavy, which adds weight to the guitar top during a repair and requires careful balancing to prevent the guitar from tipping. Aluminum alloy frames provide an excellent middle ground, offering high strength and corrosion resistance—a vital feature in the humid Philippine climate—while remaining lightweight enough to handle easily.
Reinforced nylon or composite clamps are highly portable and resistant to rust, making them popular for quick adjustments or light-duty tasks. However, they may flex under the high tension required for a complete bridge reglue, which can lead to an uneven bond or joint failure. When evaluating these materials, check the manufacturer’s specifications for load capacity and pressure limits. Over-tightening a clamp is one of the most common mistakes in DIY guitar repair; a high-quality clamp should allow you to apply firm, even pressure without requiring you to force the handle.
Safety boundaries must always be respected when undertaking instrument repairs. While a high-quality bridge clamp empowers you to handle minor lifting issues, complex structural damage requires professional intervention. If you observe deep cracks in the soundboard radiating from the bridge area, loose internal braces that rattle when tapped, or a bridge that has warped and twisted out of shape, clamping alone will not solve the problem. In these scenarios, attempting a DIY repair can cause permanent, irreversible damage to your instrument. It is always safest to stop and consult a professional luthier who has the specialized diagnostic tools and experience to handle complex structural restorations.
Your Pre-Purchase Verification Checklist
To ensure you select a compatible and reliable tool from online marketplaces or local specialty shops, use this practical checklist before finalizing your purchase. First, measure your guitar’s physical dimensions: record the distance from the soundhole edge to the back of the bridge, the thickness of the body at the bridge site, and the height of the bridge itself. Compare these measurements directly against the throat depth and jaw opening specifications listed by the seller. Never rely on generic ‘one-size-fits-all’ product titles, as acoustic guitar dimensions vary significantly between parlor, classical, and dreadnought shapes.
Next, inspect the product description for included accessories that add value and safety to your purchase. High-quality kits often include interchangeable cauls designed to fit different bridge profiles, extension rods for deeper bodies, or replacement silicone padding. Purchasing a clamp that already includes these protective accessories saves you the time and expense of fabricating your own cauls from scrap wood or cork.
Additionally, consider the cost-to-utility ratio of the tool. If you are a hobbyist performing a one-time repair on an entry-level guitar, spending ₱3,000 or more on a professional-grade luthier clamp might not be practical. However, investing ₱800 to ₱1,500 in a reliable, mid-range clamp with proper padding is a worthwhile safeguard for your instrument. For high-value or heirloom guitars, prioritizing a specialized, highly adjustable clamp is always the safest choice to preserve the instrument’s value.
Finally, review the seller’s return policies and warranty terms. Specialized luthier tools require high precision, and any manufacturing defect—such as a misaligned screw thread or a warped frame—can compromise the safety of your repair. Ensure the seller offers a clear return window so you can inspect the clamp’s alignment and test its fit on your instrument immediately upon delivery.
Frequently Asked Questions (FAQ)
Can I use a standard hardware C-clamp for guitar bridge repairs?
Using a standard hardware C-clamp for guitar repairs is highly risky and generally discouraged unless you make significant modifications. Standard hardware clamps are designed for heavy woodworking or metalworking; they lack the precision required for delicate instruments and typically feature hard metal jaws that will easily crush soft tonewoods and ruin the finish. If you must use one in an emergency, you must fabricate custom wooden cauls to distribute the pressure evenly and place thick cork or leather padding between the clamp and the guitar surfaces to prevent permanent denting.
How do I prevent a bridge clamp from denting the guitar finish?
To prevent a bridge clamp from denting your guitar’s finish, always use a protective barrier between the clamp’s jaws and the instrument. High-quality silicone pads, thick cork sheets, or dense felt inserts are excellent materials for absorbing and distributing the clamping force. Additionally, ensure you apply only moderate, even pressure; the goal of clamping a glued bridge is to hold the surfaces in close contact, not to squeeze out every drop of adhesive. Over-tightening is the primary cause of wood compression and finish damage.
Do I need a specialized clamp for tremolo bridge setups?
Yes, tremolo bridges require specialized stabilizing tools rather than traditional gluing clamps. Because a floating tremolo system is balanced dynamically by string tension and internal springs, removing the strings causes the bridge to pull back into the body, disrupting your setup. Specialized tremolo blocks or locking clamps are designed to temporarily wedge the bridge in a level position, allowing you to change strings, adjust intonation, or tune the instrument without fighting the spring tension. Using a standard bridge clamp on a floating system can damage the finish or misalign the pivot edges.
Community discussion
Share your experience or ask a question. Comments are reviewed before publication.