
Quick Answer: Which Sticker Type Works Best?
Choosing the right visual aid for your piano or keyboard can significantly impact how quickly you build confidence. Neither color-coded nor letter-labeled keyboard stickers are universally superior; effectiveness depends on the learner’s age, cognitive style, and curriculum.
Color-coded stickers excel at supporting rapid pattern recognition, making them highly effective for very young beginners and visual learners who benefit from sensory association. On the other hand, letter-labeled stickers are better suited for older students, teenagers, and adults who need to read chords, identify specific notes by name, and align their practice with standard musical notation.
How Color-Coded and Letter Labels Differ
Before selecting a set of labels for your instrument, it is essential to understand how these two primary design philosophies function. While both styles aim to bridge the gap between the physical keys and the music on the page, they rely on completely different cognitive pathways to help you identify notes.
Products mentioned in this guide

Prices are valid at publication and may change. Please refer to the product page for the latest price.

Color-Coded Stickers
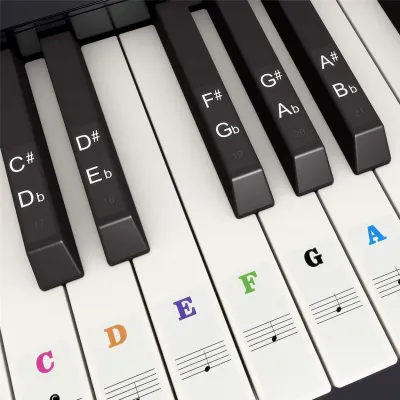
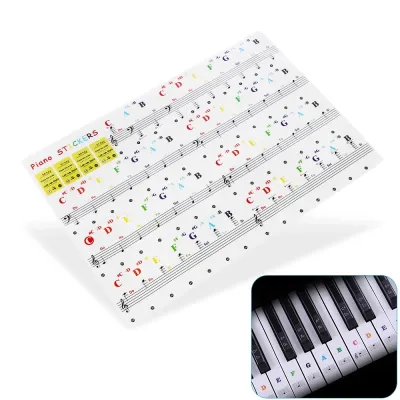
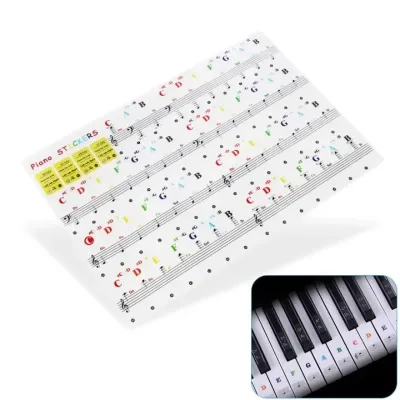
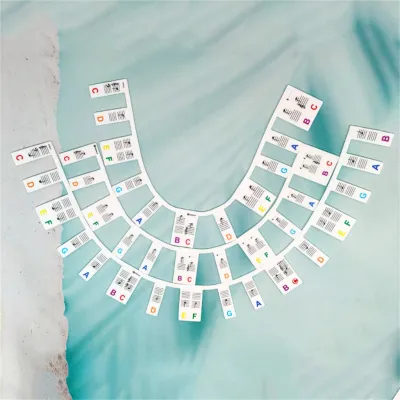
Color-coded stickers use distinct hues to group keys, often assigning a specific color to each note in an octave or matching colors to specific octaves across the keyboard. This design leverages visual association and spatial grouping, allowing the brain to identify patterns without immediately needing to process text.
Many of these color systems are designed to coordinate with specialized beginner songbooks or early-childhood music education curricula. By replacing or supplementing text with vibrant visual cues, these labels help students associate a physical key with a color, bypassing the need to memorize alphabetical note names during the very first stages of play.
Letter-Labeled Stickers
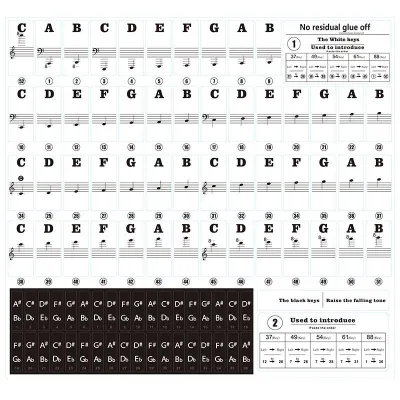
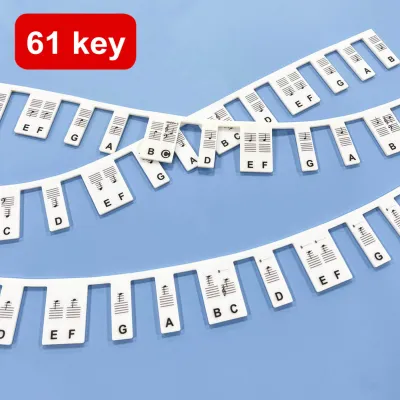
Letter-labeled stickers display the standard musical alphabet—specifically the letters A through G—directly on the surface of each key. These labels provide immediate, unambiguous identification of each note, showing exactly where C, D, or E lies on the keyboard without requiring any translation of colors.
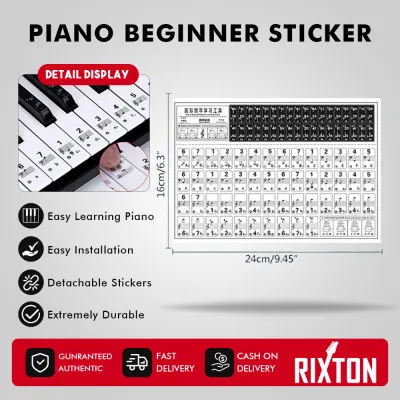
In addition to the note letters, many of these stickers include a small illustration of the corresponding musical staff, complete with the treble or bass clef and the note’s exact position. This direct approach is designed to reinforce the relationship between the physical key and standard written notation from day one.
Comparing the Learning Experience
To determine which style will serve you best, it is helpful to examine how each type of sticker influences the daily practice routine and the development of core musical skills. The way a student interacts with these visual aids shapes their muscle memory, reading habits, and overall progress.
Visual Memory and Pattern Recognition
The human brain naturally seeks patterns, and color-coded stickers capitalize on this by making the repeating structure of the keyboard immediately obvious. Because the piano keyboard consists of repeating octaves of white and black keys, assigning colors to these groups helps beginners quickly grasp the spatial relationships between notes. However, if the stickers are overly bright, they can sometimes create visual clutter, making it difficult for a student to focus on the physical shape of the keys.
Letter-labeled stickers require a slightly different cognitive process, as the student must read and interpret a letter rather than simply reacting to a color. While this builds a direct association with note names, it can sometimes slow down initial pattern recognition because the brain is busy processing text. To minimize visual fatigue, many modern letter labels feature transparent backgrounds and minimalist designs, keeping the keyboard looking clean while still providing essential reference points.
Transitioning to Standard Sheet Music
A common concern among music educators is the potential for students to develop a dependency on keyboard labels, which can delay the transition to reading standard sheet music. Letter-labeled stickers carry a specific risk: students may begin reading the letters on their keys instead of looking at the musical staff on the page. This habit can slow down the development of sight-reading skills, as the player’s eyes remain glued to their hands rather than the sheet music.
Color-coded systems face a different transition challenge. While they do not encourage reading letters on the keys, they often require an extra translation step if the student is moving to standard black-and-white sheet music. If a child is accustomed to playing a “red” key for C, they may struggle when presented with a standard black-and-white staff. To ease this transition, many teachers recommend using color-coded systems only in tandem with matching colored sheet music, gradually phasing them out as the student learns to recognize the physical layout of the keys.
Age and Learning Style Suitability
Age is one of the most decisive factors when choosing between these two labeling methods. Young children, particularly pre-readers who have not yet mastered the alphabet, find color-coded stickers highly intuitive. For a five-year-old, matching a blue sticker on the key to a blue circle on a simplified song sheet is an achievable and rewarding task that builds immediate enthusiasm for the instrument.
Conversely, older beginners, teenagers, and adults usually find letter-labeled stickers far more practical. Older students already possess strong reading skills and typically want to learn standard chords, lead sheets, or popular songs quickly. Because adult-oriented tutorials and chord charts rely heavily on alphabetical note names (such as C Major or G7), having the letters clearly marked on the keys provides a direct, efficient reference that aligns perfectly with their learning materials.
Decision Framework: Choosing the Right Stickers
To make the best choice for your home setup, you can use a simple decision framework based on the learner’s profile and goals.
Choose color-coded stickers if:
- The primary player is a young child or a pre-schooler who responds strongly to visual patterns and color matching.
- You are using a specific early-childhood music curriculum that incorporates color-coded notation or colored handbells.
- The student experiences frustration with text-heavy instructions and benefits from sensory-based learning aids.
Choose letter-labeled stickers if:
- The learner is an older child, teenager, or adult who can already read fluently and wants to understand standard music theory.
- Your goal is to learn how to read traditional sheet music, lead sheets, or chord charts from the beginning.
- You prefer a clean, minimalist aesthetic on your instrument and want to avoid bright, multicolored keys.
Before making a final purchase, always verify if your music teacher or chosen online curriculum has a specific preference. Some instructors prefer that students use no stickers at all, while others have preferred systems that match their teaching methodology. Aligning your choice with your instructional material prevents confusion and ensures a smoother learning path.
Application and Removal Best Practices
Applying keyboard stickers correctly is essential to protect your instrument and ensure the labels remain useful. Before applying any adhesive product, thoroughly clean the key surfaces with a dry or slightly damp microfiber cloth to remove dust, finger oils, and moisture. In warm, tropical climates where high humidity is common, ensuring the keys are completely dry before application is critical, as trapped moisture can weaken the adhesive or cause bubbling.
When placing the stickers, use a small tool like a plastic card to align them precisely at the top or center of each key. Avoid placing them too close to the front edge where fingers make constant contact, as this can cause the edges to peel prematurely. Ensure the stickers do not overlap the gaps between keys, which can restrict key movement or affect the overall action of the keyboard.
If you are using adhesive vinyl stickers, always check the manufacturer’s guidelines regarding safe removal. High-quality stickers typically use a low-tack, residue-free adhesive, but prolonged exposure to heat and humidity can still cause some adhesives to degrade over time. If you encounter resistance when trying to peel off an old sticker, stop immediately to avoid scratching the key surface; instead, gently warm the area with a hair dryer on its lowest, coolest setting to soften the adhesive before peeling.
To encourage independent playing, plan a gradual removal timeline. Start by removing the labels from the highest and lowest octaves, leaving only the central octaves labeled. Once the student is comfortable navigating those outer zones using physical landmarks (such as the groups of two and three black keys), you can gradually remove the remaining stickers, completing the transition to a clean, unlabeled keyboard.
Frequently Asked Questions (FAQ)
Do keyboard stickers ruin the piano keys?
High-quality keyboard stickers designed specifically for musical instruments generally do not ruin piano keys, provided they are applied and removed correctly. However, cheap adhesives can leave a sticky residue or even discolor plastic and ivory keys over time, especially in humid environments. It is always best to test a single sticker on a less visible key, such as the highest key on the keyboard, and leave it on for a few days before committing to labeling the entire instrument. If you want to avoid adhesives entirely, consider using removable silicone key overlays, which sit snugly behind the black keys and can be lifted off instantly without leaving any residue.
Should I label all 88 keys or just the middle octaves?
For most beginners, labeling only the central octaves—typically the three or four octaves surrounding Middle C—is highly recommended. Labeling all 88 keys can create unnecessary visual clutter and overwhelm a new student, as early lessons rarely venture into the extreme high or low registers of the instrument. By limiting the stickers to the primary playing zone, you help the student focus on mastering the most common notes first. This approach also encourages them to use the physical layout of the black keys to navigate the unlabeled outer octaves naturally, building stronger spatial awareness from the start.

Community discussion
Share your experience or ask a question. Comments are reviewed before publication.