
Deciding on your first electronic drum kit is a major milestone for any aspiring drummer, especially when trying to balance the urge to practice with the realities of living in a shared household or a compact neighborhood. The NUX DM-210 stands out as a highly practical first electronic drum kit for home practice, primarily because it features all-mesh drum heads that offer a realistic rebound while keeping acoustic noise to a minimum. However, determining whether this specific kit is the right fit for your home requires looking closely at your available floor space, understanding how physical vibrations travel through your floors, and knowing exactly what accessories you need to verify before making your purchase.
For beginners in the Philippines, practicing at home often means navigating tight residential layouts, high humidity, and close proximity to family members or neighbors. An electronic kit solves the volume issue of traditional acoustic drums, but it is not completely silent. By evaluating how the physical design, noise profile, and built-in learning tools of this kit align with your living situation, you can set up a highly productive practice space that keeps both your drumming skills progressing and your household relationships intact.
Space and Setup Requirements for Home Practice
Before bringing any electronic drum kit into your home, you must carefully measure your designated practice area to ensure the frame can be fully extended without blocking walkways or doors. The NUX DM-210 utilizes a lightweight, curved four-post rack design that is relatively compact compared to intermediate kits, but it still requires a dedicated footprint of approximately 1.2 meters by 0.8 meters once you factor in the space needed for a drum throne and the kick pedal. Reviewing the manufacturer’s official setup dimensions in the user manual will help you confirm if the kit can sit comfortably in a bedroom corner, a study, or a living room alcove.
Products mentioned in this guide
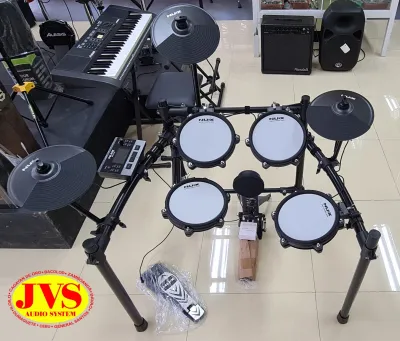
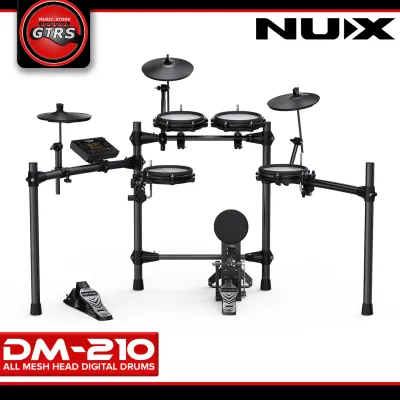
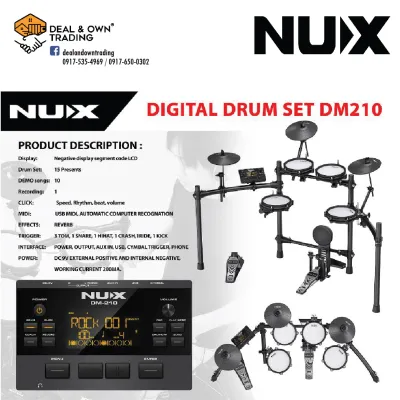
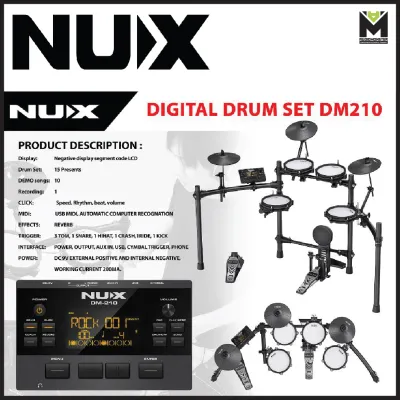
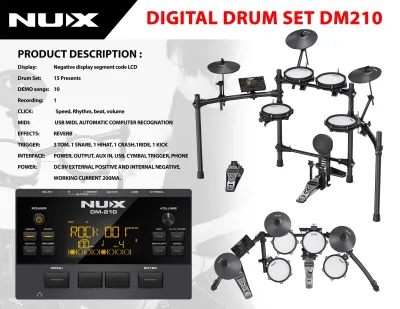
Prices are valid at publication and may change. Please refer to the product page for the latest price.
Floor selection plays a critical role in the stability of your drum rack and pedals during energetic practice sessions. Many homes in the Philippines feature ceramic tile, polished concrete, or smooth vinyl flooring, which offer very little grip for metal rack feet and spring-loaded pedals. Without proper friction, your kick drum pad and hi-hat controller will gradually slide away from you as you play. Placing a heavy-duty, non-slip drum rug or a thick rubber utility mat beneath the entire setup is highly recommended to lock the components in place and protect your home’s flooring from scratches.
Managing the tropical climate is another essential factor when planning your setup space. High humidity and direct sunlight can accelerate the degradation of rubber cymbal pads and sensitive electronic components inside the drum module. Position your drum kit in a well-ventilated room, away from open windows where sudden rain showers or intense afternoon heat could damage the wiring. Additionally, plan your layout near a reliable power outlet so you can route the power cables safely along the baseboards, using cable ties to secure the trigger lines to the rack frame to prevent tripping hazards.
Managing Noise and Vibration in Shared Spaces
One of the most common misconceptions about electronic drum kits is that they are completely silent to the outside world. While mesh drum heads emit only a soft, low-volume tapping sound when struck with wooden sticks, the physical impact of your feet operating the kick pedal and hi-hat controller creates a distinct mechanical thud. This physical impact noise can easily travel through walls and doors, sounding surprisingly loud to family members resting in adjacent rooms.

In multi-story homes, townhouses, or condominium units, low-frequency vibrations present an even greater challenge. Every time you press down on the bass drum pedal, the kinetic energy travels downward through the pedal base, into the floor, and directly into the structural beams of the building. To neighbors living on the floor below, this vibration manifests as a repetitive, dull thumping sound that can be highly disruptive, even if you are wearing headphones and cannot hear it yourself.
To mitigate these vibrations and maintain peace in shared residential spaces, you should plan to install a vibration-damping barrier beneath your kit. Commercially available noise-isolation mats designed specifically for drums can help absorb downward impact. Alternatively, many home drummers construct a simple DIY isolation platform, often called a tennis ball riser, using two sheets of sturdy plywood sandwiching several tennis balls. This floating platform decouples the drum kit from the floor, preventing the mechanical energy of your footwork from vibrating through the building’s structure.
Evaluating Beginner Features and Practice Tools
For a beginner, the features housed within the drum module are just as important as the physical pads. The NUX DM-210 module includes essential practice tools designed to help you build fundamental skills from scratch. According to the official product documentation, the module features a built-in metronome with adjustable time signatures and tempos, which is the single most important tool for developing a steady internal clock. It also includes pre-programmed play-along tracks across various musical genres, allowing you to practice keeping time with a full band.
Connectivity options on the back of the module determine how easily you can integrate modern learning tools into your daily routine. Verify the presence of a USB-MIDI port, which allows you to connect the drum kit directly to a computer, tablet, or smartphone. This connection enables you to use interactive drumming apps, educational software, or digital audio workstations to record your practice sessions and track your progress over time. The module also features an auxiliary input and Bluetooth connectivity, allowing you to stream backing tracks or drum tutorials directly from your phone into your headphones.
Additionally, the physical construction of the pads supports the development of proper drumming technique. The mesh heads on the snare and toms can be tightened or loosened using a standard drum key, allowing you to adjust the rebound tension to closely match the feel of an acoustic drum kit. This adjustable tension is crucial for beginners, as it helps build the necessary wrist and finger strength required to transition to traditional acoustic drums in the future without feeling disoriented by a lack of stick response.
What to Verify Before Buying Your First Kit
Before finalizing your purchase, it is vital to confirm exactly what is included in the retail package. Electronic drum kits are frequently sold in varying configurations; some packages include only the drum pads and rack, while others are bundled as complete starter sets. Carefully read the seller’s product description to verify if essential accessories—such as a kick drum pedal, a height-adjustable drum throne, a pair of drumsticks, and a set of headphones—are included in the price, or if you need to budget extra ₱ to purchase them separately.
Electrical compatibility is another critical detail to check before plugging in your new equipment. Ensure that the included power adapter is rated for the standard 220V electrical system used in the Philippines and features the correct plug shape for your wall outlets. Using an incompatible or low-quality third-party power adapter can cause electrical noise in your headphones, inconsistent trigger response, or even permanent damage to the sensitive internal circuitry of the drum module.
Finally, protect your investment by purchasing only from authorized local music distributors or reputable dealers. Buying from official channels ensures that you receive a genuine product and access to a valid manufacturer’s warranty. Electronic drum triggers and cables are subject to constant physical impact, and having a reliable local warranty means you can easily get replacement parts or professional technical support if a pad or the module experiences an electronic fault during your first year of ownership.
Frequently Asked Questions (FAQ)
Do I need a special amplifier for the NUX DM-210?
For daily home practice, a dedicated pair of stereo headphones is the best option because it keeps your playing silent to those around you. If you want to play out loud for family or friends, you will need a dedicated electronic drum amplifier or a portable PA system designed to handle a wide frequency range. Avoid plugging your electronic drum kit into a standard electric guitar amplifier; guitar amps are designed specifically for mid-range frequencies and can easily suffer speaker damage from the deep, low-frequency signals produced by a digital bass drum.
How do I clean and maintain the drum pads?
To keep your electronic drum kit in optimal condition, wipe down the mesh heads and rubber cymbal pads regularly with a clean, dry, or slightly damp microfiber cloth to remove dust, sweat, and wood shavings from your drumsticks. Never use harsh household chemical cleaners, solvents, or excessive amounts of water on the kit. Moisture can easily seep through the mesh heads or around the edges of the rubber pads, damaging the sensitive piezoelectric triggers underneath and causing the drum module to miss or misread your drum strokes.
Community discussion
Share your experience or ask a question. Comments are reviewed before publication.