
A lifting acoustic guitar bridge is a common structural issue caused by string tension, humidity changes, or glue failure. Using a bridge doctor—a mechanical tension-relief device installed inside the guitar body—allows you to pull the lifting bridge back down flush against the soundboard. This tool works by leveraging an internal wooden block and a tension rod that presses against the tail block of the guitar, neutralizing the rotational pull of the strings.
While a bridge doctor is an effective DIY solution for moderate bridge lift and soundboard bulging (bellying), it requires careful assessment, precise drilling, and gradual adjustment. This guide walks you through the entire process of evaluating your guitar, preparing the instrument, installing the device safely, and maintaining your guitar afterward to prevent future structural damage.
Assessing Bridge Lift and Repair Suitability
Before purchasing or installing a bridge doctor, you must determine if your guitar’s bridge lift is suitable for a mechanical tension repair or if it requires a complete professional reglue. A lifting bridge occurs when the glue joint between the wooden bridge and the soundboard (the guitar’s top) begins to fail under the constant tension of the steel strings.
Products mentioned in this guide
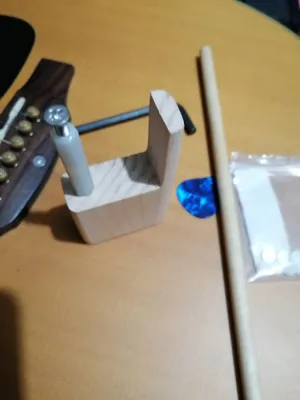
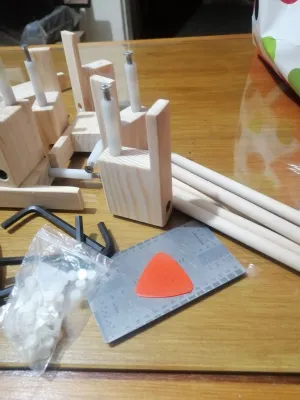
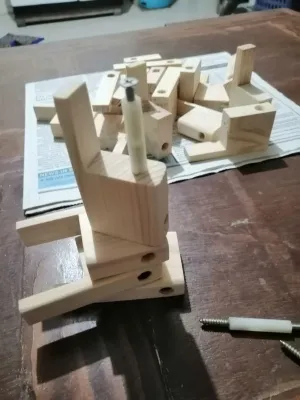
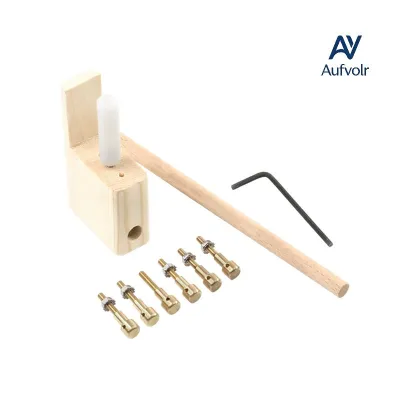
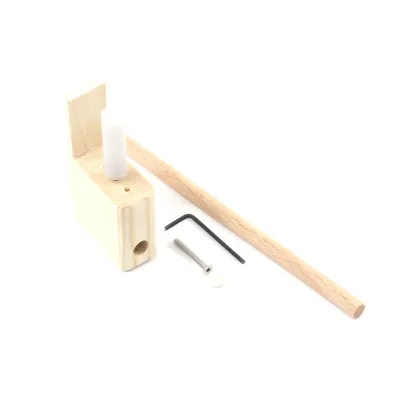
Prices are valid at publication and may change. Please refer to the product page for the latest price.
To inspect the severity of the lift, perform a simple paper test or use a metal feeler gauge. Gently slide a thin sheet of paper or a 0.05 mm feeler gauge under the back and side edges of the bridge. If the paper slides in only a few millimeters along the back edge, the lift is minor to moderate, making it an excellent candidate for a bridge doctor installation. However, if the paper slides more than halfway under the bridge, or if the bridge is visibly lifting across its entire width, the structural integrity of the glue joint is severely compromised.
Next, inspect the soundboard for severe top deformation, commonly known as “bellying.” Look across the top of the guitar from the side; a slight upward curve behind the bridge is normal, but a dramatic, swollen bulge indicates that the internal braces or the bridge plate may have failed. Look inside the soundhole with a small mirror and a flashlight to check the condition of the internal bridge plate—the hardwood strip directly beneath the bridge where the string balls rest. If the bridge plate is cracked, splintered, or completely chewed out by string wear, a mechanical tension device cannot safely correct the issue without first repairing or replacing the plate.
Differentiating between minor edge lifting and a completely detached bridge is crucial. A bridge doctor is designed to stabilize and pull down a bridge that is still mostly adhered to the soundboard. It acts as a mechanical clamp to prevent further lifting and flatten the top. If the bridge is completely detached or held on only by the bridge pins, installing a tension device without regluing will put immense, concentrated stress on a single point, potentially cracking the soundboard or the bridge itself.
Gathering Tools and Preparing the Guitar
A successful installation relies on having the correct tools ready and preparing your workspace to prevent accidental damage to your instrument. You will need a standard bridge doctor kit, which typically includes the internal wooden block, a tension rod, a mounting screw, and a matching wooden dot inlay to cover the screw hole.

Additionally, gather a hand drill or a variable-speed power drill, drill bits matching the manufacturer’s specified sizes, high-quality masking tape, a small mirror, a flashlight, and a screwdriver. If your kit instructions recommend a specific adhesive for securing the internal block or the decorative dot inlay, ensure you have it on hand. Avoid using generic superglues or harsh chemical adhesives that can damage the guitar’s finish or make future repairs impossible.
Begin by loosening the guitar strings slowly to relieve all tension on the soundboard. Once loose, remove the strings completely, along with the bridge pins, and store them safely. Working on a guitar under string tension is highly dangerous and can cause the bridge to rip off violently during the modification process.
With the strings removed, carefully clean the lifting gap. Use a dry, soft-bristled brush or compressed air to blow out any dust, lint, or loose debris from under the lifted edge of the bridge. Do not force the bridge upward or pry it with sharp metal tools, as this can tear the wood fibers of the soundboard or scratch the guitar’s delicate finish. If there is stubborn dirt, a dry microfiber cloth can be gently slid under the edge to clear the surface.
Step-by-Step Installation of the Bridge Doctor
The bridge doctor operates on a simple but highly effective mechanical principle. Instead of relying solely on a glue joint to resist the rotational pull of the strings, the device uses an internal wooden block mounted directly beneath the bridge. A long tension rod extends from this block to the tail block at the rear of the guitar. When the tension screw is tightened, it pushes the rod against the tail block, creating a counter-lever force that pulls the back of the bridge down flat against the soundboard.
Because this installation involves drilling into your guitar and applying mechanical pressure to aged wood, safety and precision are paramount. Always protect the guitar’s top by applying several layers of masking tape around the work area. Work slowly, check your alignment inside the soundhole frequently, and never force any components if you encounter resistance.
Drilling the Mounting Hole and Securing the Block
The first physical modification is drilling the mounting hole through the bridge and soundboard. To find the correct location, refer strictly to the manufacturer’s template or instructions. Typically, the hole is drilled directly behind the saddle, centered between the third and fourth string holes (the G and D strings). This placement ensures the mounting screw passes through the thickest part of the bridge and the internal bridge plate without interfering with the string holes.
Before drilling, inspect the inside of the guitar using your mirror and flashlight to locate the internal X-bracing. The drill path must clear these braces completely; drilling through an internal brace will permanently weaken the guitar’s structure. Apply a piece of masking tape over the drilling spot on the bridge to prevent the wood from splintering as the drill bit enters.
Hold the drill perfectly perpendicular to the guitar top. Drill slowly with light pressure, allowing the bit to do the work. Control your drill depth carefully to prevent the chuck of the drill from slamming into the guitar top when the bit breaks through the soundboard and bridge plate.
Once the hole is clean, position the internal wooden mounting block inside the guitar body, aligning its pre-drilled hole with the hole you just drilled through the bridge. If your kit specifies using an adhesive to secure the block to the bridge plate, apply a small, controlled amount of the recommended glue to the mating surface of the block. Press the block firmly against the underside of the bridge plate, ensuring it is aligned straight toward the tail block. Allow the adhesive to cure completely according to the manufacturer’s instructions before proceeding to the next step.
Threading the Screw and Applying Tension
With the internal block secured and the glue fully cured, you can begin the tensioning process. Insert the tension screw through the hole in the bridge from the outside of the guitar. From inside the soundhole, guide the screw into the pre-drilled hole of the internal wooden block. Use a manual screwdriver to thread the screw, ensuring it sits straight and does not cross-thread or bind.
Next, insert the tension rod into the bottom of the internal block, extending it toward the tail block at the rear of the guitar. The rod should rest securely against the tail block. If your kit uses an adjustable screw at the end of the rod, adjust it until it makes light contact with the tail block.
Slowly tighten the main mounting screw on the bridge in small, incremental turns. This action pulls the internal block upward against the bridge plate while the tension rod pushes against the tail block, forcing the lifting bridge back down toward the soundboard. Turn the screw a quarter-turn at a time, pausing for a few minutes between turns to allow the wood to slowly adapt to the new mechanical pressure.
Throughout this process, monitor the soundboard and the edges of the bridge continuously. Use your flashlight to inspect the gap. If you hear any creaking, cracking, or popping sounds, or if you feel sudden resistance while turning the screw, stop immediately. Back off the screw slightly and inspect the wood for structural failure. Forcing a stubborn bridge down too quickly can crack the soundboard or split the bridge.
Verifying the Repair and Post-Installation Care
Once the tension screw is adjusted, verify that the bridge is fully seated flush against the soundboard. There should be no visible gaps along the back or side edges of the bridge. If a tiny gap remains but the tension is already firm, do not over-tighten the screw; the mechanical stabilization is often sufficient even if a microscopic cosmetic gap persists.
Now, restring the guitar and slowly tune it to standard pitch. As you bring the strings up to tension, monitor the bridge and the soundboard closely. The bridge doctor should counteract the string tension, keeping the bridge flat and preventing the top from bulging. Re-check the bridge seating under full string tension to ensure the repair holds securely.
To protect your repair and prevent future wood movement, proper post-installation care is essential. Wood is highly sensitive to environmental changes, particularly in tropical climates like the Philippines, where high humidity and rapid temperature fluctuations are common. Excessive humidity can soften wood glues and cause the soundboard to swell, while extreme dryness can cause the wood to shrink and crack.
Store your guitar in a high-quality hard case when not in use. To manage humidity, place silica gel packets or a specialized two-way humidity control pack inside the case. Aim to keep the relative humidity inside the case between 45% and 55%. Avoid storing the guitar near air conditioning units, open windows, or in direct sunlight, as rapid temperature shifts can stress the wood and compromise the repair.
When to Stop and Consult a Professional Luthier
While installing a bridge doctor is a manageable DIY project for many guitar owners, certain structural issues require professional expertise. If you discover a cracked soundboard, a severely damaged or split internal bridge plate, or loose internal bracing during your initial inspection, do not attempt a DIY repair. These structural failures compromise the safety of the instrument and require specialized wood repair techniques.
It is also important to understand the limitations of mechanical tension devices. A bridge doctor is designed to stabilize and correct moderate bridge lift and top bellying; it is not a universal replacement for a traditional hot hide glue or wood glue reglue. On vintage, highly valuable, or sentimental instruments, a mechanical modification like drilling a hole through the bridge can significantly reduce the instrument’s market value and historical integrity. For these guitars, a professional luthier should perform a traditional bridge removal, clean the old glue, and reglue the bridge using historically accurate methods.
If at any point during the drilling, gluing, or tensioning process you feel uncomfortable or unsure of your skills, stop immediately. If the wood makes unusual noises, or if the bridge refuses to pull flat under reasonable tension, do not force it. Consulting a qualified luthier ensures your guitar is repaired safely without risking irreversible structural damage.
Frequently Asked Questions (FAQ)
Can a bridge doctor fix a completely detached guitar bridge?
No, a bridge doctor is not designed to fix a completely detached guitar bridge. The tool functions as a mechanical stabilizer to pull down and support a bridge that is still largely adhered to the soundboard. If the bridge has completely separated from the guitar top, or if the glue joint has failed entirely, installing the device without regluing will place extreme, concentrated stress on the mounting screw and the soundboard. This can lead to severe wood cracking or structural failure. A completely detached bridge must be professionally cleaned of old glue residue, prepped, and properly reglued to the soundboard using appropriate wood adhesives and clamps before any tensioning device is considered.
Will installing a bridge doctor affect the guitar's tone?
Installing a bridge doctor introduces additional mass—specifically a wooden block and a tension rod—inside the guitar’s soundbox, which can alter how the soundboard vibrates. Some players notice a slight change in the guitar’s acoustic properties, such as a subtle reduction in bass response or a slight increase in sustain and midrange clarity. Because the device couples the bridge directly to the tail block, it changes the overall resonance of the top. However, these tonal shifts vary significantly depending on the guitar’s construction, wood type, and overall condition. Many players find the tonal trade-off highly acceptable, as it restores playability and structural stability to an otherwise unusable instrument. You should evaluate the sound quality after restringing and tuning the guitar to pitch to determine if any adjustments to the tension rod are needed.
Community discussion
Share your experience or ask a question. Comments are reviewed before publication.