
Setting up and adjusting a Guyker tremolo bridge for stable tuning requires balancing the physical tension of the guitar strings against the counter-tension of the tremolo springs in the rear cavity. When these two opposing forces are perfectly equalized, the bridge rests at its designed angle, allowing you to use the whammy bar without throwing the guitar out of tune. In tropical climates like the Philippines, where high humidity can cause subtle shifts in the guitar’s neck wood, achieving this mechanical equilibrium is essential for preventing tuning drift. By systematically adjusting the spring claw, setting the correct action, and eliminating friction points, you can achieve a highly responsive tremolo system that returns to pitch reliably.
Identifying Your Guyker Tremolo Type and Specifications
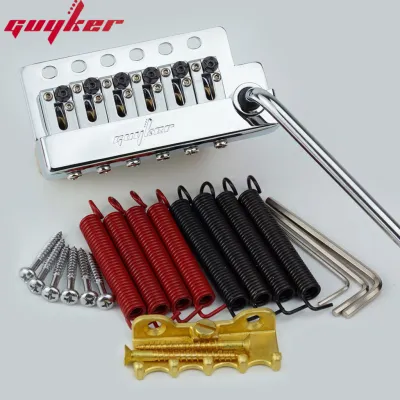
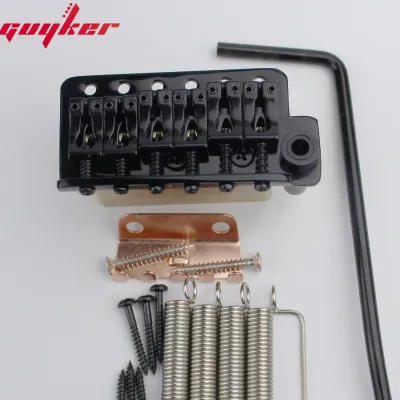
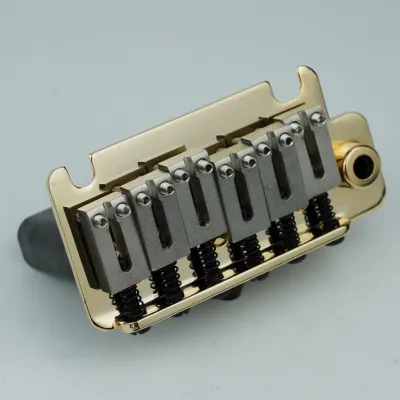
Guyker produces several aftermarket tremolo systems, ranging from classic six-screw vintage-style bridges to modern two-point floating systems and double-locking units. Identifying which type is installed on your guitar is the first step, as the mechanical behavior of each style dictates how you balance the tension. A vintage-style six-screw bridge typically rests flush against the guitar body or floats slightly for subtle vibrato, whereas a two-point floating tremolo is designed to sit parallel to the body, allowing for both upward and downward pitch bends.
Before turning any screws, locate the specific model number or specification sheet provided by Guyker or your guitar builder. This documentation helps verify the exact thread sizes, adjustment limits, and recommended baseplate angles for your hardware. Take a moment to inspect the bridge and locate the primary adjustment points: the spring claw screws inside the rear cavity, the saddle height screws, the saddle intonation screws, and, if applicable, the pivot posts or locking studs. Understanding where these components are prevents accidental damage during the setup process.
Products mentioned in this guide
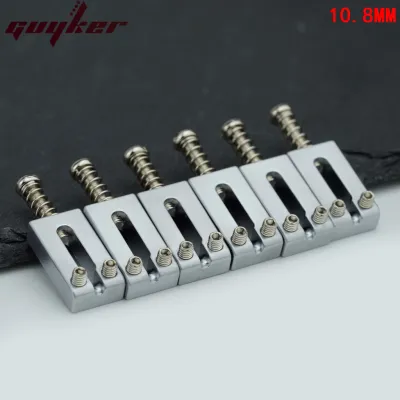
Prices are valid at publication and may change. Please refer to the product page for the latest price.
Gathering the Right Tools for the Setup
Adjusting a tremolo bridge requires precision, and using the wrong tools can easily strip the heads of small components. You will need a set of high-quality hex keys (often metric for Guyker hardware), a flathead or Phillips screwdriver for the spring claw, and a smooth string winder to speed up string changes. Because Guyker components are precisely machined, using a hex key that is even slightly too small can permanently round out the socket of a saddle lock or pivot post.

In addition to basic hand tools, a highly accurate chromatic tuner is indispensable for tracking the minute pitch changes that occur during adjustment. A capo is also highly recommended; clamping it at the first fret keeps the strings secured at the nut while you loosen tension at the headstock, preventing the strings from unraveling from the tuning posts. Having these tools organized on a clean, padded work surface ensures a smooth, frustration-free setup.
Step-by-Step Guide to Adjusting the Tremolo
Setting up a tremolo is a balancing act where every adjustment affects another variable. If you raise the bridge height, the string tension changes; if you tighten the springs, the pitch goes up. Because of this interconnected relationship, tremolo adjustment must be approached as an iterative process of fine-tuning, checking, and re-adjusting until the entire system reaches a stable equilibrium.
Before making any major structural changes—such as raising or lowering the pivot posts on a two-point bridge—always loosen the string tension. Adjusting pivot posts under full string and spring tension can grind the knife edges of the bridge against the posts, dulling the contact points and permanently ruining the bridge’s ability to return to pitch. Patience is key; expect to repeat the tuning and balancing steps several times before the bridge settles perfectly.
Balancing Spring Tension and Bridge Angle
Begin by tuning your guitar to your desired pitch using your chromatic tuner. Once in tune, look at the profile of the guitar to check the angle of the tremolo baseplate relative to the body. For a floating setup, the baseplate should sit perfectly parallel to the guitar’s top surface. If the back of the bridge is lifting too high, the string tension is stronger than the spring tension; if the bridge is pulled flat against the body or tilting backward, the springs are pulling too hard.
To correct this balance, flip the guitar over and remove the rear cavity cover to access the spring claw. If the bridge is lifting too high, use your screwdriver to tighten the two claw screws clockwise by a quarter-turn to increase spring tension. If the bridge is tilting backward, loosen the claw screws counterclockwise by a quarter-turn. After every adjustment of the claw, flip the guitar back over and retune all six strings to pitch, as changing the spring tension will have pulled them out of tune.
Repeat this cycle of adjusting the claw screws and retuning the strings until the bridge sits at the correct parallel angle while the guitar is fully in tune. Be careful not to over-tighten the claw screws; excessive force can strip the wood threads in the guitar body cavity or warp the metal claw itself. If you find you need to tighten the screws excessively to balance heavy-gauge strings, it is safer to add an extra spring to the block rather than forcing the screws deeper into the wood.
Adjusting String Action and Intonation
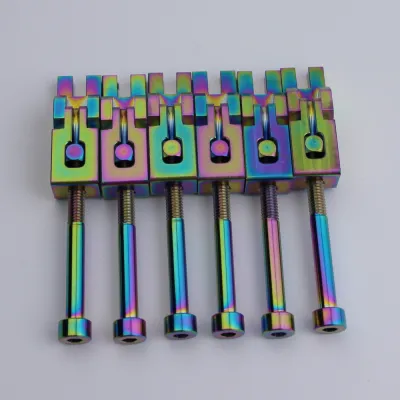
Once the bridge is balanced and floating at the correct angle, you can adjust the string action to suit your playing style. For vintage-style bridges, use a small hex key to adjust the individual saddle height screws, keeping the radius of the strings matching the curve of your fretboard. For two-point systems, you can raise or lower the entire bridge using the two main pivot posts, remembering to slacken the strings first to protect the knife edges. Aim for a height that allows clean note definition across the entire fretboard without causing excessive fret buzz.
With the action set, you must adjust the intonation so the guitar plays in tune all the way up the neck. Tune the open string or play the 12th-fret harmonic, then press the string down at the 12th fret and compare the fretted note to the harmonic. If the fretted note is sharp, the saddle needs to move backward to lengthen the string; if the fretted note is flat, the saddle must move forward.
Before sliding or turning the intonation screws on your Guyker bridge, ensure you loosen any locking screws or saddle blocks that hold the saddle in place. Attempting to force a locked saddle to move will strip the threads of the adjustment screw. Once the saddle is in the correct position and the 12th-fret harmonic matches the fretted note perfectly, tighten the locking screws securely to prevent the saddle from shifting during aggressive playing.
Troubleshooting Tuning Instability After Setup
If your guitar still struggles to stay in tune after a thorough setup, the issue is often not the bridge itself, but friction elsewhere in the string path. The most common culprit is binding at the nut slots. When you use the tremolo arm, the strings slacken and slide through the nut; if the slots are too tight or rough, the strings get caught and fail to return to their original tension, leaving the guitar sharp or flat. You can test this by pressing down on the strings behind the nut; if the pitch jumps and stays sharp, the nut slots need to be widened or smoothed by a professional luthier.
Next, inspect the string trees on the headstock and the tuning machine heads. Ensure your strings are wound neatly around the posts with minimal overlapping wraps, as loose or messy wraps act like tiny springs that slip and cause tuning instability. If your guitar uses non-locking tuners, aim for two to three neat wraps; for locking tuners, pull the string taut through the post, lock it, and wind no more than a half-turn to eliminate any potential slack.
Finally, examine the tremolo pivot points where the bridge plate contacts the mounting screws or posts. On two-point systems, the knife edges must sit cleanly in the grooves of the pivot posts. If the bridge was adjusted under full tension in the past, these knife edges may have developed small burrs or flat spots, causing them to bind rather than pivot smoothly. Inspecting these contact points under a bright light can help you identify if wear or misalignment is preventing the bridge from returning to its zero point.
Routine Maintenance to Keep Your Tremolo Stable
In the warm, humid climate of the Philippines, sweat and environmental moisture can quickly lead to corrosion and dirt buildup on your guitar hardware. To preserve the smooth operation of your Guyker tremolo, make it a habit to wipe down the bridge, saddles, and pivot points with a clean, dry microfiber cloth after every playing session. This simple step removes corrosive skin oils and prevents debris from accumulating in the moving parts of the bridge.
Periodically apply a tiny drop of specialized guitar hardware lubricant or graphite-based lubricant to the high-friction contact points. Focus on the knife edges where they meet the pivot posts, the saddle slots where the strings rest, and the nut slots. Avoid using household penetrating oils or heavy greases, which can attract dust and gummy residue, ultimately worsening the friction and binding issues over time.
Whenever you install a new set of strings, take the time to stretch them thoroughly before finalizing your tremolo adjustments. New strings naturally stretch and settle around the tuning posts over the first few hours of play. To speed up this process, gently pull each string away from the fretboard along its entire length, retune, and repeat until the pitch stops dropping. This ensures that any tuning instability you experience is not simply due to fresh strings settling in.
Frequently Asked Questions (FAQ)
Can I upgrade the springs on my Guyker tremolo for better stability?
Yes, upgrading or changing the springs can significantly affect the stability and feel of your tremolo. High-tension or noiseless springs can provide a firmer response and reduce the sympathetic ring often heard through the amplifier. However, keep in mind that changing the number or tension of your springs alters the physical balance of the system. Any time you swap or add springs, you must repeat the entire balancing process from scratch to ensure the bridge remains parallel to the body at your desired pitch.
Why does my floating bridge pull up when I bend a string?
This behavior is a natural mechanical consequence of a floating tremolo system. When you bend a string on the fretboard, you increase its tension, which pulls the bridge forward against the tremolo springs. As the bridge tilts forward, it decreases the tension on the remaining five strings, causing them to go slightly flat. If this mechanical interaction interferes with your playing style, you can choose to block the tremolo so it only moves downward, or tighten the spring claw so the bridge rests flush against the guitar body.
Community discussion
Share your experience or ask a question. Comments are reviewed before publication.