
Walking into a music store to purchase your first stringed instrument is an exciting milestone, but it can also feel overwhelming. Row after row of polished wood and varying price tags can make it difficult to know which instrument is truly ready to play and which one might harbor hidden defects. Making the wrong choice can lead to physical discomfort, tuning frustration, and ultimately, an abandoned hobby. If you are planning a visit to a specialized store like Fermata Guitar Shop, knowing exactly what to look for will ensure you walk out with an instrument that inspires you to practice every day.
The key to a successful purchase lies in a systematic physical and acoustic inspection. You do not need to be an expert player to identify a poorly cut nut, a warped neck, or structural instability. By learning a few simple, hands-on diagnostic checks, you can confidently evaluate any acoustic guitar or ukulele right on the showroom floor.
How to Prepare Before Visiting the Music Store
Before you step through the door of a music store, you need a clear plan of action. The sheer variety of instruments on display can easily distract you from your initial goals. Defining your musical preferences, establishing a firm budget, and bringing a few basic tools will keep your shopping trip focused and efficient.
Products mentioned in this guide



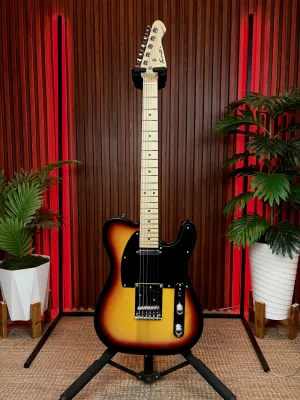
Prices are valid at publication and may change. Please refer to the product page for the latest price.
First, identify your primary musical goal. If you want to play bright, driving folk or pop rhythms, an acoustic steel-string guitar is the classic choice. If you prefer classical pieces, flamenco, or gentle fingerpicking, a classical guitar with nylon strings offers a warmer tone and is gentler on beginner fingertips. If portability, quick success, and a cheerful tone are your priorities, a soprano or concert ukulele is an excellent, highly accessible starting point.
Next, establish a realistic budget that covers more than just the instrument itself. In the Philippines, beginner ukuleles of decent quality typically range from ₱1,500 to ₱4,000, while reliable entry-level acoustic guitars generally cost between ₱4,000 and ₱12,000. Remember to set aside a portion of your budget for essential accessories. You will need a padded gig bag to protect the wood from sudden temperature shifts, a strap for comfortable playing, extra strings, and a clip-on tuner.
Do not rely solely on the store’s tuning equipment or the ambient noise of a busy showroom. Bring your own clip-on chromatic tuner to the store. This small device allows you to independently verify how well each instrument holds its tune in real-time. If you do not know how to play yet, consider bringing a friend who plays, or prepare a simple checklist of three or four basic chords to test how the neck feels in your hand.
Step-by-Step Visual and Structural Inspection
Once you have narrowed down your choices to a few candidate instruments, it is time to perform a thorough physical examination. Manufacturing errors or damage from shipping and storage can slip past initial quality control. A systematic visual check will help you spot these structural issues before you commit to a purchase.

Begin by checking the neck and fretboard alignment. Hold the instrument at eye level and look straight down the edge of the neck from the headstock toward the body, much like aiming a pool cue. The neck should be straight or have a very slight, almost imperceptible upward curve. Any obvious twisting, S-curves, or severe bowing indicates a warped neck that will be difficult or impossible to play. Next, run your thumb and index finger gently along both sides of the fretboard. The metal fret ends should feel smooth and flush with the wood. If they feel sharp or protrude past the edge of the wood—a common issue known as “sprouting frets”—the instrument has dried out, and playing it will be uncomfortable.
Examine the body and the finish quality under bright lighting. Look closely at the top, back, and sides for hairline cracks, deep dents, or patches of uneven lacquer. Pay extra attention to the neck joint, where the neck meets the body, and check for any visible hairline fractures or gaps in the glue. Inspect the bridge, which is the wooden piece glued to the top of the body holding the strings. There should be absolutely no gap between the bridge and the top wood. If you can slide a thin piece of paper under the back edge of the bridge, the glue is failing under string tension, which is a major structural defect.
Test the hardware and tuning machines to ensure they function reliably. Turn each tuning peg slowly in both directions. The gears should rotate smoothly and consistently without grinding, slipping, or feeling completely loose. If a peg feels stiff or jumps suddenly when turned, the gear mechanism may be damaged or poorly cast.
Finally, perform a quick internal inspection. Turn on your smartphone flashlight and peer directly into the soundhole of the guitar or ukulele. Look at the wooden braces glued to the underside of the top and back panels. They should be clean, flush, and free of massive, messy glue spills or loose wood shavings. Loose internal braces can cause mysterious, irritating vibrations and rattles when you play certain notes, which are highly difficult to diagnose and repair later.
How to Test Playability and Sound Quality
An instrument can look pristine but still feel frustrating to play or sound dull. Testing the playability and acoustic properties of a guitar or ukulele on the showroom floor is the most critical phase of your evaluation. You do not need to play complex solos; simple, methodical tests will reveal the true character of the instrument.
Start by evaluating the action, which is the height of the strings above the fretboard. Measure this visually at the 12th fret. If the gap between the bottom of the strings and the top of the metal frets is too high, you will have to press down excessively hard to produce a clean note, resulting in hand fatigue and finger pain. Conversely, if the action is extremely low, the strings will rattle against the frets when vibrated. The ideal action should feel comfortable and easy to press down without requiring white-knuckle force.
Next, check for fret buzz and dead notes across the entire neck. This is a simple but vital test: press down and play every single fret on every single string, one by one, working your way up the fretboard. Listen closely to each note. If you hear a metallic buzzing sound, or if a note sounds completely muffled and dies out instantly, you have encountered a “dead note” or an uneven fret. While minor buzz on a single fret might be adjustable, widespread buzzing across multiple areas of the neck is a sign of poor manufacturing or a warped fretboard.
Evaluate the tuning stability of the instrument. Clip your chromatic tuner to the headstock and tune the instrument to standard pitch. Once tuned, play a series of loud, heavy chords for about a minute, and perform a few moderate string bends if you are testing a guitar. Recheck the tuning on your device. A quality instrument should hold its pitch relatively well. If multiple strings have slipped significantly flat after just a minute of playing, the tuning pegs may be slipping, or the strings may be binding in poorly cut slots on the plastic or bone nut.
Perform a basic intonation check to ensure the instrument plays in tune with itself across the entire neck. Tune a string perfectly, then gently press it down at the 12th fret (the exact midpoint of the string) and pluck it. Next, play the natural harmonic at the 12th fret by resting your finger lightly over the metal fret wire without pressing down, plucking, and lifting your finger. Compare the pitch of the fretted note to the harmonic. If the two pitches sound noticeably different, or if your tuner shows a significant discrepancy, the instrument’s intonation is off. Poor intonation means the instrument will sound out of tune when you play higher up the neck, even if the open strings are perfectly tuned.
Finish your playability test by assessing the overall tone and resonance. Strum a few simple open chords—like G, C, and D on a guitar, or C, F, and G7 on a ukulele—and let the sound ring out completely. Listen to the balance between the low bass strings and the high treble strings. The sound should feel full, clear, and sustained, rather than thin, boxy, or muddy. Compare this sound directly against another instrument in the same price bracket to help train your ear to recognize good resonance.
Evaluating the Setup and Working with Staff at a Fermata Guitar Shop
Many beginners do not realize that brand-new instruments rarely leave the factory in perfect playing condition. They often require a professional “setup” to perform at their best. Understanding what a setup involves and how to communicate your needs to the store staff will save you from struggling with a poorly adjusted instrument.
A basic setup is a series of precise adjustments made by a technician or luthier. This includes adjusting the truss rod (the metal rod inside a guitar neck that controls its curvature), filing the nut slots so the strings sit at the correct height near the headstock, and sanding down or raising the saddle at the bridge. A proper setup transforms how an instrument feels, making it significantly easier for a beginner to press down chords. When shopping, ask the store staff—such as the technicians at a specialized retailer like Fermata Guitar Shop—if the display models have been set up, or if they offer a complimentary professional setup with your purchase.
In tropical regions like the Philippines, climate considerations are highly important. The persistent high humidity can cause the tonewoods of guitars and ukuleles to absorb moisture and swell. This swelling often raises the top soundboard, which in turn raises the saddle and increases the string action, making the instrument harder to play over time. Ask the shop staff how they manage their in-store humidity and if they provide seasonal setup adjustments to help compensate for these environmental changes.
It is vital to establish a strict safety boundary when evaluating an instrument’s setup. Do not attempt to adjust the truss rod, file the nut slots, or sand down the bridge saddle yourself while testing instruments in the store. These tasks require specialized luthier tools, precise measurements, and technical training. Making amateur adjustments can permanently damage the neck or bridge, voiding any return policies or warranties. If you find an instrument you love but the action feels too high, ask the store’s resident technician to evaluate and adjust it for you before you finalize the transaction.
Additionally, inspect the condition of the strings currently on the instrument. If the strings on the display model look dark, discolored, rusty, or feel rough to the touch, they are old and oxidized. Old strings sound dull and lifeless, which can make a great instrument sound mediocre. Request that the store staff install a fresh set of strings so you can hear the true tonal potential of the instrument before making your final decision.
Finalizing the Purchase and Verifying Accessories
Once you have selected the perfect guitar or ukulele, you must ensure that everything included in your purchase is verified, protected, and properly documented. Taking a few extra minutes at the counter will prevent post-purchase headaches and unexpected costs.
First, verify the exact contents of your purchase package. Ensure that any promised accessories—such as a padded gig bag, a strap, a clip-on tuner, starter picks, or instructional booklets—are present and in brand-new condition. Check the zippers on the gig bag to make sure they slide smoothly, and verify that the padding is thick enough to protect the instrument from minor bumps during your commute.
If the store staff brings out a brand-new, boxed instrument from the stockroom instead of selling you the display model you tested, you must inspect the new instrument. Do not assume it is identical to the showroom model. Unbox it at the counter and repeat the core visual and playability checks. Ensure the wood grain, color, and specifications match, and look closely for any shipping damage that may have occurred during transit to the store.
Carefully review the store’s return policy, exchange window, and the manufacturer’s warranty details before paying. Understand what specific issues are covered under the warranty—such as structural glue failures or neck warping—versus normal wear and tear, like worn frets or broken strings. Keep your physical receipt and warranty card in a safe, dry place.
Finally, ask about the store’s post-purchase support services. Many dedicated music shops offer free initial string changes, discounts on future setups, or trade-in programs that allow you to upgrade your instrument later as your skills progress. Establishing a good relationship with the store staff can provide you with a reliable resource for maintenance and advice throughout your musical journey.
Frequently Asked Questions (FAQ)
Is it better to buy a guitar or ukulele as a first instrument?
The best choice depends on your physical comfort and the style of music you want to play. The ukulele is generally much easier for absolute beginners and children because it uses soft nylon strings, has a smaller neck, and features only four strings, which reduces initial finger pain and simplifies chord shapes. However, the guitar offers a much wider tonal range, deeper bass, and greater versatility across genres like rock, jazz, and classical. If you have your heart set on guitar music, start with a guitar and build up your finger strength; if you want a gentle, highly portable introduction to music, the ukulele is an ideal starting point.
Should I buy a brand-new or secondhand instrument for my first purchase?
Buying a brand-new instrument from an authorized music store is highly recommended for beginners because it includes a manufacturer warranty, guarantees pristine structural condition, and often comes with a professional in-store setup. A secondhand instrument can offer excellent value, allowing you to buy a higher-tier model for a lower price, but it carries significant risks. Used instruments may have hidden structural defects, such as warped necks, lifting bridges, or drying wood cracks that are expensive to repair. If you choose to buy secondhand, always bring an experienced player with you to thoroughly inspect the instrument before handing over any money.
What if the instrument I like has a slight fret buzz?
A slight, isolated fret buzz on one or two frets is very common and can usually be easily resolved with a standard professional setup, such as a minor truss rod adjustment or slightly raising the saddle. However, if the buzzing is severe, occurs across almost every string, or results in completely dead notes, it is a major red flag. Widespread buzzing often points to a warped neck, unevenly installed frets, or a twisted fretboard, which require costly luthier work to correct. Beginners should avoid buying any instrument with severe, widespread fret buzz unless the store technician can fully resolve the issue to your satisfaction before you buy it.
Community discussion
Share your experience or ask a question. Comments are reviewed before publication.