
To achieve smooth, seamless control over your wah-wah, volume, or pitch-shifting effects with the Hotone Ampero Press, you must physically connect the pedal using a balanced TRS cable and calibrate its sweep range within the Ampero Edit software. Skipping the software calibration process often leads to annoying dead spots, where physical movement of the pedal fails to change the sound, or sudden jumps in volume. Taking a few minutes to configure the hardware and software ensures that every millimeter of physical travel translates into precise musical expression.
What You Need Before Starting the Setup
Before beginning the installation, gather all the necessary hardware components to ensure a smooth, uninterrupted setup process. You will need the Hotone Ampero Press pedal, your compatible Ampero multi-effects processor (such as the Ampero, Ampero One, or Ampero II Stomp), and a computer with internet access to run the editing software. Because the Ampero Press is a passive expression pedal, it does not require an external power supply or battery when operating in expression mode, which simplifies your cable management on stage or in the studio.
The choice of cable is critical for this setup to function correctly. You must use a high-quality TRS (Tip-Ring-Sleeve) cable, which features two insulating rings on the jack plug, creating three distinct metal contact sections. A standard TS (Tip-Sleeve) mono instrument cable, commonly used for electric guitars, will not work because it lacks the third conductor required to transmit variable resistance data. Using a standard guitar cable will result in the multi-effects unit failing to recognize the pedal’s movement entirely.
Products mentioned in this guide
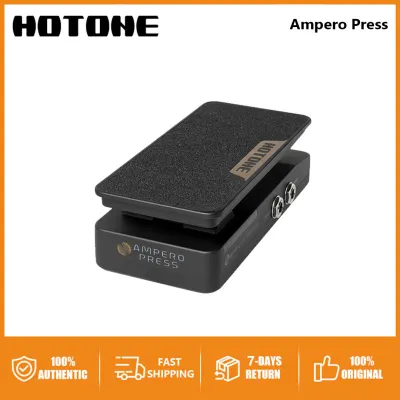
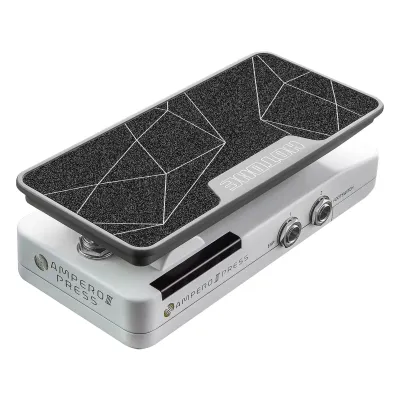
Prices are valid at publication and may change. Please refer to the product page for the latest price.
On the software side, visit the official Hotone website to download and install the latest version of the Ampero Edit software compatible with your operating system. At the same time, verify that your multi-effects unit is running the most recent firmware version, as outdated firmware can cause communication errors or calibration glitches. Keeping your software and firmware synchronized ensures compatibility and access to the latest performance optimizations.
As a final safety precaution before making any physical connections, turn down the master volume on your guitar amplifier, PA system, or audio interface. Plugging control cables into active hardware can generate loud electrical pops and transient spikes. This simple step protects your hearing and prevents potential damage to your speaker cones, especially in humid or high-static environments.
Step-by-Step Physical Connection Guide
To begin the physical connection, locate the dedicated expression pedal input on your multi-effects processor. On most Ampero units, this port is labeled as EXP 2, EXP/CTRL, or EXP/FS, and is distinct from the standard instrument input and stereo output jacks. Refer to your specific Ampero model’s manual to confirm the exact location, as plugging the expression pedal into an audio input port can prevent the system from reading the control data.

Once you have identified the correct port, connect one end of your TRS cable to the jack labeled EXP OUT on the back of the Ampero Press. Ensure the jack is fully inserted and clicks firmly into place. Next, connect the other end of the TRS cable to the EXP/CTRL input on your multi-effects unit, making sure this connection is also completely secure to prevent intermittent signal loss during live performances.
After securing the physical cable connections, power on your Ampero multi-effects processor. Allow the device to complete its boot sequence fully before attempting to interact with the pedal. If you are using a pedalboard setup with multiple power supplies, ensure the main processor is receiving stable power according to its manufacturer specifications.
To conduct an initial hardware check, look at the physical screen of your Ampero unit. Navigate to any preset that contains an active expression-controlled effect, such as a volume pedal block or a wah-wah. Gently rock the Ampero Press back and forth with your hand; if the hardware recognizes the connection, you should see the corresponding on-screen parameter bar or virtual pedal icon move slightly, confirming that physical data is reaching the processor.
Calibrating the Pedal Using Ampero Edit
With the physical connections verified, connect your Ampero multi-effects processor to your computer using a compatible USB cable. Launch the Ampero Edit software and wait for it to sync with your hardware unit. Once the connection is established, the software interface will display your current presets and global settings.
To access the calibration menu, navigate to the Global settings tab, which is typically represented by a gear icon or labeled clearly in the main menu of the Ampero Edit interface. Within the Global menu, locate the sub-category for hardware configuration, often labeled as EXP 2/Ctrl or External Pedal. Click on the Calibration button to initiate the software-guided setup wizard.
Follow the on-screen prompts precisely to execute the calibration sequence:
- Step 1: Move the Ampero Press to the full heel-down position, which represents the minimum value (0%). Once the pedal is resting naturally at this limit, click the "Next" or "Min" button in the software interface to record the resistance value.
- Step 2: Push the pedal forward to the full toe-down position, representing the maximum value (100%). Click the "Next" or "Max" button to record this upper limit.
- Step 3: If your specific Ampero model supports an integrated toe-switch function and you wish to use it, apply firm pressure to the front of the pedal to calibrate the switch sensitivity threshold as prompted by the software.
Once the calibration wizard confirms a successful sequence, click the Save or Apply button to write these parameters directly to the non-volatile memory of your Ampero hardware. This step is crucial because it ensures the calibration profile remains active even when you disconnect the computer and take your processor to a gig or rehearsal space.
This software calibration process is essential because physical potentiometers and cables exhibit slight variations in electrical resistance due to manufacturing tolerances and environmental conditions. Calibration maps the unique physical limits of your specific Ampero Press pedal to the digital MIDI control range of 0 to 127. Without this step, the processor may expect a wider electrical range than the pedal can physically deliver, resulting in dead zones at either end of the pedal’s travel.
Testing Your Setup and Troubleshooting Common Issues
To verify that your calibration was successful, select a preset on your Ampero unit that features a highly sensitive effect, such as a pitch shifter or a classic wah-wah. Play a sustained chord on your guitar and slowly sweep the Ampero Press from the absolute heel-down position to the absolute toe-down position. Listen closely to ensure the transition is smooth, linear, and free of sudden jumps or dropouts in the effect.
If you notice dead spots at the extremes of the pedal travel or if the parameter values jump erratically on the screen, the first step is to repeat the calibration sequence in Ampero Edit. If recalibration does not resolve the issue, inspect your TRS cable for physical damage, kinks, or oxidization on the plugs. In tropical climates like the Philippines, high humidity can accelerate the oxidation of metal contacts and allow dust to accumulate inside open jacks, leading to unstable resistance readings.
If the pedal control feels sluggish or exhibits a perceived delay, understand that expression pedals transmit analog resistance data almost instantaneously, meaning true hardware latency is highly unlikely. Instead, this sluggishness is usually caused by software parameters within your active effect block. Open the settings for your volume or wah block in Ampero Edit and check the “slew rate” or “smoothing” parameter; lowering this value will make the effect respond more rapidly to your physical foot movements.
If your Ampero unit fails to recognize the expression pedal entirely after trying multiple high-quality TRS cables and performing a factory reset of the global settings, stop troubleshooting to avoid damaging the internal circuitry. Consult the official Hotone user manual or contact authorized Hotone support to verify if the hardware requires professional servicing or if there is a specific hardware compatibility limitation with your older multi-effects model.
Frequently Asked Questions (FAQ)
Can I use a standard guitar cable to connect the Ampero Press?
No, you cannot use a standard mono guitar cable to connect the Ampero Press for expression control. A standard instrument cable is a TS (Tip-Sleeve) cable with only two conductors, which is designed to carry a single audio signal and ground. An expression pedal requires a TRS (Tip-Ring-Sleeve) cable with three conductors to establish a voltage divider circuit, which allows the multi-effects unit to read the changing resistance as you move the pedal. Using a TS cable will result in no signal detection or erratic on-off switching behavior.
Why is my expression pedal suddenly acting erratically after working fine?
Sudden erratic behavior is usually caused by physical wear, dust accumulation, or environmental changes. In high-humidity regions like the Philippines, moisture and dust can settle inside the pedal’s internal potentiometer, causing temporary contact loss and erratic value jumps. You can often resolve this by unplugging the cables, clearing any visible debris from the jacks, and performing a fresh software calibration in Ampero Edit to reset the minimum and maximum threshold values. If the problem persists, test the setup with a different TRS cable to rule out internal cable strain.
Community discussion
Share your experience or ask a question. Comments are reviewed before publication.