
Selecting the correct tuning pegs, also known as machine heads, for a classical guitar requires matching the physical specifications of your instrument’s headstock and evaluating the internal mechanisms for stability. Because classical guitars use nylon strings under unique tension profiles, installing the wrong hardware can lead to poor tuning stability, physical damage to the wood, or an unusable instrument. By taking precise measurements and understanding the mechanical indicators of quality, you can confidently select a replacement set that preserves your guitar’s playability and structural integrity.
Understand Classical Guitar Tuning Peg Configurations
Classical guitar tuning pegs differ significantly from those found on steel-string acoustic or electric guitars. The most apparent difference is the mounting style. Classical guitars almost exclusively use plate-mounted tuners, which consist of two metal plates—one for each side of the headstock—each holding three individual tuning pegs. These are commonly referred to as three-on-a-plate tuners. Individual, single-unit machine heads do exist but are highly uncommon on traditional classical instruments.
The physical construction of the rollers also sets classical tuners apart. Because classical guitars feature a slotted headstock, the tuning rollers lie horizontally inside two carved channels. These rollers are typically made of thick plastic, nylon, or composite materials, measuring around 10mm in diameter. This thick, smooth surface is necessary because nylon strings are highly elastic and require multiple wraps around a wide post to prevent slipping. In contrast, steel-string guitars use thin, vertical metal posts that would slice or severely pinch delicate nylon strings.
Products mentioned in this guide
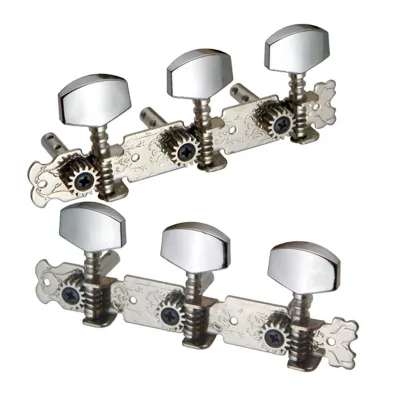

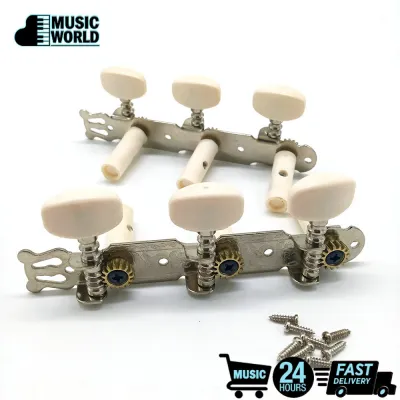
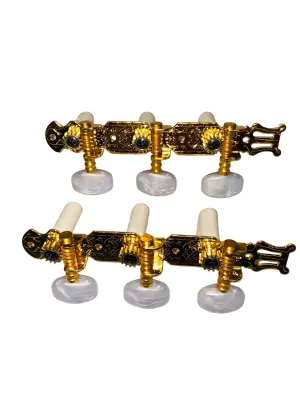
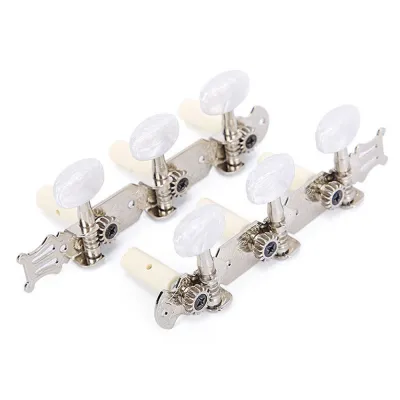
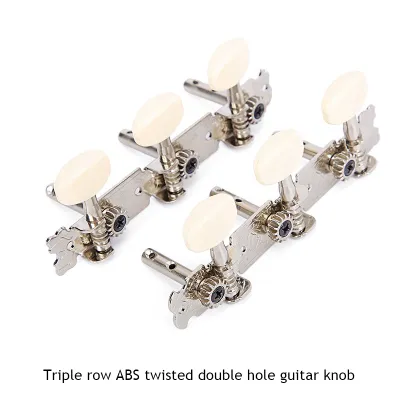

Prices are valid at publication and may change. Please refer to the product page for the latest price.
Before looking at replacement options, closely inspect your guitar’s current headstock. Note whether the tuning keys point backward or to the side, and observe how the plates are secured to the wood. This initial visual inspection establishes your baseline. It ensures you do not accidentally purchase individual vertical tuners meant for a solid headstock, saving you from a frustrating return process.
Check Compatibility and Measurements Before Buying
Physical compatibility is the most critical factor when choosing new tuning pegs. Unlike electric guitars, which often follow highly standardized modern templates, classical guitars—especially vintage models, handmade instruments, or those from diverse regional workshops—vary widely in their dimensions. You must measure your existing setup before purchasing any replacement parts.

The most vital measurement is the roller spacing, which is the distance from the center of one roller to the center of the next. The modern industry standard for classical guitars is 35mm between rollers, resulting in a total span of 70mm from the first to the third roller. However, older instruments or unique regional builds may use 39mm spacing or other non-standard intervals. Even a deviation of a single millimeter will prevent the new rollers from aligning with the pre-drilled holes in your headstock.
To obtain accurate measurements, you should safely remove one of the existing gear plates. Loosen the strings completely, unwind them from the rollers, and use a properly fitting screwdriver to remove the mounting screws. Once the plate is free, slide the rollers out of the headstock. Use a digital caliper to measure the roller diameter, the center-to-center distance between the rollers, and the overall length of the mounting plate. Measuring with a standard ruler can easily introduce small errors that lead to a mismatched purchase.
You must also verify the thickness of your guitar’s headstock against the length of the replacement rollers. If the rollers are too short, the string holes will remain hidden inside the headstock wood, making it impossible to thread and tie your strings. Conversely, rollers that are too long will protrude awkwardly, putting unnecessary leverage on the gear mechanism and potentially causing the gears to bind or wear out prematurely.
Finally, examine the screw hole pattern on the mounting plates. While minor differences in screw placement can be managed, matching the original holes is always the preferred path. If the new plates require you to drill new holes, you will have to fill the old ones to maintain structural integrity. Drilling into a headstock is an irreversible modification that carries a risk of splitting the wood, particularly in tropical climates where wood expands and contracts with seasonal humidity changes.
Evaluate Quality and Performance Indicators
Once you have established the correct physical dimensions, you can focus on the mechanical quality of the tuning pegs. The primary indicator of tuning precision is the gear ratio. This ratio, such as 14:1, 16:1, or 18:1, represents the number of times you must turn the tuning button to complete one full rotation of the string roller. A higher gear ratio, like 16:1 or 18:1, provides finer control, allowing you to make micro-adjustments to accommodate the high elasticity of nylon strings.
Always verify the gear ratio and construction details by reading the manufacturer’s official specification sheet rather than relying on visual estimates. High-quality tuning pegs feature precisely cut worm gears made of durable metals like brass or bronze. These materials resist wear and handle the constant tension of the strings without slipping. Avoid tuning pegs that exhibit “backlash,” which is the loose play or dead space you feel when you reverse the direction of the tuning button before the gear actually engages.
The materials used for the rollers and buttons also play a role in both performance and aesthetics. Rollers are commonly made of ABS plastic, synthetic ivory, or solid wood. While lightweight plastic rollers are common on entry-level instruments, high-performance models often feature reinforced aluminum or composite sleeves that reduce friction inside the headstock holes. Ensure the product description explicitly states the materials used so you can avoid cheap, brittle plastics that may crack under tension.
Smoothness of operation is another key quality indicator. Premium machine heads often incorporate friction-reducing bearings or internal lubrication systems. When evaluating a set of tuners in person, turn the buttons slowly to check for any grinding sensations, tight spots, or uneven resistance. If you are purchasing online, look for specifications that mention sealed bearings or self-lubricating gear designs, which help protect the mechanism from dust, sweat, and ambient moisture.
Installation Considerations and When to Seek Help
If you have purchased a direct drop-in replacement that matches your original measurements perfectly, installation is a straightforward process. Begin by cleaning the headstock slots and screw areas while the old hardware is removed. Slide the new rollers into the headstock holes, ensuring they seat fully without forcing them. Align the mounting plates parallel to the headstock edge, insert the screws, and tighten them gently. Avoid over-tightening, as classical guitar headstocks are often made of relatively soft woods like mahogany or cedar, and stripping the screw threads in the wood is incredibly easy.
However, you must establish clear stop conditions during the installation process. If the rollers do not slide into the headstock holes smoothly, do not force them or try to hammer them in. Forcing a tight roller can easily crack the delicate wood veneer on the face of the headstock. Similarly, if the screw holes do not align, do not attempt to force the screws in at an angle, as this will strip the wood and cause the tuning plate to sit crookedly.
Any task that requires modifying the wood of your guitar should be approached with extreme caution. If the headstock holes are too small and require reaming, or if you need to drill new screw holes and fill the old ones, it is highly recommended to consult a professional luthier or qualified repair technician. A professional has the specialized clamps, drills, and alignment jigs necessary to perform these modifications without splintering the wood or damaging the finish.
Lastly, always preserve your old tuning pegs and original mounting screws. Keep them stored safely in a labeled bag inside your guitar case. If you ever decide to sell the instrument, upgrade to a different set, or need to return the new tuners due to an unforeseen compatibility issue, having the original components on hand ensures you can easily restore the guitar to its factory state.
Frequently Asked Questions (FAQ)
Can I use steel-string acoustic guitar tuning pegs on a classical guitar?
No, you cannot use steel-string acoustic guitar tuning pegs on a classical guitar. Steel-string guitars use vertical metal posts designed for solid headstocks, whereas classical guitars require horizontal rollers designed for slotted headstocks. Additionally, the thin metal posts of steel-string tuners have a much smaller diameter, which can cut or severely damage nylon strings under tension. The spacing between the tuning posts on steel-string guitars is also entirely different, meaning they will not align with the pre-drilled slots and holes of a classical guitar headstock.
How often should I replace the tuning pegs on my classical guitar?
There is no fixed time cycle for replacing tuning pegs; they should only be replaced when they exhibit clear signs of mechanical failure or wear. Common symptoms that indicate a need for replacement include frequent string slippage, gears that slip or jump teeth while tuning, bent roller shafts, or cracked tuning buttons. If your guitar holds its pitch reliably, the gears turn smoothly without grinding, and there is no physical damage to the plates or rollers, your current tuning pegs are functioning correctly and do not require preventive replacement.
Community discussion
Share your experience or ask a question. Comments are reviewed before publication.