
Selecting the right electric drum stand is just as important as choosing the drum module itself. A high-quality stand provides the structural foundation for your entire setup, ensuring that your snare, toms, cymbals, and module remain securely in place while you practice. For beginners in the Philippines, finding a stand that balances stability, compatibility, and affordability requires a clear understanding of hardware specifications. By focusing on key physical attributes and verifying compatibility with your specific drum pads, you can avoid common purchasing mistakes and build a setup that supports your learning journey for years to come.
Core Requirements for a Beginner's Drum Stand
When evaluating a drum stand, the first factor to consider is its weight capacity. Electronic drum pads, though lighter than acoustic shells, still exert significant downward and lateral forces when struck repeatedly. A beginner’s stand must support the combined weight of multiple rubber or mesh pads, cymbal triggers, and the control module without sagging or shifting. Look for manufacturer specifications detailing the maximum load capacity of the rack, and ensure it can comfortably handle the weight of your entire kit with some headroom for future additions.
Material durability is another critical consideration, particularly when it comes to the thickness of the steel tubing. Standard drum racks typically utilize steel tubes with an outer diameter of 1.5 inches, which provides excellent structural rigidity. Thicker steel walls resist bending and denting when clamps are tightened, ensuring the stand remains stable over years of use. In the humid tropical climate of the Philippines, untreated metal is highly susceptible to rust and corrosion. To prevent this, ensure the stand features high-quality chrome plating or a robust powder-coated finish that protects the steel from moisture, humidity, and sweat.
Products mentioned in this guide
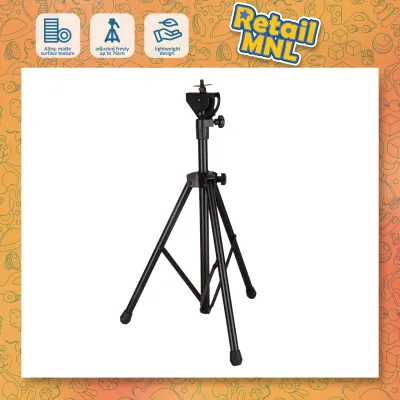
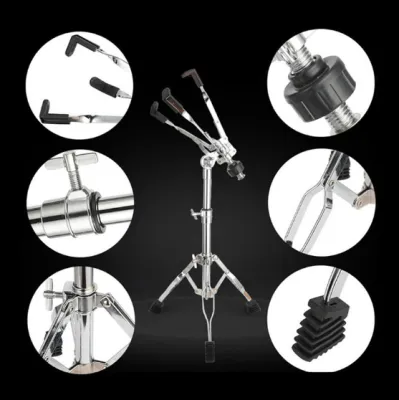
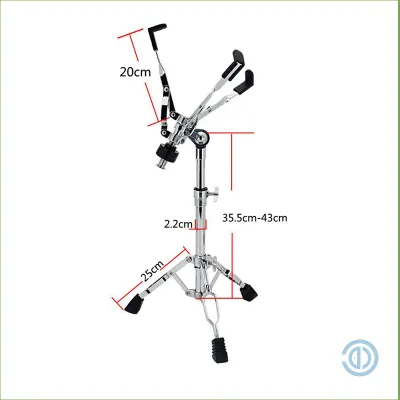
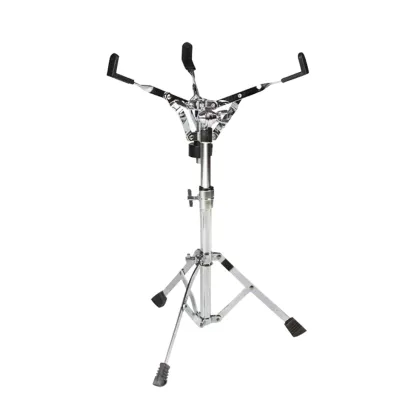

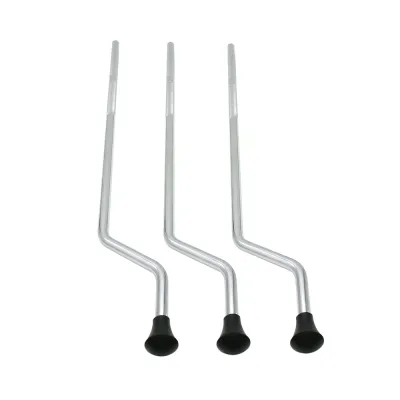
Prices are valid at publication and may change. Please refer to the product page for the latest price.
Joint reinforcement is equally vital for long-term durability. The clamps that connect the tubes and hold the pad mounts in place must be made of heavy-duty nylon, composite materials, or cast metal. Clamps with metal inserts for the tension bolts are highly recommended, as they prevent the threads from stripping when tightened. A stand with weak or poorly designed joints will slip during play, causing your pads to sag and disrupting your practice sessions.
Finally, consider the physical footprint of the stand. Space is often a premium in Philippine homes, particularly in urban apartments, condominiums, or shared bedrooms. A drum stand must offer a compact footprint without sacrificing stability. Measure your available floor space before making a purchase. A standard three-sided rack typically requires an area of about 1.2 meters by 1.2 meters, while compact H-frame stands can fit into tighter corners, making them ideal for smaller rooms.
Checking Compatibility with Your Electronic Drum Kit
Before purchasing a stand, you must verify that its tube diameter matches the mounting clamps of your electronic drum kit. While the professional standard for drum racks is 1.5 inches (approximately 38 millimeters), some entry-level or proprietary electronic drum kits use smaller tubing, such as 1.18 inches (30 millimeters). If you buy a standalone rack with standard 1.5-inch tubing, your existing small-diameter clamps will not fit. Always measure the inner diameter of your pad clamps or the outer diameter of your existing rack tubes to ensure a perfect match.

The type of clamps required for pad attachment is another compatibility checkpoint. Different pad manufacturers use distinct mounting systems. Some pads require L-rods, which are hexagonal or textured metal rods that insert directly into the pad’s mounting bracket. Others utilize ball-and-socket joints, which offer infinite angle adjustment but require specific mounting arms. Ensure the stand you select includes the correct clamp types or is compatible with standard multi-clamps, allowing you to attach third-party mounting arms if needed.
Module mounting is another area where compatibility issues can arise. The drum module, or the “brain” of your electronic kit, must be mounted securely and within easy reach. Some modules use a standard four-screw mounting plate that attaches to a dedicated bracket on the stand. Others might require a snare-style basket mount or a specialized clamp that attaches directly to the rack tubing. Always verify that the stand’s layout and included hardware can accommodate your module’s specific mounting bracket.
Additionally, consider the routing of your trigger cables. A good drum stand should have integrated cable management clips or hollow tubes that allow you to route cables neatly. This not only keeps your setup looking clean but also prevents cables from getting snagged or damaged during play. Neatly routed cables also reduce the risk of accidental disconnections, ensuring a seamless practice experience.
Stability, Adjustability, and Ergonomics
The foundation of any drum stand lies in its leg design. Double-braced legs feature two parallel metal supports on each leg, offering superior resistance to lateral movement and wobble during intense playing sessions. Single-braced legs are lighter and more portable, making them easier to pack away, but they may flex under heavy impact. For a permanent home setup, double-braced hardware or a multi-legged rack system is generally preferred, as it provides the rock-solid stability needed to keep your pads from moving while you play.
Proper playing posture is essential for preventing strain and injury, especially for beginners who are developing their technique. The stand must offer a wide range of height adjustments for the snare, toms, and cymbals. This allows you to position each pad at the correct height and angle, promoting good ergonomics and reducing fatigue. Look for stands that allow you to adjust the angle of the crossbars and individual pad mounts, giving you the flexibility to customize the layout to your body size and playing style.
Memory locks are invaluable features for maintaining a consistent setup. These are metal or plastic collars that clamp onto the tubing at your desired height and angle. Once set, they prevent the tubes from slipping down over time, even under heavy play. They also allow you to quickly reassemble the kit in the exact same position if you need to pack it away or move it to another room. This saves you from having to readjust every single pad and cymbal every time you set up your kit.
Many homes in the Philippines feature tiled, polished concrete, or smooth wooden floors. These surfaces offer very little traction, causing the drum stand to “creep” or slide away from you as you play. Look for stands equipped with large, heavy-duty rubber feet with deep tread patterns to grip smooth surfaces. If you play on carpet or a dedicated drum rug, some stands offer retractable metal spikes that anchor the hardware firmly in place, preventing any unwanted movement during your practice sessions.
Building Your Shortlist: Balancing Value and Expandability
When building your shortlist, it is helpful to differentiate between entry-level fixed stands and modular rack systems. Entry-level stands often feature a fixed H-frame design, which is highly compact and affordable but offers limited adjustability. These are ideal for basic 4-piece kits consisting of a snare, two toms, and a cymbal. If you plan to expand your kit in the future with additional crash cymbals, a ride cymbal, or extra tom pads, a modular rack system is a better investment. Modular racks allow you to add extra curved bars, side wings, and clamps as your setup grows.
Be mindful of hidden costs when comparing different drum stands. Some stands are sold as bare frames, requiring you to purchase cymbal boom arms, pad mounts, and multi-clamps separately. These individual accessories can quickly add up, sometimes doubling the initial cost of the stand. Opt for complete hardware packages that include all necessary clamps and arms to get started. This not only saves you money but also ensures that all components are fully compatible with each other.
Assess the long-term value of the stand by determining if it can accommodate extra pads or heavier modules as your skills progress. A reliable drum stand should outlast your first electronic kit. Choosing a sturdy, standard-sized stand now ensures you won’t need to purchase an entirely new rack system when you decide to upgrade your pads or module later. Look for brands that offer a wide range of compatible accessories, such as add-on clamps and boom arms, making it easy to expand your setup over time.
Additionally, consider the ease of assembly and disassembly. If you plan to transport your kit for gigs, rehearsals, or music lessons, a stand that folds down quickly and compactly is essential. Look for stands with quick-release clamps or folding joints that allow you to pack the rack away without having to disassemble every single component. This saves time and effort, making it much easier to take your drums on the go.
Purchasing Checklist and Delivery Verification
When ordering your drum stand from local music stores or online marketplaces, perform a thorough check upon delivery. Immediately unbox the package and inventory every component against the user manual. Ensure all wingnuts, bolts, memory locks, and mounting brackets are present. Missing a single specialized screw can halt your entire setup process, so it is crucial to verify that the package is complete before you begin assembly.
Inspect the metal tubing for any signs of bending, denting, or manufacturing defects. Check the plastic and nylon clamps for hairline cracks, which can compromise their structural integrity under tension. In the Philippines, high humidity can sometimes affect items stored in warehouses for long periods; check all metal joints for any early signs of surface rust or oxidation. If you notice any defects, contact the seller immediately to arrange for a replacement.
Before finalizing your purchase, verify the return policy and warranty terms offered by the seller. Ensure there is a clear window (typically 7 to 14 days) to return or exchange the product if you discover missing parts or manufacturing defects. Confirm whether the local distributor stocks replacement parts, such as extra wingnuts or clamps, in case of wear and tear over time. A reliable warranty and access to spare parts provide peace of mind and ensure your investment is protected.
Frequently Asked Questions (FAQ)
Can I use an acoustic drum stand for an electronic kit?
Yes, but with some important caveats. Acoustic drum stands, such as snare stands or cymbal boom stands, are designed to hold heavy, individual acoustic shells and cymbals. They offer excellent stability and a low center of gravity. However, electronic drum pads are much smaller and lighter, requiring specific mounting hardware like L-rods or specialized clamps that may not fit standard acoustic stands without adapters. Additionally, using individual acoustic stands for every electronic pad will take up significantly more floor space than a single, unified electronic drum rack, making it less practical for small rooms.
Do I need a drum throne with my electric drum stand?
Yes, a drum throne is an essential separate purchase. Drum stands and racks only support the instrument hardware and do not include seating. Using a standard household chair or stool is highly discouraged, as they lack the necessary height adjustability and stability required for proper drumming posture. A dedicated, adjustable drum throne allows you to sit at the correct height—where your thighs are slightly angled downward—ensuring optimal reach, pedal control, and spinal alignment during practice.
How much should a beginner expect to spend on a drum stand?
As a general rule, beginners should allocate approximately 15% to 25% of their total electronic drum kit budget toward reliable hardware. Basic, single-post stands and simple H-frames represent the entry-level tier, offering a cost-effective solution for compact setups. Multi-tier, modular rack systems sit at a higher price tier but offer the structural integrity and expandability needed for larger kits. Investing in a slightly sturdier stand upfront prevents the frustration of a wobbling kit and saves money on future hardware upgrades.
Community discussion
Share your experience or ask a question. Comments are reviewed before publication.