
Selecting your first crash cymbal is a milestone that directly shapes your early drumming experience, influencing both your physical technique and your musical enjoyment. To choose the right Arborea crash cymbal as a beginner, you should focus on acquiring a 16-inch medium or medium-thin bronze model, which offers the ideal balance of durability, responsive stick feel, and tonal versatility. While budget-friendly brass cymbals are common in starter kits, upgrading to a bronze alloy option from Arborea’s lineup provides a more authentic dynamic response, helping you learn how to control your striking force while enjoying a warmer, more satisfying decay.
Core Traits to Evaluate in a Beginner Crash Cymbal
Size is the primary factor determining a crash cymbal’s pitch, volume, and sustain. For beginners, a 16-inch crash is widely considered the standard starting point because it is large enough to produce a full, explosive crash sound without requiring excessive physical force to activate. Smaller sizes, such as 14-inch or 15-inch crashes, speak very quickly and decay rapidly, making them excellent for quiet practice spaces or fast accents, but they lack the body needed for general rock or pop playing. Conversely, larger 18-inch crashes deliver a deep, powerful wash and long sustain, but their heavier mass requires more precise striking technique and can easily overwhelm a small practice room.
The weight and thickness of a cymbal dictate its responsiveness and durability. Thin cymbals flex easily under the stick, meaning they open up and reach their full volume even with light, relaxed strokes, which is highly beneficial for beginners developing their touch. However, thin cymbals can be prone to cracking if struck with excessive, uncontrolled force. Heavy cymbals are highly durable and project loudly in high-volume settings, but they feel stiff to play, require a very hard strike to sound full, and can sound harsh or “choked” when played softly. A medium or medium-thin profile provides the safest middle ground, offering enough flexibility to teach you dynamic control while retaining the structural strength to withstand occasional mishits.
Products mentioned in this guide
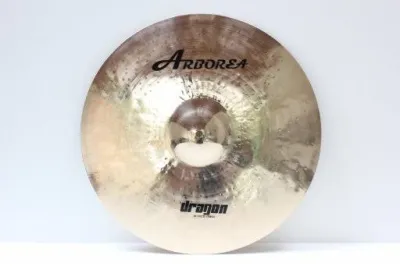
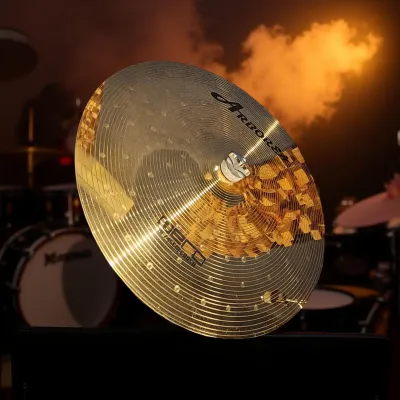
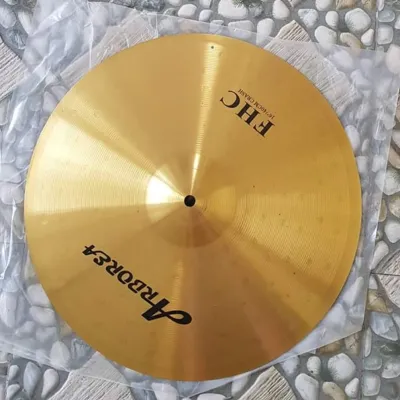
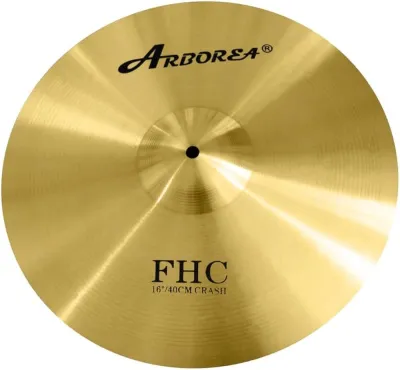
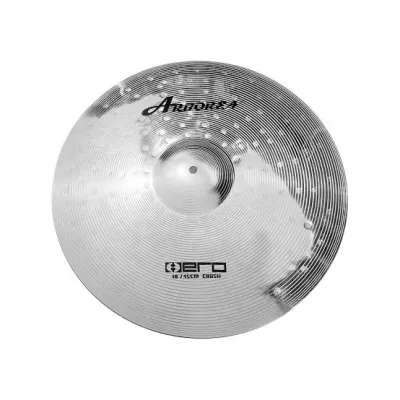
Prices are valid at publication and may change. Please refer to the product page for the latest price.
When examining product specifications, pay close attention to the alloy composition. Brass cymbals are the most affordable but produce a harsh, tinny sound with very little musical complexity, often leading to early dissatisfaction as your ears develop. Bronze alloys, which combine copper and tin, are the industry standard for quality drum set cymbals. B8 bronze (containing 8% tin) is known for its bright, focused, and cutting tone, making it highly durable and clear in a mix. B20 bronze (containing 20% tin) is the premium alloy used in professional cymbals, offering a much darker, richer, and more complex sound profile with a wider dynamic range. Checking the product label for these alloy designations ensures you know exactly what level of tonal sophistication and durability you are purchasing.
How to Read Arborea Specifications and Labels
Arborea categorizes its cymbals into distinct series, each designed to achieve a specific sonic character. When browsing their catalog, look for series descriptions that match your primary practice environment and musical preferences. Bright series are typically designed for high-volume projection, featuring brilliant finishes that enhance high-frequency overtones. Darker series focus on low-pitched, warm tones that blend smoothly into the background, which is often more forgiving in small, untreated practice rooms. Reading the manufacturer’s descriptions carefully will help you avoid buying a highly specialized, dry, or trashy effects cymbal when you actually need a versatile, all-purpose crash.

Understanding manufacturing terms like hammering and lathing will help you decode the visual and physical characteristics of different Arborea models. Lathing refers to the process of shaving circular grooves into the cymbal’s surface on a lathe, which thins the metal, brightens the tone, and allows the cymbal to vibrate more freely. A fully lathed cymbal will sound lively and traditional, whereas an unlathed or raw cymbal will sound dry, focused, and short-lived. Hammering patterns—whether applied by machine or by hand—compress the metal to create pockets of varying tension, which lowers the pitch and introduces complex, dark overtones. Cymbals with deep, irregular hammer marks generally offer a more complex, hand-crafted sound, while uniform machine hammering provides consistency and a bright, predictable response.
Because online marketplaces and local music stores offer a wide variety of percussion gear, verifying the authenticity of your Arborea cymbal is crucial. Genuine Arborea cymbals feature clean, laser-etched or stamped brand logos near the bell, along with clear series markings printed on the surface. When shopping online, avoid listings with blurry photos, generic descriptions, or prices that seem unrealistically low compared to established music retailers. Checking for official distributor markings, holographic stickers, or purchasing directly from authorized dealers in the Philippines ensures you receive a genuine product backed by a valid manufacturer warranty.
Matching Cymbal Profiles to Your Playing Style
Your physical practice environment plays a massive role in how your cymbal will sound to you and those around you. In the Philippines, many beginner drummers practice in residential areas, garage setups, or concrete-walled rooms where high-frequency sounds bounce harshly off the walls. In these reflective spaces, a bright, heavy crash can quickly cause ear fatigue and disturb neighbors. Opting for a medium-thin crash with a slightly darker or faster-decaying profile helps absorb some of that harshness, keeping your practice sessions comfortable and musically productive.
Your choice of drumsticks and your physical striking technique must align with your cymbal’s characteristics to prevent premature damage. Beginners often start with heavier sticks like 5B or 2B to build wrist strength, but striking a thin or medium-thin crash directly on the edge with a heavy stick can easily cause cracks. To protect your investment, practice a glancing blow technique—striking the cymbal with a sweeping motion across the edge rather than hitting it straight down. If you prefer using heavier sticks or have a naturally aggressive playing style, choosing a medium-weight crash will provide the necessary durability to handle the extra impact.
A well-planned drum kit relies on a balanced tonal relationship between all your cymbals. Your crash cymbal should not sound identical in pitch or wash to your hi-hats or ride cymbal; instead, it should occupy its own sonic space. A standard 16-inch crash sits perfectly in the middle, offering a distinct, explosive accent that contrasts clearly with the tight, crisp chick of 14-inch hi-hats and the steady, metallic ping of a 20-inch ride. As you plan your setup, aim for a cohesive blend where no single cymbal dominates the others in volume or harshness.
Pre-Purchase Inspection and Buying Checklist
Before finalizing your purchase, performing a thorough physical inspection is essential to ensure the cymbal is free from structural defects. Run your fingers carefully along the entire outer edge to feel for “flea bites,” which are tiny nicks or rough spots that can eventually develop into major cracks under repeated impact. Examine the center hole closely for any signs of “keyholing”—a wear pattern where the hole becomes oval-shaped due to metal-on-metal contact with an unprotected cymbal stand. Finally, hold the cymbal up to a light source to check for hairline cracks radiating along the lathing grooves or outward from the center hole.
When purchasing through an online marketplace, you must rely on the accuracy of the listing and the seller’s transparency. Look for listings that provide high-resolution photos of the actual cymbal you will receive, rather than generic stock images from the manufacturer. Reliable sellers will often list the exact weight of the cymbal in grams, which gives you a precise indication of its thickness and potential pitch. While you might find attractive deals online, setting aside a realistic budget of several thousand ₱ for a quality bronze crash is a safer long-term investment than buying the cheapest available option.
Understanding the manufacturer’s warranty terms helps protect you from unexpected losses. Most reputable cymbal brands offer a limited warranty that covers manufacturing defects, such as cracks that develop along the lathing lines or structural failures near the bell. However, warranties do not cover damage caused by improper use, such as edge cracks resulting from poor striking technique, keyholing from mounting the cymbal without a plastic sleeve, or physical drops. Keep your original purchase receipt and take clear photos of any issues immediately to facilitate a smooth warranty claim process if a defect arises.
Frequently Asked Questions (FAQ)
How many crash cymbals should a beginner start with?
A beginner should start with a single, versatile crash cymbal, ideally a 16-inch model. Starting with one high-quality crash allows you to focus your budget on a better-sounding, more durable bronze instrument rather than buying multiple cheap, poor-sounding brass cymbals. This single-crash setup keeps your kit simple, helping you master basic striking techniques and coordination without unnecessary distractions.
When integrating your new crash into your drum kit, proper mounting is critical for both sound and safety. Position the cymbal stand at a comfortable height and angle, tilting it slightly toward you so that you can strike it with a natural, glancing blow rather than hitting the edge at a sharp angle. Always use a plastic or rubber sleeve on the cymbal stand tilter, along with felt washers on both the bottom and top of the cymbal, to prevent metal-on-metal contact and allow the cymbal to swing freely.
Do I need a special bag to transport my cymbals?
Yes, investing in a dedicated cymbal bag is highly recommended to protect your instruments from physical damage and environmental wear. Transporting cymbals loose or stacked directly against each other in a standard backpack can lead to severe edge chipping, surface scratches, and keyhole wear. In the tropical climate of the Philippines, high humidity can also accelerate oxidation and tarnish, making a protective bag essential for keeping moisture away from the metal surface.
When choosing a basic cymbal bag, look for models that feature padded interior dividers to keep each cymbal physically separated during transport. A reinforced bottom section is also crucial to prevent the heavy edges of the cymbals from tearing through the fabric. Some bags also include a dedicated smaller pocket for hi-hats and splash cymbals, ensuring that your entire setup remains secure, dry, and free from scratches whenever you travel to practice sessions or gigs.
Community discussion
Share your experience or ask a question. Comments are reviewed before publication.