
To start playing the drums, you only need two things: a surface to strike and a pair of drumsticks. However, walking into a music store or browsing an online marketplace can quickly become overwhelming when you are confronted with dozens of letter-and-number codes, various wood types, and different tip shapes. Choosing the wrong pair can lead to hand fatigue, poor technique, or even damaged gear, while the right pair acts as an extension of your hands, making practice sessions comfortable and productive.
Finding your ideal starter sticks is not about picking the most expensive brand, but about matching the physical specifications of the stick to your hand size, musical goals, and daily practice environment. By understanding how weight, diameter, and material interact, you can make an informed choice that supports your learning journey from the very first stroke.
Understand Drumstick Anatomy to Decode Specifications
Every drumstick may look like a simple piece of shaped wood, but its design is a highly engineered balance of four distinct zones. Understanding these anatomical parts helps you decode how a stick will behave when it makes contact with a drumhead or cymbal.
Products mentioned in this guide
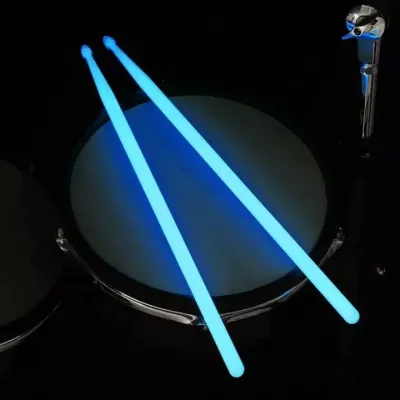
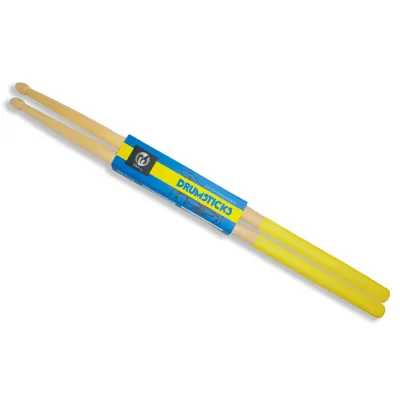
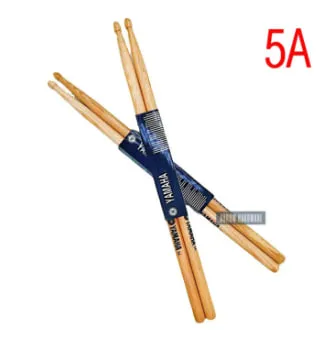
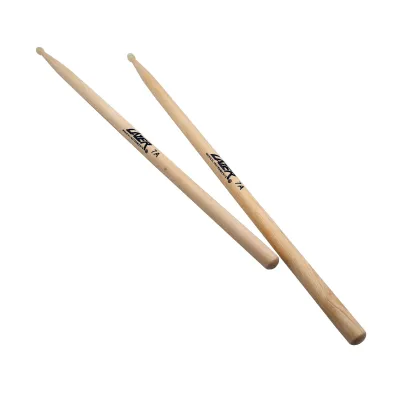
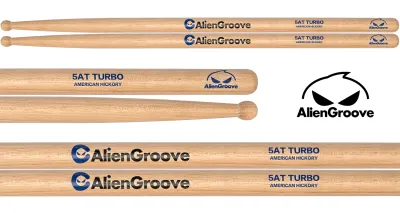
Prices are valid at publication and may change. Please refer to the product page for the latest price.
- The Butt: The back end of the stick, which rests near the heel of your hand and provides the counterweight to the tip.
- The Shaft: The main body where you place your grip. Its diameter determines how substantial the stick feels and how much shock it absorbs.
- The Shoulder: The area where the shaft tapers down toward the tip. The length and thickness of this taper dictate how the stick's weight is distributed.
- The Tip (or Bead): Located at the front, the tip is the point of contact that defines the initial sound, articulation, and volume of each stroke.
The taper of the shoulder is particularly critical for beginners to understand. A short, thick taper pushes the center of gravity forward toward the tip, creating a front-heavy stick that delivers powerful, loud hits with minimal effort but offers less rebound. Conversely, a long, thin taper shifts the weight back toward your hand, providing a nimble, highly responsive bounce that is excellent for fast, low-volume patterns. For a beginner, finding a balanced, medium taper is crucial for developing a natural wrist motion and learning how to control rebound.
Match Size and Weight to Your Hand Size and Age
The alphanumeric codes stamped on the side of almost every drumstick—such as 7A, 5A, 5B, or 2B—serve as the industry’s sizing standard. This system dates back to the early days of industrial drumstick manufacturing, where the number indicated the stick’s relative diameter and the letter designated its recommended application. While modern manufacturing has evolved, these codes remain the best way to identify the thickness and weight of a stick, though exact dimensions can vary slightly between different brands.

Historically, letters stood for settings like orchestra (A), band (B), and street (S). Counterintuitively, the numbering system runs backward: the lower the number, the thicker and heavier the stick. Therefore, a 2B stick is significantly thicker and heavier than a 7A stick.
- 7A (Thin and Light): Featuring a narrow diameter and lightweight feel, these are recommended for children, players with smaller hands, or those with lighter grip strength. They allow for delicate control without straining developing hand muscles.
- 5A (The Universal Standard): This is the most versatile starting point for teens and adults with average-sized hands. Its balanced weight and diameter can handle genres from soft jazz to moderate rock, making it ideal for learning fundamental rudiments.
- 5B (Medium-Heavy): Slightly thicker and heavier than the 5A, the 5B is excellent for larger hands or building physical endurance. It provides more volume and durability, making it a great transition stick if you find yourself denting lighter sticks.
- 2B (Thick and Heavy): These are heavy-duty sticks designed for maximum volume. While generally too heavy for a beginner's daily practice, some use them on practice pads to build wrist strength, or for playing heavy rock and metal.
When starting out, your primary goal is to avoid hand fatigue and muscle strain. If a stick feels too thick, your fingers will struggle to wrap around it securely, forcing you to squeeze too tightly and causing cramps. If it is too light, you may overcompensate by swinging your arms harder to get enough volume, which ruins your form. Starting with a 5A is generally the safest bet, but do not hesitate to drop down to a 7A if you feel any strain in your wrists or fingers.
Select Material and Tip Shape for Your Target Genre
The physical dimensions of your drumstick dictate how it feels in your hands, but the material composition and tip design dictate how it sounds on the drums. Aligning these factors with the musical genres you want to play will make your practice sessions sound more authentic and rewarding.
Compare Common Wood Materials
The vast majority of drumsticks are crafted from wood, with three species dominating the market. Each wood type possesses a unique density, grain structure, and flexibility that alters both the stick’s lifespan and the vibration transmitted to your hands.
- Hickory: The industry standard. Hickory offers an excellent balance of weight, flexibility, and density. Its natural shock-absorbing properties are highly beneficial for beginners, absorbing impact vibrations rather than transferring them to your wrists and elbows.
- Maple: A lighter, less dense wood than hickory. A maple stick feels noticeably lighter in the hand than a hickory stick of the same size. This makes maple excellent for low-volume acoustic playing, fast jazz, or beginners who want a thicker grip without the heavy weight, though it wears down faster.
- Oak: A dense, heavy, and incredibly hard wood. It is highly durable and resists chipping, making it a favorite for heavy rock drummers. However, its rigidity transfers more high-frequency vibration back into your hands, which can cause fatigue if your technique is still developing.
Pick the Right Tip Shape and Material
The tip of the drumstick is the point of contact that coaxes tone out of your cymbals and drumheads. Even subtle variations in shape alter the surface area of contact, changing the balance between a sharp, defined click and a broad wash of sound.
- Teardrop Tips: Featuring an oval shape that tapers toward the end, these are highly versatile. Depending on the strike angle, they produce a warm, focused tone on drums and a controlled, rich wash on cymbals.
- Round (or Ball) Tips: These small, spherical tips provide a consistent contact area regardless of your strike angle. They produce a bright, highly articulate sound, especially on ride cymbals.
- Barrel Tips: With a flat, cylindrical surface, barrel tips provide a larger contact area. This results in a punchy, broad, and loud sound, which is excellent for rock, pop, and high-volume situations.
- Oval Tips: Similar to teardrop tips but with a larger surface area, oval tips offer a balanced, mid-range tone that works well across almost all musical genres.
Beyond shape, you must choose between wood and nylon tips. Wood tips deliver a warm, organic tone but will eventually chip or soften over time, which dulls their sound. Nylon tips are synthetic caps that produce a bright, glassy cymbal sound and are highly durable. However, some players find nylon tips sound too harsh for acoustic jazz, and poorly manufactured nylon caps can occasionally fly off during intense playing.
Adapt Your Choice to Your Practice Setup and Environment
Your physical playing environment plays a major role in which drumsticks you should buy. A stick that works perfectly on a loud acoustic drum kit in a soundproof studio might be completely inappropriate for an electronic kit in a quiet apartment.
If you are practicing on a traditional acoustic drum kit, standard hickory sticks with wood tips are the most reliable option. They provide the natural rebound and organic tone that acoustic drums and brass cymbals are designed to produce. However, if you are practicing in a shared living space or an apartment in the Philippines, managing acoustic noise is essential. In these high-density housing situations, using lighter maple sticks or multi-rod bundles (often called “cool rods”) can significantly reduce the volume of your practice sessions without forcing you to change your grip or striking motion.
For those learning on an electronic drum kit, stick selection requires extra care. Electronic kits use rubber pads or sensitive mesh drumheads that can easily be damaged by splintered wood tips. For this reason, many electronic drum manufacturers recommend using nylon-tipped sticks. Nylon tips have a smooth, snag-free surface that will not tear mesh heads. Additionally, you must ensure that your sticks are dedicated solely to your electronic kit; using a pair of sticks on acoustic cymbals can create sharp, microscopic burrs on the wood or nylon, which will subsequently slice through your electronic kit’s mesh heads when you play on them later.
Finally, living in a tropical climate like the Philippines introduces high humidity, which can wreak havoc on wooden drumsticks. Wood is a hygroscopic material, meaning it absorbs moisture from the air. Excessive humidity can cause wooden sticks to warp, swell, or lose their structural integrity, leading to a muddy rebound and a higher likelihood of snapping. To protect your investment, always store your drumsticks in a dry, temperature-stable environment, preferably inside a padded drumstick bag with a silica gel packet to absorb excess moisture. Avoid leaving your sticks in hot cars or damp storage rooms where rapid temperature and humidity swings will warp the wood.
Test and Verify the Grip Before You Commit
Before you purchase several pairs of drumsticks, it is highly recommended to test them physically. Even if a stick’s specifications look perfect on paper, the unique anatomy of your hands will determine whether a pair truly fits. You can perform a few simple, non-destructive checks in a local music store or at home on a practice pad to verify your choice.
First, perform the balance test to locate the natural fulcrum point of the stick. Hold the stick lightly between your thumb and index finger, about one-third of the way up from the butt end. Strike a practice pad or even your thigh and observe how many times the stick bounces naturally on its own. A well-balanced stick will rebound effortlessly several times without requiring you to push down with your wrist. If the stick feels like it wants to dive forward or if it feels excessively back-heavy, adjust your grip or try a different taper.
Second, conduct a quick comfort and fatigue check. Grip the sticks and play a basic, continuous single-stroke roll (alternating left and right hands) on a practice pad for two to three minutes. Focus on the sensations in your hands and forearms. If you feel an immediate stinging vibration traveling up your fingers, or if your hand begins to cramp and slip, the shaft diameter is likely incorrect for your hand size. The stick should rest comfortably in your hand without requiring a tight, white-knuckled grip to keep it from flying away.
Keep an eye out for immediate stop conditions during your test. If you notice any visible warping when rolling the stick on a flat table, or if the two sticks in the pair sound completely different in pitch when tapped against a hard surface, reject them. Inconsistent pitches indicate that the wood density between the two sticks is poorly matched, which will make your hands feel unbalanced while playing.
Frequently Asked Questions (FAQ)
How often should a beginner replace their drumsticks?
There is no fixed calendar schedule for replacing drumsticks, as lifespan depends entirely on your practice frequency, striking angle, and technique. A beginner practicing lightly on an electronic kit might use the same pair for several months, while someone practicing aggressive rock patterns on acoustic cymbals might wear them out in a few weeks. Instead of tracking time, look for physical warning signs. You must replace your sticks immediately if you notice deep chipping along the shoulder, severe splintering on the shaft, a visible crack running down the body, or a chipped wood tip. Playing with cracked or deformed sticks ruins your technique, alters your sound, and can easily puncture your drumheads.
Should beginners buy expensive or heavily branded drumsticks?
Beginners do not need to buy premium, artist-signature, or highly expensive drumsticks to learn effectively. Standard, mid-tier sticks from established, reputable musical instrument manufacturers—typically costing between ₱400 and ₱800 per pair—are excellent for developing proper technique and offer consistent weight matching. However, you should avoid ultra-cheap, unbranded sticks often sold in bulk on online marketplaces for incredibly low prices. These budget-basement options are frequently made from low-grade, warped wood that lacks proper weight matching. They tend to splinter dangerously upon impact, offer poor shock absorption, and can break within minutes of your first practice session, costing you more in the long run.
Community discussion
Share your experience or ask a question. Comments are reviewed before publication.