
Upgrading to a bone saddle is one of the most effective and accessible ways to enhance the tone, sustain, and overall playability of your acoustic guitar. Unlike synthetic factory parts, bone offers a dense, natural structure that efficiently transfers string vibration directly to the guitar’s soundboard. However, finding the right replacement is not a matter of simply grabbing any bone piece off the shelf. To achieve a perfect fit that preserves your instrument’s intonation and action, you must carefully evaluate several physical specifications.
Selecting the correct bone saddle requires a clear understanding of your guitar’s existing hardware and dimensions. A mismatch in thickness, length, or curvature can lead to severe playability issues, such as fret buzz, high action, or even physical damage to the bridge. This guide will walk you through the critical dimensions, material qualities, and measurement techniques required to select the ideal bone saddle for your acoustic guitar.
Quick Selection Checklist for Acoustic Bone Saddles
Before purchasing a replacement bone saddle, having a clear roadmap of what to look for will save you time and prevent costly fitting mistakes. Use this quick checklist to verify the essential specifications of any saddle blank or pre-shaped replacement:
Products mentioned in this guide
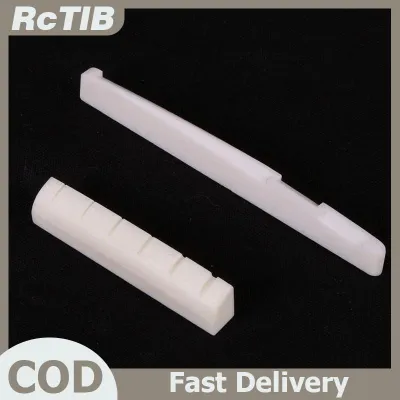
![[COD] AqToCna Ship within 24 hours Ivory Buffalo Bone Bridge Saddle And Slotted Nut For 6 String Acoustic Guitar](https://img.lazcdn.com/g/p/6e68ea3b0029e7eebad22e5d9105f7d4.jpg_400x400q80.jpg_.webp)
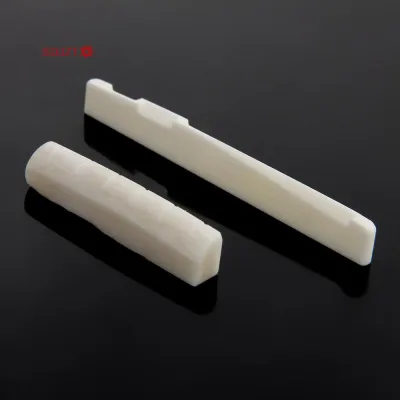
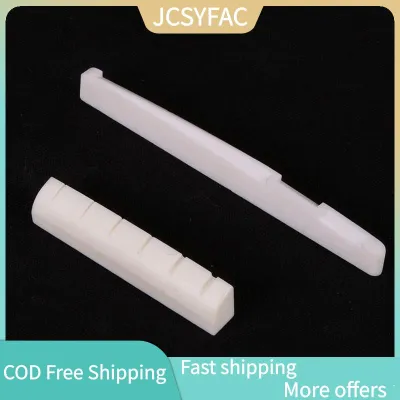
![[ammoon]Guitar Saddle and Nut Real Bone Material 2PCS for 6 Strings Acoustic Guitar](https://img.lazcdn.com/g/p/0e49915013c464b84dc36427f9b67c8c.jpg_400x400q80.jpg_.webp)
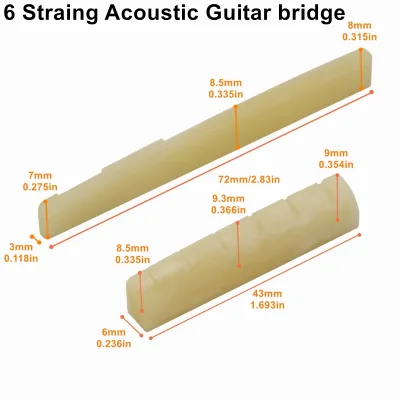
![[COD] EHBqna Real Bone Bridge Saddle For Folk Acoustic Guitar 72MM/74MM/76MM/80MM * 12MM](https://img.lazcdn.com/g/p/f1debf4dde1aeebc171752c6e1ed3d02.jpg_400x400q80.jpg_.webp)

Prices are valid at publication and may change. Please refer to the product page for the latest price.
- Length: Ensure the saddle is long enough to fill the bridge slot completely from end to end without leaving gaps.
- Thickness: The saddle must match the width of the bridge slot perfectly to prevent leaning or binding.
- Top Radius: The curvature of the saddle's top edge must match your guitar's fretboard radius to maintain consistent string height.
- Compensation Style: Choose between a traditional straight saddle or a compensated design based on your guitar's current setup and intonation needs.
Buying a slightly oversized bone blank is standard practice for custom fitting. Because factory bridge slots can vary slightly due to manufacturing tolerances or wood movement under tropical humidity, starting with a larger blank allows you to sand it down to a perfect, snug fit. Always cross-reference your guitar manufacturer’s official specifications with your own physical measurements rather than relying solely on generic model compatibility lists.
Understanding Saddle Dimensions: Length, Thickness, and Radius
The physical dimensions of your saddle directly dictate your guitar’s action, string spacing, and structural stability. A saddle that is too loose in the bridge slot will lean forward under the immense tension of the strings. This leaning action not only ruins your intonation but can also exert uneven pressure on the bridge wood, eventually causing the bridge to crack or lift from the soundboard.

Length and thickness tolerances must be precise. The saddle should slide into the slot with light finger pressure and remain upright on its own without wobbling. Even a fraction of a millimeter of play can cause a loss of acoustic energy transfer, resulting in a duller tone and decreased sustain. If the saddle is too tight, forcing it into the slot can split the bridge, especially during periods of high humidity when the wood naturally swells.
The top radius, or the curvature of the saddle’s upper edge, must match the radius of your guitar’s fretboard. Fretboards are not flat; they have a slight curve measured in inches (such as 12-inch, 16-inch, or 20-inch radii). If the saddle radius is flatter than the fretboard, the middle strings will sit too low, causing fret buzz. If the saddle radius is too round, the outer strings will be excessively high, making the guitar difficult to play.
To find these specifications, start by checking the official documentation provided by your guitar manufacturer. If the manufacturer does not list the exact saddle dimensions, you can consult reputable luthier forums or measure your existing saddle directly using precision tools. Keep in mind that older or vintage guitars may have undergone modifications, making physical measurement the safest route.
Choosing Between Straight and Compensated Saddles
Saddles generally fall into two categories: straight (non-compensated) and compensated. The mechanical function of a compensated saddle is to correct intonation errors inherent to guitar strings. Because thicker strings require slightly more length to vibrate at the correct pitch when fretted, a compensated saddle features a carved top ridge that alters the contact point for individual strings.
Visually, a straight saddle has a uniform, centered ridge along its entire length. A compensated saddle features distinct offsets, most commonly a setback for the B-string and sometimes a forward slant for the low E-string. These offsets ensure that notes remain in tune as you play higher up the neck, preventing chords from sounding sour in upper registers.
If you are upgrading from a straight saddle to a compensated one, be prepared for a more involved installation process. This transition often requires a full professional setup and intonation check to ensure the new contact points align correctly with your guitar’s scale length. If your guitar was originally designed for a straight saddle, switching to a compensated model without adjusting the bridge slot angle can sometimes worsen intonation rather than improve it.
How to Measure Your Guitar for a Replacement Saddle
To get accurate measurements, you should avoid using standard plastic rulers or tape measures. Instead, use a digital caliper and a precision steel ruler. These tools allow you to measure down to the hundredth of a millimeter, which is crucial for achieving a snug saddle fit.
When measuring your current saddle, record the total length, the thickness at the widest point, and the height at both the bass and treble ends. Be sure to measure the entire height of the saddle, including the portion that sits hidden inside the bridge slot, rather than just the visible top profile. This ensures you do not buy a replacement that is too short to sit securely in the slot.
If your original saddle is missing, broken, or has been heavily modified by a previous owner, you will need to measure the bridge slot directly. Insert the depth gauge of your digital caliper into the slot to determine its depth, and measure the slot’s length and width. Ensure the slot is clean and free of wood shavings, dust, or old adhesive before taking these measurements.
A common pitfall is failing to account for the curvature of the bridge slot bottom. Some slots are flat, while others may have a slight radius or contain an under-saddle pickup element. Ensuring your measurements account for these internal factors will prevent you from purchasing a saddle that sits unevenly or fails to make proper contact with the bottom of the slot.
Verifying Bone Material and Blank Quality
When shopping on online marketplaces, you will encounter many synthetic saddles marketed as bone. To verify real bone material, look closely at the product labels, descriptions, and packaging. Real bone typically exhibits subtle, organic grain patterns and tiny pores under close inspection, whereas synthetic alternatives like plastic or composite materials tend to have perfectly uniform surfaces and visible mold lines.
You will also need to choose between bleached and unbleached bone. Bleached bone offers a clean, bright white aesthetic that matches modern guitar bindings, but the chemical bleaching process can sometimes make the material slightly more brittle. Unbleached bone has a natural, yellowish-ivory hue and is favored by many players for its slightly higher density, natural self-lubricating properties, and classic, vintage appearance.
Before installing your new saddle, perform a thorough physical inspection of the blank. Hold it up to a strong light source to check for internal structural flaws, micro-cracks, or uneven density. A saddle with internal voids or cracks will not transfer string vibrations efficiently and may split prematurely under string tension. If you notice any dark streaks that look like soft tissue, avoid using that section of the bone, as it will be softer than the surrounding material.
Safe Adjustments and When to Stop for Professional Help
Once you have selected the correct bone blank, you will likely need to make minor adjustments to achieve the perfect action height. The safest way to do this at home is by sanding the bottom of the saddle. Secure a piece of 240-grit sandpaper to a perfectly flat surface, such as a piece of glass or a marble countertop, and draw the saddle across it in a straight line, applying even downward pressure to keep the bottom perfectly square.
Avoid attempting to alter the saddle’s width, length, or top radius yourself unless you possess specialized luthier tools like radius gauges and nut slotting files. Shaving the sides of a saddle unevenly can cause it to lean, while altering the top radius without precision guides can ruin your guitar’s playability and string-to-string balance.
Knowing when to stop and seek professional help is vital to protecting your instrument. If you encounter any of the following conditions, it is best to consult a qualified luthier:
- Bridge Slot Damage: Cracks, chips, or warping in the wooden bridge slot.
- Severe Intonation Issues: Notes sounding sharp or flat even after adjusting the saddle height.
- Under-Saddle Pickups: The presence of a delicate piezo pickup wire beneath the saddle.
- Unclear Specifications: Uncertainty regarding your guitar's fretboard radius or scale length.
In the Philippines, professional luthier services are widely available and can save you from costly mistakes, especially when dealing with delicate electronics or structural bridge repairs. Budgeting for a professional setup ensures your new bone saddle is optimized for your specific playing style and local climate conditions.
Frequently Asked Questions (FAQ)
Does a bone saddle require a specific type of acoustic guitar pickup?
A bone saddle does not require a specific type of pickup, but it does demand precise installation if your guitar uses an under-saddle piezo pickup. For a piezo pickup to function correctly and balance the volume across all six strings, the bottom of the bone saddle must be perfectly flat and square. Any unevenness, high spots, or rough sanding marks will result in uneven string-to-string volume or unwanted hum. Always check your pickup manufacturer’s guidelines to ensure the saddle material and installation method are fully compatible with your specific pickup system.
Can I reuse my old saddle as a template for the new bone blank?
Yes, you can use your old saddle as a template, but you must do so with caution. Tracing the length, thickness, and top radius of your old saddle onto the new bone blank can save time and provide a helpful starting point. However, if your original saddle was poorly fitted, worn down by string friction, or caused intonation issues, copying it will simply transfer those same problems to your new bone saddle. Always verify the actual dimensions of your bridge slot first to ensure your template is accurate and that you are not replicating past setup errors.

Community discussion
Share your experience or ask a question. Comments are reviewed before publication.