
Applying guitar lemon oil is a practical way to condition and protect unfinished wood fretboards, preventing them from drying out, cracking, or shrinking over time. The process involves removing the strings, cleaning away surface grime, applying a small amount of dedicated guitar lemon oil with a lint-free cloth, letting it sit briefly according to the product label, and thoroughly buffing away any excess residue. By taking the time to care for the wood, you preserve both the playability and the structural integrity of your instrument.
In tropical climates like the Philippines, guitars are often exposed to high humidity, but they are also frequently kept in air-conditioned rooms or dry storage cases. This constant shifting between humid and dry air accelerates wood movement, making regular inspection essential. Sweat and skin oils from regular playing also accumulate on the surface, attracting dust and grime that can dry out the wood over time. This guide provides a safe, step-by-step approach for beginners to maintain their instruments without causing accidental damage.
When and Why to Condition Your Fretboard
Unfinished fretboards made of woods like rosewood, ebony, or laurel require periodic conditioning to maintain their moisture balance. When these woods dry out, they display clear visual cues. You might notice a pale, ashy, or dusty appearance across the wood grain, and the rich, dark color of the wood may fade to a dull greyish-brown.
Products mentioned in this guide





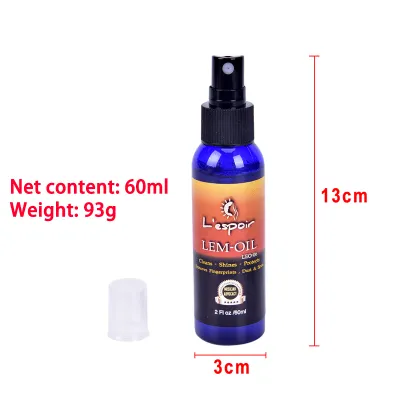

Prices are valid at publication and may change. Please refer to the product page for the latest price.
There are also tactile signs that indicate your fretboard needs attention. When wood loses moisture, it shrinks slightly. This shrinkage can cause the metal frets to protrude from the sides of the neck, resulting in rough or sharp fret ends that feel scratchy when you slide your hand along the neck.
While environmental factors like air conditioning and seasonal changes play a significant role, your playing habits also affect the wood. Regular playing deposits sweat, skin oils, and dead skin cells onto the fretboard, which can build up and dry out the wood fibers.
To determine how often to condition, evaluate your specific environment and how often you play. There is no strict calendar schedule that fits every instrument. A safe approach is to condition the fretboard only when it shows visible signs of dryness, which might be once or twice a year. Always check your guitar manufacturer’s care instructions first, as some brands warn against certain oils or have specific maintenance protocols.
Tools and Materials You Will Need
Before you begin, gather the correct supplies to ensure you do not accidentally damage your instrument. Using the wrong materials can harm the wood or the finish of your guitar.

First, obtain a bottle of dedicated guitar lemon oil or fretboard conditioner. Never use household furniture polish or pure essential lemon oil, as these often contain harmful solvents, silicones, or acids. Verify the product label to ensure it is explicitly formulated for musical instruments and safe for your specific fretboard wood.
You will also need clean, lint-free microfiber cloths. It is best to have at least two or three cloths on hand: one for wiping away loose dirt, one for applying the oil, and one for buffing the wood dry. Microfiber is ideal because it does not leave fibers behind or scratch the wood.
For cleaning stubborn grime, a soft-bristle brush like a clean, soft toothbrush can help gently dislodge dirt around the frets. Only use fine steel wool if the manufacturer’s instructions explicitly state it is safe for your fretboard and frets, as steel wool particles can cling to magnetic guitar pickups and cause electrical issues.
Finally, keep some low-tack painter’s tape or fret guards nearby. Painter’s tape is useful for masking off the guitar body, pickups, and headstock to protect finished surfaces and electronics from accidental oil spills or scratches during the process.
Step-by-Step Guide to Applying Lemon Oil
Conditioning your fretboard is a systematic process that requires patience and care. It is best performed in a clean, stable, and well-ventilated workspace with plenty of flat surface area. Working methodically ensures you do not miss any spots or accidentally apply oil to areas that should remain dry.
Step 1: Prepare and Clean the Fretboard
To access the entire fretboard, you must remove the strings. Use a string winder to loosen the tension safely, then cut or unwind the strings and remove them completely. This is also an excellent opportunity to inspect the bridge, nut, and tuning pegs for any wear.
Place the guitar on a flat, padded surface, such as a dedicated guitar work mat or a soft towel on a table. Use a neck rest or a rolled-up towel to support the neck securely, preventing the guitar from tipping or sliding while you work.
Use a dry microfiber cloth or a soft-bristle brush to gently sweep away loose dust, skin flakes, and grime from the fretboard. Pay close attention to the corners where the frets meet the wood, as dirt tends to accumulate there.
Before using any cleaning agents or abrasive tools, consult your guitar’s manual. Some manufacturers recommend only a dry or slightly damp cloth for cleaning, and using unauthorized cleaners can void your warranty or damage the wood.
Step 2: Apply the Lemon Oil
Never pour or spray guitar lemon oil directly onto the fretboard. Doing so can cause the oil to pool in the fret slots, softening the wood and potentially loosening the frets or inlays over time. Instead, apply a small, coin-sized amount of oil onto a clean microfiber cloth.
Work in small sections, starting from the first fret and moving down the neck. Rub the oiled cloth into the wood using gentle, circular motions, then finish by wiping along the natural direction of the wood grain to help the oil penetrate the pores evenly.
Keep the oil away from the guitar nut, the bridge saddle, any glued joints, and the electronics. Oil can weaken glue bonds over time and interfere with the performance of pickups and switches. If you accidentally get oil on these parts, wipe it off immediately with a clean, dry cloth.
Step 3: Wipe and Buff the Wood
Allow the oil to penetrate the wood for the exact duration specified on the product label. This is typically just a few minutes. Do not leave the oil on the wood longer than recommended, as it can saturate the fibers and leave a sticky residue.
Take a clean, dry microfiber cloth and thoroughly wipe down the entire fretboard. Use firm, even pressure to remove any unabsorbed oil. You may need to fold the cloth to a clean section multiple times to ensure you are lifting the oil rather than just spreading it around.
Inspect the fretboard closely, especially along the edges of the frets and within the wood pores. If you feel any sticky or tacky areas, continue buffing with a clean cloth until the surface feels completely smooth, dry, and uniform.
Step 4: Restring and Final Check
Once the fretboard is dry and buffed, it is time to restring your guitar. Thread the new strings through the bridge, wind them securely around the tuning posts, and cut off the excess wire.
Hold the guitar under a bright light source to inspect your work. The fretboard should have a consistent, healthy, matte or satin sheen. There should be no wet patches, shiny spots, or dark streaks of pooled oil.
Tune the guitar to pitch and play a few chords and scales. Pay attention to how the fretboard feels under your fingers. It should feel smooth and clean, without any oily residue transferring to your fingertips or affecting your playability.
Common Mistakes and Safety Boundaries
One of the most common mistakes beginners make is using household lemon oil or furniture polish. These products often contain high concentrations of petroleum distillates, silicones, waxes, or acidic lemon extracts. These ingredients can degrade the wood, dissolve adhesives, leave a heavy buildup, or damage the guitar’s finish. Always use a product specifically labeled for guitar fretboards.
More is not better when it comes to conditioning wood. Over-saturating the fretboard can cause the wood to swell and soften. This can lead to loose frets, lifting inlays, and a muddy acoustic tone. It also creates a sticky surface that attracts dirt and sweat, accelerating grime buildup.
Stop immediately if you notice any structural issues, such as deep cracks in the wood, loose frets, or peeling inlays. If your guitar has a finished (lacquered or varnished) fretboard, do not apply lemon oil, as it cannot penetrate the finish and will only create a messy, slippery layer. If the product instructions conflict with your guitar manufacturer’s care guide, always defer to the manufacturer or consult a professional luthier.
Frequently Asked Questions (FAQ)
Can I use lemon oil on a maple guitar fretboard?
Most maple fretboards are finished with a clear lacquer, gloss, or satin coating. Because the wood is sealed, lemon oil cannot penetrate the surface. Applying oil to a finished maple fretboard will only leave a greasy, sticky residue that attracts dirt. Instead, clean finished maple fretboards with a slightly damp microfiber cloth. If you have an unfinished or roasted maple fretboard, check your guitar manufacturer’s care guide first, as some manufacturers recommend specific non-oil conditioners or advise against lemon oil entirely.
How often should I apply lemon oil to my guitar?
You should only apply lemon oil when the fretboard shows clear signs of dryness, rather than following a strict calendar schedule. For many players, conditioning once or twice a year is more than enough. Factors such as low humidity, frequent playing, and exposure to dry air-conditioned environments can cause the wood to dry out faster. Always inspect the wood visually and tactilely before deciding to apply oil, and defer to the guitar manufacturer’s recommended maintenance intervals.
Community discussion
Share your experience or ask a question. Comments are reviewed before publication.