
Selecting the best waterproof drum cover for a beginner drum set in the Philippines requires balancing size compatibility, material durability, and moisture management. In a tropical climate characterized by sudden downpours, high relative humidity, and seasonal monsoons, leaving an acoustic drum kit unprotected can lead to rapid deterioration. The ideal drum cover must not only shield the instrument from direct water contact but also prevent the accumulation of trapped moisture, which can warp wooden shells, rust chrome hardware, and ruin drumheads.
For most beginner drum sets, a high-quality, full-kit waterproof cover made from heavy-duty synthetic fabric with a polyurethane backing offers the most practical protection. Unlike individual gig bags, which require dismantling the kit after every session, a full-kit cover drapes over the entire assembled setup, including cymbals and hardware. This approach provides a convenient, daily shield against environmental hazards while keeping the instrument ready to play at a moment’s notice.
To make an informed purchase, drum owners must understand the specific material properties that resist water, how to accurately measure their unique hardware configurations, and how to maintain the cover to prevent mold growth. By focusing on verifiable product specifications rather than generic marketing claims, beginners can safeguard their investment and ensure their drums remain in optimal playing condition for years to come.
Products mentioned in this guide
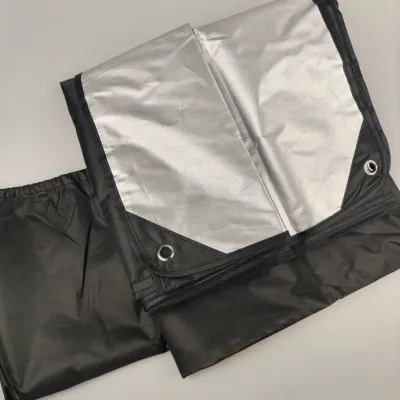
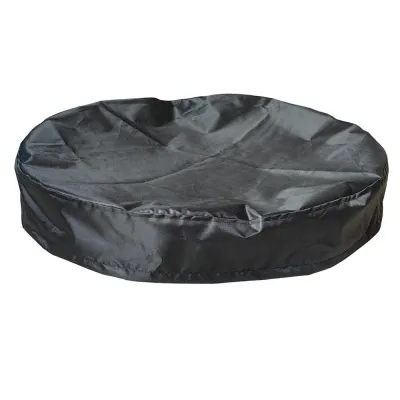
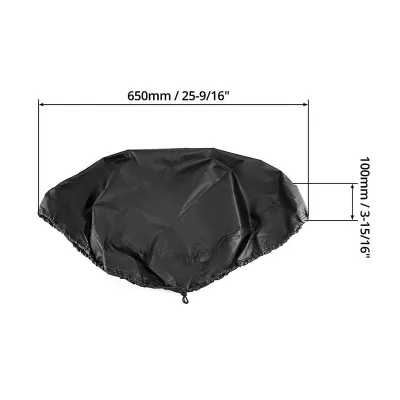
Prices are valid at publication and may change. Please refer to the product page for the latest price.
Quick Selection Guide for Waterproof Drum Covers
When searching for a waterproof drum cover, the first decision is choosing between a single, large drape cover and individual protective bags. For a beginner drum set that remains set up in a bedroom, garage, or covered outdoor space, a full-kit drape cover is highly recommended. It allows you to protect the entire instrument in seconds without adjusting your cymbal stands, throne, or pedal positions. Individual bags are superior for travel and gigging, but they are impractical for daily, stationary protection.
It is critical to distinguish between water-resistant and fully waterproof materials when browsing product listings. Water-resistant covers, often made of lightweight nylon or thin polyester, can repel light splashes or dust but will eventually saturate and leak during heavy rain or high-humidity exposure. Fully waterproof covers utilize heavier synthetic fabrics, such as high-denier Oxford polyester, paired with an internal waterproof coating like polyurethane or polyvinyl chloride. These materials block liquid water entirely, ensuring that even direct leaks from a ceiling or open window will not reach the drums.
To ensure a cover is truly suitable for the Philippine climate, look for three primary design features: exact size matching, seam sealing, and adequate ventilation. A cover that is too small will leave sensitive hardware exposed, while one without sealed seams will allow water to seep through the stitching holes. Most importantly, because tropical air carries high levels of moisture, a completely airtight cover can trap humidity inside, creating a greenhouse effect that accelerates rust. Built-in ventilation flaps are essential to allow air circulation while keeping external water out.
Matching Cover Sizes to Standard Beginner Drum Kits
Standard beginner drum kits in the Philippines typically feature a 5-piece configuration. This setup generally includes a 22-inch bass drum, a 14-inch snare drum, 10-inch and 12-inch rack toms, and a 16-inch floor tom. Along with the drums, the kit includes essential hardware: a hi-hat stand, a snare stand, one or two cymbal stands, a bass drum pedal, and a drum throne. When fully assembled, this configuration occupies a significant three-dimensional footprint that extends far beyond the diameter of the drum shells themselves.

To find a cover that fits, you must measure the maximum outer boundaries of your fully assembled kit rather than relying solely on the drum shell sizes. Start by setting up your kit in your preferred playing position. Measure the total width from the outermost edge of the hi-hat cymbal to the outermost edge of the ride cymbal. Next, measure the depth from the back of the drum throne to the front hoop of the bass drum. Finally, measure the height from the floor to the highest point of your tallest cymbal stand. These three dimensions represent the minimum clearance your cover must accommodate.
Choosing between a custom-fitted cover and a universal full-set tarp involves clear trade-offs. Custom-fitted covers are tailored to the general shape of a drum kit, featuring a sloped design that drapes neatly over the toms and cymbals without excess fabric pooling on the floor. They look professional and are less likely to catch drafts from electric fans or open windows. Universal rectangular tarps or utility covers are often more affordable and widely available, but their boxy shape can result in loose, sagging material that accumulates dust and moisture in its folds.
Evaluating Materials and Weather Resistance Features
To verify the protective capabilities of a drum cover, look past generic product titles and inspect the technical specifications of the fabric. The thickness and durability of synthetic fabrics are measured in denier, represented by the letter “D” (for example, 210D, 420D, or 600D). A higher denier number indicates thicker threads and a more robust weave. For reliable protection against tears, dust, and water, a cover rated at 420D or 600D Oxford fabric is highly recommended, as it withstands the tension of draping over sharp cymbal edges and hardware adjustment screws.
In addition to fabric thickness, check the manufacturer’s specifications for a waterproof rating, often indicated by a hydrostatic head measurement in millimeters. A rating of 1500mm to 3000mm means the fabric can withstand a substantial column of water pressure before leaking, making it highly effective against heavy indoor leaks or outdoor splashes. This waterproofing is achieved through an internal coating, typically polyurethane, which must be applied evenly across the underside of the fabric to ensure consistent protection.
Structural construction details are just as important as the fabric itself. When a cover is sewn together, the sewing needle punctures thousands of tiny holes along the seams. Under high humidity or direct water contact, moisture will seep through these unsealed holes. High-quality waterproof covers feature heat-sealed or taped seams on the interior, where a waterproof tape is thermally applied over the stitching to block water entry. Additionally, look for heavy-duty zippers equipped with storm flaps—strips of fabric that fold over the zipper teeth to prevent water from bypassing the closure.
Finally, prioritize covers that feature integrated mesh vents or breathable panels. In the Philippines, the ambient relative humidity frequently exceeds 80 percent. If you cover a drum kit in a humid room using a completely sealed, non-breathable plastic cover, the moisture in the air will become trapped. As the temperature drops overnight, this trapped moisture condenses into water droplets on the cold metal hoops, tension rods, and chrome stands of your drum kit. Breathable vents allow this internal moisture to escape, maintaining a stable microclimate under the cover.
Your Measurement and Purchasing Checklist
To simplify your search on online marketplaces and ensure you purchase a cover that fits perfectly, follow this step-by-step workflow. This structured approach minimizes the risk of buying an incompatible product and helps you filter through hundreds of generic listings to find a high-quality option.
- Step 1: Measure the footprint and height. Set up your drum kit in its playing configuration. Use a tape measure to record the maximum width, depth, and height in centimeters. Write these numbers down. If you plan to store your drum throne separately, measure the kit without the throne to reduce the required cover size.
- Step 2: Filter online listings by exact dimensions. When searching online marketplaces, look for "waterproof drum cover" or "drum kit dust cover waterproof." Compare your recorded measurements against the product dimensions listed in the description. Always select a cover that is at least 10 to 15 centimeters larger than your kit's measurements on all sides. This extra clearance ensures the cover is easy to slip on and off without snagging on hardware.
- Step 3: Cross-reference user reviews for environmental performance. Look for reviews written by buyers living in tropical or coastal regions. Search the review text for keywords such as "rain," "humidity," "moisture," "mold," or "rust." Pay close attention to feedback regarding whether the cover material cracked under heat, peeled on the inside, or allowed moisture to accumulate after a heavy downpour.
- Step 4: Verify return and exchange policies. Because drum hardware configurations vary widely, there is always a slight chance the cover may not fit your specific cymbal arm angles or pedal extensions. Before finalizing your purchase, confirm that the seller offers a clear return or exchange policy for unused items in their original packaging. This protects your budget if you need to swap the cover for a larger size.
Maintaining Your Drum Cover and Kit in Humid Conditions
Owning a waterproof cover is only the first step; maintaining it properly is essential to ensure long-term protection for your drum set. Over time, dust, sweat, and environmental grime will accumulate on the exterior of the cover. To clean it safely, wipe the outer surface with a soft cloth dampened with lukewarm water and a mild, non-abrasive soap. Avoid using harsh chemical solvents, bleach, or machine washing, as these can degrade the internal polyurethane waterproof coating and strip away the fabric’s water-repellent properties.
Never fold, store, or reuse a drum cover while it is damp. If the cover is exposed to a leak or heavy condensation, remove it from the kit and hang it to dry completely in a well-ventilated, shaded area. Placing a damp cover back over your drums creates a closed, high-humidity chamber that actively promotes mold growth on wooden shells and accelerates the oxidation of metal parts. Ensure both the drum kit and the cover are dry before reassembling the protective barrier.
To combat the persistent humidity of the Philippine climate, supplement your drum cover with active moisture-control practices. Place several large, rechargeable silica gel packs or hanging dehumidifier bags directly underneath the cover, positioning them near the snare drum and toms. These desiccants actively absorb moisture from the air enclosed by the cover. If you store your drums in a non-air-conditioned room, garage, or studio, consider running a small household dehumidifier nearby to lower the ambient humidity of the entire space, protecting your instrument from the inside out.
Frequently Asked Questions (FAQ)
Can I use a standard dust cover instead of a waterproof one?
A standard dust cover is designed primarily to prevent airborne particles from settling on your drumheads and cymbals. These covers are typically made from thin, single-layer nylon, cotton, or lightweight polyester blends. They lack the dense weave, internal polyurethane backing, and sealed seams required to block liquid water.
In the Philippines, relying on a standard dust cover during the rainy season carries significant risks. Because dust covers are highly porous, they easily absorb moisture from the humid air. Once saturated, a dust cover will hold dampness directly against your drum shells and metal hoops, accelerating wood warping and chrome rust rather than preventing it. A dedicated waterproof cover is necessary to block both liquid water and ambient moisture transfer.
How do I prevent mold from forming under the drum cover?
To prevent mold from forming under your drum cover, you must ensure that no moisture is trapped inside when you cover the kit. After a vigorous practice session, wipe down the drumheads, wooden hoops, and hardware with a dry microfiber cloth to remove sweat and condensation. Let the kit air out for at least 15 to 30 minutes before draping the cover over it.
Additionally, ensure your cover features built-in ventilation flaps to facilitate continuous air circulation. Place high-capacity silica gel canisters or moisture-absorbing bags inside the covered area, securing them away from direct contact with the wood finish. Regularly remove the cover on dry, sunny days to let both the kit and the cover breathe, preventing the stagnant conditions that mold requires to thrive.
Community discussion
Share your experience or ask a question. Comments are reviewed before publication.