
To start maintaining your guitar frets as a beginner luthier, you do not need expensive power tools or industrial machinery. The essential fret polishing tools you need are simple, manual, and highly controllable: a set of fretboard guards, a progression of fine abrasives (such as fret erasers or micro-mesh pads), low-tack masking tape, and basic dust-management tools like microfiber cloths. These tools allow you to safely remove oxidation, restore a mirror-like shine, and improve string-bending feel without risking damage to the delicate wood of the fretboard.
Core Fret Polishing Tools Every Beginner Needs
Fret guards, also known as fretboard shields, are thin strips of material with a central slot designed to expose a single fret while covering the surrounding wood. They act as a physical barrier, protecting the fretboard from accidental slips when you are working with abrasive materials. For a beginner, these are indispensable because they allow you to focus on polishing the metal wire without constantly worrying about scratching the wood grain.
When choosing fret guards, you will typically encounter metal and plastic options. Metal guards, usually made of thin stainless steel, are highly durable and resist wear from sandpaper or erasers. However, you must inspect their edges before use; cheap metal guards can sometimes have sharp burrs from the manufacturing process that can scratch your fretboard if pressed down too hard. Plastic guards are softer and safer for the wood, but they wear out quickly and can melt if you generate too much friction heat.
Products mentioned in this guide
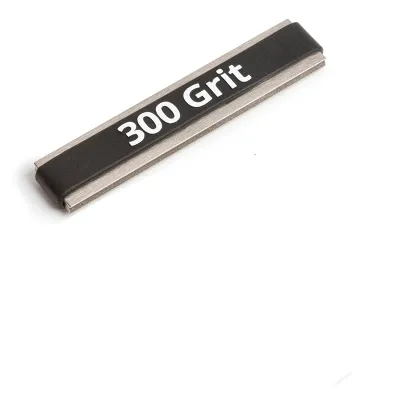
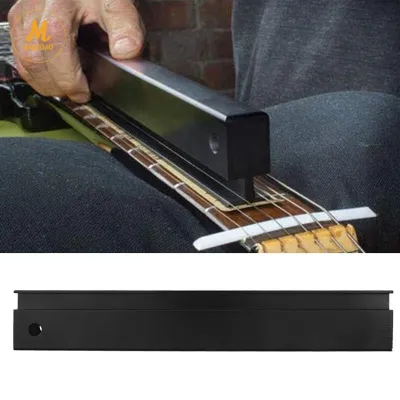
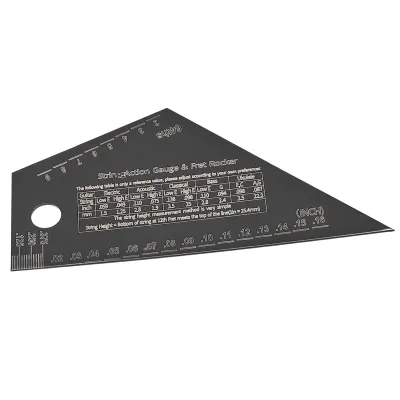
81 Lazada user ratings
While it can be used to check the frets for high spots, the marks cannot be used to identify the action of the guitar. The mark lines are ma…Read full reviewShow less
While it can be used to check the frets for high spots, the marks cannot be used to identify the action of the guitar. The mark lines are marked too high from the flat surface and only the small ruled part can be used to check the action properly.
recieved earlier than expected,ok naman ang packaging, but di ko pa nagagamit, mukhang ok naman at straight, mag update ako ng review pag na…Read full reviewShow less
recieved earlier than expected,ok naman ang packaging, but di ko pa nagagamit, mukhang ok naman at straight, mag update ako ng review pag nagamit ko na.
maliit pala, mukhang ang laki kasi sa pics. looks very precise naman. I appreciate the string height measurements in mm and 64ths. happy for…Read full reviewShow less
maliit pala, mukhang ang laki kasi sa pics. looks very precise naman. I appreciate the string height measurements in mm and 64ths. happy for my purchase
💰Price:Perfect for luthiers and guitar enthusiasts, 🔨Durability:Essential tool for guitar maintenance, Price:affordable and awesome
This is quite nice, I'll be using it to check the frets of my guitars. Thanks
Prices are valid at publication and may change. Please refer to the product page for the latest price.
It is also crucial to check the thickness and slot width of your guards. The guard must sit completely flush against the fretboard surface. If the slot is too narrow for your specific fret wire, the guard will sit proud of the fretboard, leaving a gap where abrasive dust can collect and scratch the wood. Conversely, if the slot is too wide, it will expose the wood directly adjacent to the fret, defeating the purpose of the shield.
Abrasive mediums are the tools that do the actual work of removing tarnish and polishing the metal. For beginners, the safest and most effective options are fret erasers, micro-mesh pads, or ultra-fine polishing papers. Unlike standard sandpaper, these mediums are designed to conform to the rounded shape of the fret wire, ensuring an even polish across the entire crown.
Fret erasers are rubber blocks impregnated with abrasive grit. They are incredibly popular for beginners because they are easy to hold, wear down slowly, and provide excellent control. They typically come in color-coded sets ranging from coarse grits for removing heavy oxidation to ultra-fine grits for final polishing.
Micro-mesh pads and polishing papers offer a similar level of control but use a cushioned backing or highly flexible sheets. These are excellent for wrapping around your finger or a small wooden block, allowing you to feel the contour of the fret as you work. When selecting these abrasives, always look for products that specify their grit levels clearly, as a structured progression is key to achieving a smooth, scratch-free finish.
While fret guards are excellent for quick touch-ups, low-tack masking tape is the gold standard for comprehensive fretboard protection. Before starting any major polishing job, you should tape off the entire fretboard, leaving only the metal frets exposed. This provides complete coverage and ensures that no stray abrasive or metal dust can contact the wood.
Using the correct type of tape is critical to protecting your instrument. Standard high-tack masking tape or duct tape should never be used on a guitar. The strong adhesive can pull up wood fibers from dry, unsealed fretboards or peel away delicate lacquer finishes on maple necks. Instead, opt for low-tack painter’s tape, which is designed to release cleanly without leaving sticky residue or damaging the surface.
Beyond protecting the wood, low-tack tape serves a practical dual role in your workspace. You can use it to secure the guitar strings out of the way if you choose not to remove them completely during a quick maintenance session. By gently pulling the strings to the side of the neck and taping them to the back of the neck, you create a clear, unobstructed work area.
Polishing metal frets generates a significant amount of microscopic metal dust and abrasive residue. If left unmanaged, this fine dust can settle into the open pores of unsealed fretboard woods, turning them a dull grey or black. Even worse, because guitar pickups contain powerful magnets, loose metal dust can be drawn directly into the pickup coils, potentially causing short circuits or permanent damage over time.
To prevent these issues, a beginner’s kit must include dedicated dust-management tools. A soft-bristle brush, such as a clean makeup brush or a soft paintbrush, is perfect for gently sweeping metal particles off the fretboard and away from the pickups. Always brush away from the body of the guitar, and consider covering your pickups with a piece of low-tack tape before you begin.
A high-quality microfiber cloth is the final piece of the dust-management puzzle. Microfiber is uniquely suited for this task because its tiny fibers trap dust rather than just pushing it around. Use one cloth specifically for wiping down the frets after each polishing step, and keep a separate, clean cloth for applying any final conditioners or wiping down the guitar body.
Optional Upgrades for Advanced Finishing
As you gain experience and confidence with manual polishing, you may want to explore advanced finishing tools to speed up the process or tackle severe tarnish. However, these upgrades come with increased risks that require careful handling and a solid understanding of guitar materials.

Polishing compounds and liquid metal polishes can deliver an incredibly bright, mirror-like finish, but they must be used with extreme caution. Many commercial metal polishes contain harsh chemicals or ammonia, which can react negatively with nickel-silver frets or damage plastic binding and wood finishes. If you choose to use a liquid compound, verify that it is specifically formulated for musical instruments and is compatible with your fretboard wood. Unsealed, porous woods like rosewood can easily absorb liquid polishes, leaving unsightly white residue trapped in the grain that is nearly impossible to clean out.
Rotary tools equipped with felt polishing wheels are another common upgrade, but they are generally not recommended for beginners. The high rotational speed of a power tool generates intense friction heat almost instantly. This heat can easily soften the glue holding the fret in the slot, causing the fret to lift and ruin the guitar’s playability. It can also melt plastic fretboard binding or scorch the wood. Until you have mastered manual polishing and understand how quickly heat builds up, it is best to stick to hand tools.
It is also vital to distinguish polishing tools from leveling and crowning tools. Polishing is a purely cosmetic and tactile process that removes surface tarnish and minor scratches to make the frets feel smooth. It will not fix uneven fret heights, fret buzz, or deep divots worn into the metal by the strings. Addressing those structural issues requires specialized leveling beams, crowning files, and fret rockers. Confusing polishing pads with leveling tools can lead to over-polishing, which can accidentally flatten your fret crowns and ruin the guitar’s intonation.
How to Select the Right Abrasives for Your Guitar
Selecting the right abrasives requires understanding how different materials interact and planning a logical progression to achieve the best results safely. The goal is to gradually refine the surface of the metal, moving from coarse grits that remove oxidation to ultra-fine grits that polish the surface to a high shine.
A proper grit progression logic is essential for a scratch-free finish. If you start with a coarse abrasive to remove heavy rust, you will leave visible scratches in the metal. If you skip directly to an ultra-fine polishing pad, the fine abrasive will only shine the tops of those scratches, making them stand out even more under light. Instead, you must transition smoothly through intermediate grits, ensuring that each step completely removes the scratch pattern left by the previous grit.
You must also adjust your abrasive choices based on the hardness of your guitar’s fret wire. Traditional nickel-silver frets are relatively soft and respond quickly to standard fret erasers and fine sandpapers. However, many modern guitars feature stainless steel frets. Stainless steel is extremely hard and highly resistant to wear, meaning standard polishing papers will wear out quickly and require significantly more effort. For stainless steel, you may need to invest in highly durable diamond-coated polishing sheets or specialized heavy-duty micro-mesh pads to achieve the same mirror finish.
Finally, adapt your polishing approach to match your fretboard’s finish. Sealed fretboards, such as gloss-finished maple, require absolute precision because any slip with an abrasive will scratch the shiny lacquer, requiring a difficult and costly finish repair. For these necks, taping off the entire fretboard is mandatory. Unsealed fretboards, like rosewood or ebony, are more forgiving of minor slips but have open wood pores that easily trap fine metal dust. Ensuring your tape is pressed down firmly around the base of each fret is crucial to preventing dust from embedding into these open pores.
Building a Budget-Friendly Starter Kit
Building your first luthier kit does not have to be an expensive endeavor. By focusing on manual control and sourcing smart, generic alternatives, you can assemble a highly effective toolkit that delivers professional results without a premium price tag.
Prioritizing manual control is the best way for a beginner to develop the tactile feedback necessary for high-quality work. When you polish by hand, you can feel the resistance of the metal change as the oxidation is removed and the surface becomes smoother. This physical feedback teaches you how much pressure to apply and helps you avoid removing excessive fret material or accidentally flattening the rounded crown of the fret, which is critical for maintaining accurate intonation.
To keep costs low, look for generic alternatives at local hardware stores or automotive supply shops. Ultra-fine wet-and-dry sandpaper is widely available and highly affordable, performing just as well as specialized luthier papers when used carefully. Low-tack blue painter’s tape is also easily sourced and serves as an excellent, budget-friendly alternative to expensive specialty tapes.
Once you have assembled your kit, proper tool maintenance and storage will extend its lifespan and prevent cross-contamination. Metal dust quickly clogs the surface of fret erasers and micro-mesh pads, reducing their cutting efficiency. Clean your abrasives regularly by wiping them with a dry cloth or tapping them against a hard surface to dislodge the dust. Store your polishing tools in a dedicated, sealed container—such as a plastic organizer box—to keep them clean and prevent wood dust, oils, or grease from other projects from contaminating your polishing surfaces.
Frequently Asked Questions (FAQ)
Can I use regular household metal polish on guitar frets?
Using regular household metal polish on guitar frets is generally not recommended due to the high risk of damaging the instrument. Many common household cleaners contain ammonia or other harsh chemical solvents. While these chemicals are highly effective at cleaning household brass or steel, they can chemically react with the nickel-silver alloy in guitar frets, causing discoloration or weakening the metal over time.
Furthermore, liquid polishes can easily seep into the wood grain of unsealed fretboards or run under plastic binding, causing swelling, discoloration, or adhesive failure. If you must use a liquid polish, ensure it is a specialized, ammonia-free formula designed specifically for musical instruments. Always apply a tiny amount to a microfiber cloth first rather than applying it directly to the neck, and wipe away any residue immediately.
How often should a beginner polish guitar frets?
The frequency of fret polishing depends largely on your playing habits and environmental conditions. In humid tropical climates like the Philippines, moisture and sweat accelerate the oxidation process, causing nickel-silver frets to tarnish much faster than they would in dry climates. As a general rule, you should polish your frets when you notice visual dullness, dark tarnish, or a rough, scratchy feeling when bending strings.
For most players, a light polish during every second or third string change is sufficient to maintain optimal playability. Avoid over-polishing with aggressive, coarse abrasives during routine maintenance, as this can unnecessarily wear down the height of your frets over time. For regular upkeep, a quick wipe with a very fine polishing cloth or a high-grit fret eraser is all that is needed to keep your frets smooth and shiny.
Community discussion
Share your experience or ask a question. Comments are reviewed before publication.