
Getting a new BOSS GT-1 multi-effects processor is an exciting step for any guitarist looking to explore a vast library of tones in a compact, portable format. However, unboxing the pedal is only the first part of the equation. To hear your guitar through the unit, control your effects in real time, and keep the device running reliably, you need a specific set of supporting accessories. Out of the box, the processor does not include all the cables, power adapters, or monitoring gear required for every setup scenario.
Preparing these essential items beforehand ensures you can plug in, configure your signal chain, and start playing without unexpected interruptions. In tropical environments where humidity is high and local power grids can experience voltage fluctuations, choosing the right accessories is also a matter of protecting your digital investment. By selecting compatible, high-quality gear, you preserve your tone and prevent hardware damage over years of practice and performance.
Powering Your Rig: Choosing the Right Power Supply
Powering your multi-effects processor correctly is the single most important factor in ensuring stable, noise-free operation. The processor requires a steady 9-volt direct current (DC) power source, but not all 9V adapters are created equal. Before plugging any power supply into your unit, you must verify its polarity. The device requires a center-negative configuration, which is typically represented on the adapter’s label by a diagram showing a negative sign pointing to the center dot of a circle. Connecting a center-positive adapter can trigger protective fuses or permanently damage the internal digital circuitry.
Products mentioned in this guide
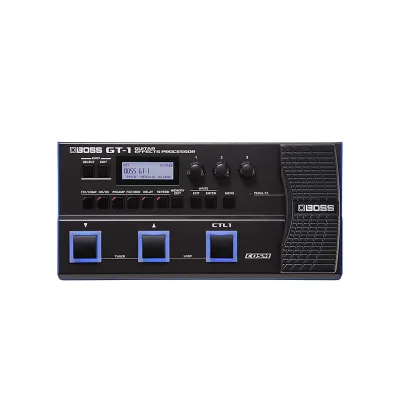
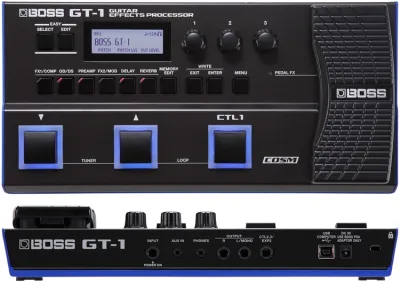
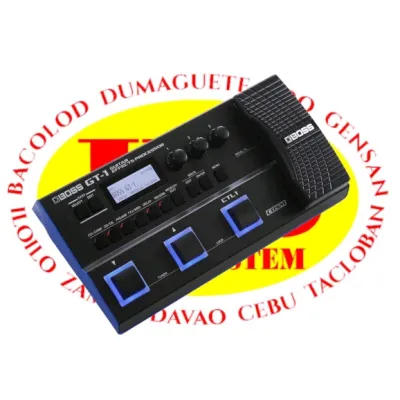
Prices are valid at publication and may change. Please refer to the product page for the latest price.
In addition to voltage and polarity, you must check the current delivery, measured in milliamperes (mA). The power supply must be capable of delivering at least the minimum current draw specified in the official user manual, which is typically around 150 mA. Using an adapter with an insufficient mA rating can cause the processor to reboot unexpectedly, freeze during patch changes, or exhibit high-pitched digital hum. It is perfectly safe to use an adapter with a higher current rating (such as 500 mA or 1,000 mA), as the pedal will only draw the current it needs, but the voltage must remain exactly 9V.
Physical plug dimensions are another critical detail that determines connection stability. The power input jack on the unit is designed for a standard barrel plug with a 2.1 mm inner diameter and a 5.5 mm outer diameter. A loose-fitting plug can cause intermittent power loss if the pedal is bumped during a performance, which can interrupt your signal mid-song. If you live in an area prone to electrical storms or power surges, plugging your AC adapter into a high-quality surge protector or voltage regulator is a wise precaution to shield the sensitive digital processor from grid spikes.
While an AC adapter is ideal for continuous home use and studio recording, the unit also supports battery operation using four standard AA alkaline batteries. This battery option provides excellent portability for outdoor busking or quick practice sessions where wall outlets are unavailable. However, digital processors consume battery power much faster than traditional analog pedals. To avoid sudden power failure during a performance, it is best to use batteries primarily as a backup or for short sessions, and always keep a fresh spare set in your gig bag.
Routing Your Signal: Essential Instrument Cables
To get your guitar signal into the processor and out to your amplification system, you need reliable, shielded instrument cables. These connections require standard 1/4-inch TS (Tip-Sleeve) unbalanced cables. The “Tip” carries the hot audio signal, while the “Sleeve” acts as the ground and shield. Using unshielded speaker cables instead of instrument cables will introduce massive amounts of electromagnetic interference, resulting in a loud buzz that ruins your tone.

Cable length plays a significant role in maintaining high-frequency clarity. Every foot of guitar cable adds capacitance to your signal chain, which gradually rolls off the high-end frequencies of your guitar tone, making it sound dull or muddy. For home practice or small studio setups, a 3-meter (10-foot) cable from your guitar to the pedal input, and another 3-meter cable from the pedal output to your amplifier, is generally optimal. If you perform on larger stages, you may need to step up to 6-meter (20-foot) cables, but you should avoid excessively long runs unless you are using a dedicated buffer or active pickups.
When planning your physical layout, consider the shape of the cable connectors. Straight connectors are highly universal, but they stick out significantly from the rear panel of the unit, making the setup vulnerable to accidental kicks or cable strain. Right-angle connectors lie flat against the chassis, which helps protect the input and output jacks from physical damage and allows you to position the pedal closer to walls or the edge of a pedalboard. However, because the jacks on the rear panel are positioned close together, you must verify that the molded housings of your right-angle plugs do not block adjacent ports, such as the headphone or auxiliary inputs.
In humid tropical climates, cable maintenance becomes even more critical. High humidity can accelerate the oxidation of copper wire and metal jacks, leading to crackling noises, signal dropouts, or a degraded connection over time. Choosing cables with gold-plated connectors can help resist corrosion, as gold does not oxidize as easily as nickel or silver. Additionally, storing your cables loosely coiled rather than tightly wrapped prevents internal wire breakage and extends the lifespan of your signal routing setup.
Expanding Real-Time Control: Expression Pedals and Footswitches
While the processor features a built-in expression pedal, expanding your setup with external controllers unlocks a much higher level of real-time performance flexibility. The rear panel includes a dedicated jack labeled CTL2,3/EXP2, which allows you to connect either an external expression pedal or up to two external footswitches. This expansion is incredibly useful for toggling individual effects on and off, tapping in delay tempos, or adjusting parameters like delay feedback and gain on the fly without bending down.
If you decide to connect an external expression pedal, you must use a 1/4-inch TRS (Tip-Ring-Sleeve) cable rather than a standard TS instrument cable. A TRS cable features two bands on the plug, allowing it to carry the control voltage back and forth between the pedal and the processor. Using a standard TS cable will result in the processor failing to recognize the pedal’s movement. Before purchasing a third-party expression pedal, verify its compatibility and check if it features a polarity or resistance switch, as different manufacturers use different wiring standards for their control pots.
For players who prefer discrete switches for patch navigation or effect toggling, external footswitches are the ideal solution. You must choose between momentary (unlatched) and latching footswitches. The processor is designed to work primarily with momentary footswitches, which send a quick pulse when pressed, allowing the unit’s internal software to handle the toggling logic. A latching switch, which physically clicks and stays in place, will not function correctly for features like tap tempo or momentary effect bursts. Popular momentary options include compact single switches or dual-switch units.
To connect two separate external footswitches to the single CTL2,3/EXP2 jack, you will need a 1/4-inch TRS-to-dual-TS insert cable, often referred to as a Y-cable. The TRS end plugs into the processor, while the two TS ends plug into the individual footswitches, splitting the control signals for CTL2 and CTL3. Once connected, you must access the unit’s system menu to assign specific functions to these external controls, ensuring they match your playing style and patch requirements.
Monitoring Your Tone: Headphones and Direct Outputs
Whether you are practicing silently at home or routing your signal directly to a sound system, having the right monitoring gear is essential for hearing the true character of your programmed patches. For silent practice, the unit features a dedicated headphone output. It is important to note that this port is a 3.5 mm (1/8-inch) stereo miniature jack. Many professional studio headphones come with a larger 6.3 mm (1/4-inch) plug, meaning you may need a high-quality gold-plated adapter to establish a secure connection.
When selecting headphones for your processor, pay close attention to their impedance rating, measured in ohms. High-impedance studio headphones (such as those rated at 250 ohms or higher) require a powerful headphone amplifier to drive them properly. If plugged directly into the processor’s headphone jack, they may sound quiet, thin, and lacking in bass response. For the best results without external amplification, choose headphones with a lower impedance rating, typically between 32 and 80 ohms, which can easily be driven to full, rich volume levels by the pedal’s internal headphone amp.
For recording or live performances, you will want to route your audio directly into an audio interface, mixing console, or PA system. The main L/Mono and R outputs deliver a line-level signal that can be connected using standard 1/4-inch TS cables. If you are running a long cable distance to a mixing board, passing these outputs through a direct box (DI box) to convert the signal to a balanced XLR connection is highly recommended to eliminate ground loops and stage noise. Always remember to adjust the “Output Select” setting in the processor’s system menu to match your destination, choosing “Line/Phones” for direct recording or PA systems, and the appropriate amplifier setting when plugging into a physical guitar amp.
Building Your Accessory Checklist: Verification Before Purchase
Before finalizing your accessory purchases, creating a structured verification checklist will save you time, money, and frustration. It is easy to get caught up in buying cosmetic upgrades or niche add-ons, but prioritizing your core power and signal connections is the key to a reliable rig. Investing your budget in high-quality, durable essentials prevents common performance issues like signal dropouts, excessive noise, and premature hardware failure.
When budgeting for your setup in the Philippines, allocating approximately ₱1,500 to ₱3,500 can secure a highly reliable, noise-filtered power supply and a pair of well-shielded instrument cables. While budget-grade cables costing a few hundred pesos are tempting, they often feature thin shielding and fragile solder joints that quickly fail under the stress of regular use and tropical humidity. Prioritizing a robust power source and durable cables first ensures your processor operates at its peak performance, leaving optional controllers like external expression pedals or carrying cases for future upgrades.
Always cross-reference the physical and electrical specifications of any third-party accessory with the official manufacturer guidelines before making a purchase. Check the barrel size of power adapters, the wiring configuration of expression pedals, and the plug types of your headphones. By taking the time to verify these details, you build a cohesive, reliable, and high-performing guitar rig that is ready to deliver excellent tones the moment you plug in.
Frequently Asked Questions (FAQ)
Can I use a generic power adapter instead of the official brand?
Yes, you can use a generic power adapter, but you must exercise extreme caution. The adapter must match the exact specifications required by the processor: a 9V DC output, a center-negative polarity configuration, and a current delivery of at least 150 mA (higher mA is fine, but higher voltage is dangerous). Using an adapter with incorrect voltage or center-positive polarity can permanently destroy the digital circuitry of your unit. Always inspect the physical label on the generic adapter to confirm these electrical ratings and ensure the barrel plug fits snugly without wobbling.
Do I need a special cable to connect an expression pedal?
Yes, connecting an external expression pedal to the CTL2,3/EXP2 jack requires a 1/4-inch TRS (Tip-Ring-Sleeve) cable. Unlike standard instrument cables, which only have a tip and a sleeve, a TRS cable has an additional ring contact that allows the processor to send a reference voltage to the expression pedal and read the return signal as you sweep the pedal. Using a standard TS instrument cable will prevent the expression pedal from communicating with the processor, rendering the external controller non-functional.
What is the best way to power the unit for outdoor busking?
For outdoor busking or mobile performances, powering the unit with four standard AA alkaline batteries is the most practical solution. According to the official manual, a fresh set of alkaline batteries typically provides several hours of continuous operation, though this can vary depending on your usage of the USB port and backlighting. To ensure uninterrupted performances in warm, humid outdoor conditions, always carry a spare set of fresh batteries, keep the unit shaded from direct sunlight to prevent overheating, and avoid using low-voltage rechargeable batteries unless they explicitly meet the voltage thresholds required for stable digital processing.
Community discussion
Share your experience or ask a question. Comments are reviewed before publication.