
A 7-year-old child stands at a unique developmental stage where coordination, rhythm, and motor skills are rapidly expanding, making it an ideal age to start learning the drums. However, placing a child of this age behind a standard, adult-sized drum kit can quickly lead to frustration, physical strain, and poor playing habits. To set a young beginner up for success, they require a junior-sized drum set specifically engineered to match their physical proportions. The ideal setup typically features a 16-inch or 18-inch bass drum, a simplified three- to five-piece configuration, and highly adjustable hardware that can be lowered to accommodate their shorter reach. By selecting a kit with these specific dimensions, you ensure that your child can sit with proper posture, reach every drumhead and cymbal comfortably, and develop the correct muscle memory needed for long-term musical growth.
Why Proper Sizing and Ergonomics Matter for Young Beginners
At seven years old, the average child stands between 115 and 125 centimeters tall, with a relatively short arm span and leg stride. When seated, their feet must rest flat on the floor or comfortably on the pedals while their thighs remain roughly parallel to the ground. If a drum kit is too large, the child is forced to stretch their legs excessively to reach the bass drum pedal and hi-hat, which destabilizes their core balance and compromises their posture.
Using a full-size adult drum kit presents significant physical risks for a young player. Because the bass drum on an adult kit is typically 22 inches in diameter, the mounted rack toms sit much higher and further away. To strike them, a seven-year-old must constantly overreach, raising their shoulders and straining their lower back. This unnatural posture can lead to rapid fatigue, muscle soreness, and even repetitive strain injuries over time, turning what should be a fun creative outlet into a physically exhausting chore.
Products mentioned in this guide
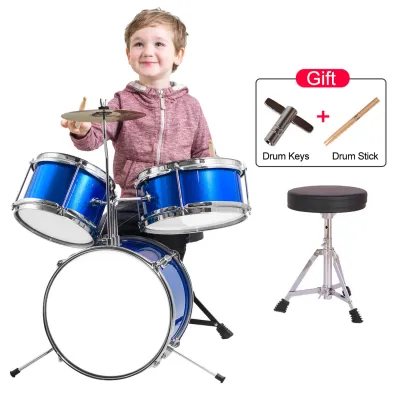
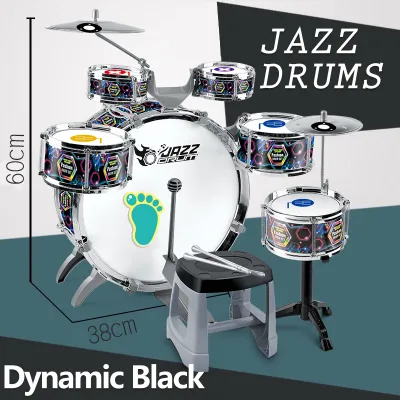
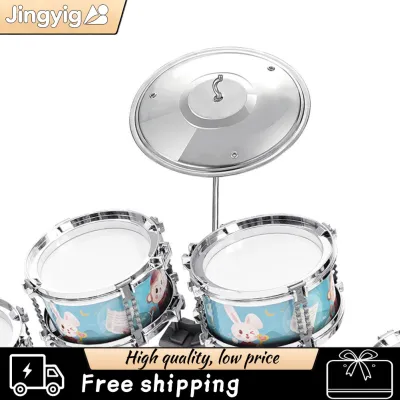
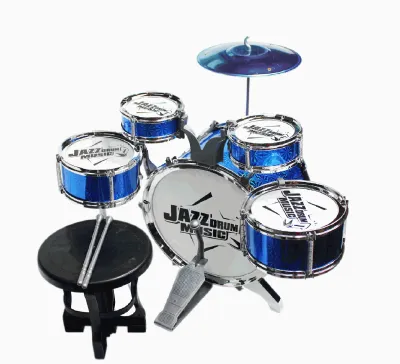

Prices are valid at publication and may change. Please refer to the product page for the latest price.
Conversely, a properly scaled junior drum kit encourages the development of correct stick grip and pedal techniques from day one. When the drums are positioned at the correct height and angle, the child can utilize their wrists and fingers to control the drumsticks rather than relying on their entire arms. This precise control is essential for learning fundamental rudiments and maintaining consistent timing. Furthermore, a comfortable seating position allows them to operate the foot pedals with a relaxed ankle motion, building the necessary leg coordination without straining their joints.
Ideal Drum Set Dimensions and Configurations for a 7-Year-Old
Finding the sweet spot in drum kit dimensions requires looking closely at the diameter and depth of each shell. The bass drum serves as the anchor of the entire set, and its size directly dictates how low the rest of the drums can be positioned. For a seven-year-old, a bass drum with a diameter of 16 inches is generally the most versatile option, though an 18-inch drum can also work well if the child is slightly taller than average. These smaller diameters keep the top of the bass drum low enough so that the mounted rack toms can be angled downward within easy arm’s reach.

A simplified drum configuration is highly recommended for early learning stages. While a massive drum kit with multiple toms and cymbals might look exciting, it can easily overwhelm a young beginner. A simplified setup allows the child to focus on the core elements of rhythm—the snare, the bass drum, and a single cymbal or hi-hat—before trying to navigate a complex array of percussion instruments. This streamlined approach helps them master basic beats and transitions more quickly, boosting their confidence.
Cymbals must also be proportionally sized and weighted for smaller players. Standard adult cymbals are often too thick and heavy, requiring a forceful strike to produce a full sound, which can damage lightweight junior drumsticks or strain a child’s wrist. Junior kits should feature smaller, thinner cymbals, such as a 10-inch crash or a set of 10-inch hi-hats. These lighter cymbals respond beautifully to gentler strikes, allowing the young drummer to explore different dynamics and tonal colors without needing to hit the instrument with excessive force.
Shell Sizes and Piece Count
When evaluating product specification sheets, look for specific measurements that define a true junior drum kit. A standard 5-piece junior configuration typically includes a 16″ x 10″ bass drum, a 10″ x 5″ snare drum, two rack toms (usually 8″ x 5″ and 10″ x 6″), and a 12″ x 10″ floor tom. If you prefer an even simpler starting point, a 3-piece kit consisting of a bass drum, a snare drum, and a single rack tom is an excellent alternative that minimizes distractions while still providing the essential tools for rhythm training.
The snare drum is the centerpiece of any drum kit and must be positioned directly between the child’s knees. A 10-inch or 12-inch snare drum is ideal for a seven-year-old, as it fits comfortably within their narrow leg span without forcing their knees too far apart. This allows them to sit naturally and maintain a stable, balanced posture while playing.
Before making a purchase, always verify the manufacturer’s age and height recommendations on the packaging or product listing. While many kits are labeled generally as “kids’ drums,” some are designed for toddlers aged three to five, while others are built for older children. Checking the exact shell dimensions and comparing them to your child’s height is the most reliable way to ensure the kit will provide a comfortable fit and last for several years of practice.
Adjustable Hardware and Drum Throne
The drum throne, or seat, is arguably the most critical piece of hardware in the entire setup. It must feature a robust, adjustable height mechanism that can be lowered to at least 30 to 35 centimeters from the floor. This low setting ensures that a seven-year-old can sit with their feet flat on the pedals while keeping their knees bent at a comfortable 90-degree angle. Avoid cheap, non-adjustable stools, as they can force the child into a hunched position that hinders their physical development.
All supporting stands—including the snare stand, cymbal stands, and hi-hat stand—must offer a wide range of height adjustments. The snare stand should be capable of holding the drum low enough to sit just below the child’s belt line when they are seated. Similarly, the hi-hat stand must be adjustable so that the top cymbal sits roughly 10 to 15 centimeters above the snare drum, allowing the child to play with crossed hands without their sticks colliding.
Hardware stability is another crucial safety consideration. Junior hardware should feature double-braced legs and slip-resistant rubber feet to prevent the stands from sliding or tipping over during energetic practice sessions. While lightweight hardware is easier to move around, it must still possess enough weight and structural integrity to support the drums and cymbals securely, especially when placed on smooth flooring.
Essential Features to Look for in a Junior Drum Kit
Beyond the physical dimensions of the drums, several key features and accessories can significantly impact a young beginner’s playing experience. Drumsticks, for instance, must be matched to the size of the child’s hands. Standard 5A or 2B sticks are often too thick and heavy for a seven-year-old to grip comfortably, leading to hand fatigue and tension. Instead, look for lightweight sticks specifically designed for children, such as 7A models or dedicated junior sticks, which feature a narrower diameter and a shorter length for better balance and control.
The foot pedals on a junior kit should feature adjustable spring tension. Children have less leg strength and weight than adults, so a pedal with a stiff, heavy spring will be difficult for them to depress consistently. By loosening the spring tension on the bass drum and hi-hat pedals, you can make the action much lighter and more responsive, allowing the child to develop a smooth, relaxed foot technique without straining their ankles or calves.
Material safety and durability are paramount when choosing instruments for children. Inspect the kit for rounded hardware edges, smooth tension rods, and high-quality finishes that are free from toxic chemicals or off-gassing odors. The drum shells should be constructed from durable woods, such as poplar or basswood, which offer a warm, pleasant tone while remaining lightweight enough to transport easily. Additionally, ensure that the drumheads are durable enough to withstand enthusiastic play without tearing or stretching out of tune too quickly.
Acoustic vs. Electronic: Which Setup Fits Your Home?
Deciding between an acoustic and an electronic drum kit is one of the most important choices parents must make. Acoustic drum kits offer an authentic tactile experience, with natural stick rebound, organic resonance, and a physical presence that many young players find highly engaging. However, they are inherently loud and require a dedicated space where the sound will not disturb family members or neighbors. In tropical climates like the Philippines, where homes often feature open windows, thin walls, or close proximity to neighbors in subdivisions and condominiums, the high volume of an acoustic kit can quickly become a source of friction.
Electronic drum kits offer an excellent, low-noise alternative that is highly suited for modern home environments. These kits feature rubber or mesh drum pads that produce very little acoustic noise when struck, allowing the child to practice quietly using a pair of headphones. Many electronic modules also include built-in metronomes, practice songs, and interactive coaching functions that can make learning more engaging and structured for a young beginner.
When comparing the two options, consider the physical footprint and portability as well. Electronic kits are generally more compact and can often be folded up and stored in a closet when not in use, making them ideal for smaller living spaces. However, they do require access to an electrical outlet and a compatible amplifier or headphones to be heard. Acoustic kits, while larger and heavier, are completely self-contained and do not rely on electronics, making them highly durable and always ready to play.
How to Build Your Shortlist: A Step-by-Step Buying Checklist
To find the perfect drum set for your seven-year-old, it is essential to look past flashy marketing claims and focus on verifiable specifications. Start by creating a shortlist of potential kits and verifying their exact dimensions in the product manual or official specification sheet. Do not rely solely on the product title or generic age labels, as these can sometimes be misleading. Ensure that the bass drum, snare, and throne heights align with your child’s current physical measurements.
Next, clarify exactly what is included in the box. Some junior drum sets are sold as complete packages that include the shells, hardware, cymbals, throne, and even a pair of sticks, while others are sold as “shell packs” that require you to purchase the hardware and cymbals separately. Buying a complete all-in-one package is usually the most cost-effective and convenient option for beginners, as it ensures that all components are compatible and ready to assemble right out of the box.
When purchasing online or from a local music store, pay close attention to the return policy and warranty terms. A reliable warranty protects your investment against manufacturing defects, while a flexible return policy allows you to exchange the kit if it turns out to be too large or too small for your child. Additionally, consider the potential resale value of the kit; high-quality junior drum sets from reputable manufacturers tend to hold their value well, allowing you to recoup some of your initial investment when your child eventually outgrows the kit and is ready to transition to a full-size setup.
Finally, budget for essential accessories that may not be included in the standard package. A high-quality drum rug is highly recommended to keep the bass drum and pedals from sliding forward on smooth floors, such as tile or polished wood. If you choose an acoustic kit, you may also want to invest in a pair of high-quality hearing protection earmuffs to safeguard your child’s hearing during loud practice sessions. By carefully planning your purchase and verifying every detail, you can provide your young drummer with a safe, comfortable, and inspiring instrument that will fuel their musical journey for years to come.
Frequently Asked Questions (FAQ)
Can a 7-year-old play on a full-size adult drum set?
While a seven-year-old can technically sit behind an adult-sized drum kit, doing so requires significant physical compromises that can hinder their learning progress. The large shell sizes force the child to stretch their arms and legs to their absolute limits, leading to poor posture, muscle strain, and rapid fatigue. If you only have access to an adult kit, you can make temporary adjustments by lowering the snare and cymbal stands to their absolute minimum heights, placing the rack toms on a separate stand closer to the player, and using a raised platform for the bass drum pedal. However, these are temporary workarounds, and most children will not be physically ready to transition to a full-size kit comfortably until they reach a height of at least 150 centimeters, which typically occurs around age 11 or 12.
Do I need to buy extra soundproofing or muffling pads?
If you choose an acoustic drum kit, investing in some form of volume control is highly recommended to maintain peace in your household and neighborhood. Practice pads, rubber mute pads, or mesh drumheads can be placed over the acoustic heads and cymbals to drastically reduce the volume while still allowing the child to practice their stick movements and coordination. For a simple and cost-effective room adjustment, place the drum kit on a thick, heavy rug or a set of interlocking foam tiles; this helps absorb low-frequency vibrations that travel through the floor and walls. Additionally, it is always wise to check your local subdivision or condominium rules regarding acceptable noise levels and establish designated practice hours to ensure your child’s musical journey remains a positive experience for everyone.
Community discussion
Share your experience or ask a question. Comments are reviewed before publication.