
A beginner drummer needs a hi-hat stand that balances reliable stability with smooth pedal action, without the premium cost of professional-tier hardware. Selecting the right stand prevents physical fatigue, protects your timing, and ensures your equipment survives the learning curve. By focusing on core mechanical features rather than aesthetic upgrades, you can secure a reliable piece of hardware that supports your practice sessions.
When you sit down at a drum kit, the hardware supporting your cymbals plays a critical role in your musical development. The hi-hat stand is unique because it requires constant, active physical interaction from both your hands and your feet. It is not merely a static holder; it is a dynamic mechanical link that translates your physical energy into musical expression. Choosing a stand that feels responsive and remains stable underfoot is essential for building proper muscle memory from day one.
Why Your First Hi-Hat Stand Impacts Your Playing
A poorly constructed hi-hat stand can quietly sabotage your progress and introduce unnecessary frustration into your daily practice sessions. One of the most immediate issues with low-quality hardware is base wobbling. When you strike the hi-hat cymbals with your sticks or step on the pedal, a flimsy stand will sway or slide across the floor. This movement shifts the physical target of your cymbals, forcing you to constantly adjust your reach and posture mid-groove. This instability disrupts your timing, makes fast footwork highly inaccurate, and prevents you from developing a consistent physical relationship with your drum kit.
Products mentioned in this guide
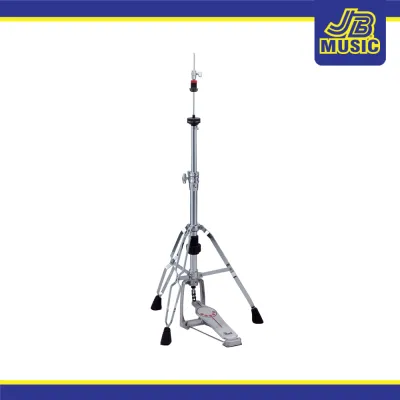
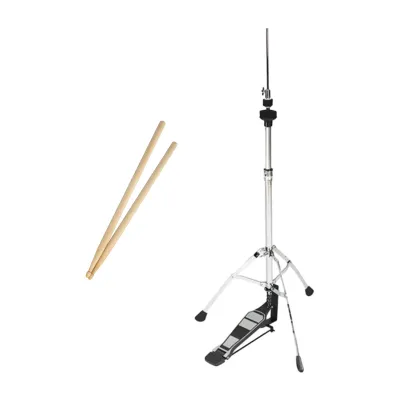
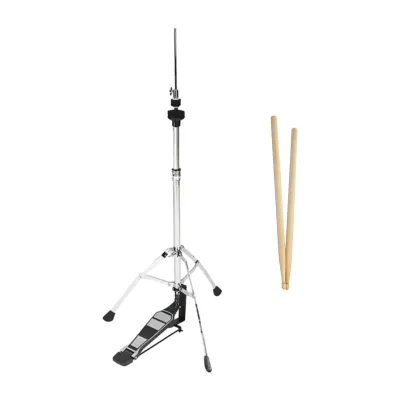
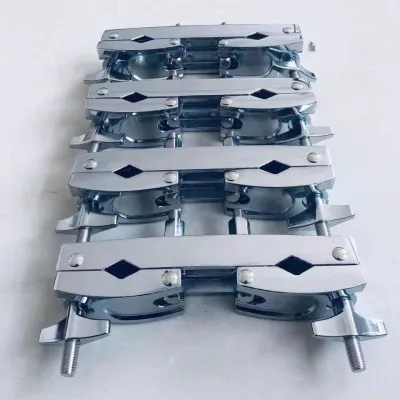
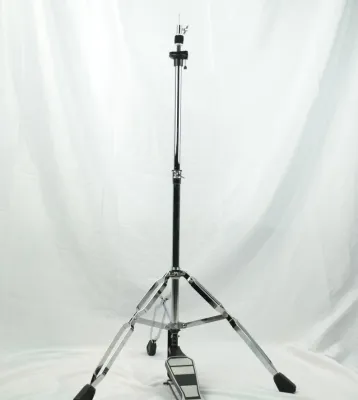
Prices are valid at publication and may change. Please refer to the product page for the latest price.
Furthermore, stiff or unresponsive pedal mechanisms can lead to physical strain and fatigue. A beginner’s leg muscles are still adapting to the unique motions required for drumming. If the pedal requires excessive force to close or fails to return quickly when you lift your foot, your shin and calf muscles must work twice as hard to compensate. This extra effort quickly leads to leg fatigue, cramping, and even shin splints, which can cut your practice sessions short. It also robs you of dynamic control, making it difficult to play quiet, subtle “chick” sounds or execute smooth cymbal splashes.
Finally, cheap entry-level hardware is highly susceptible to mechanical failure under aggressive play. Beginners often struggle with dynamic control, naturally hitting harder and stepping heavier as they try to keep time. Low-grade metal alloys, thin tubing, and poorly machined threads can easily strip, bend, or snap under this intense physical pressure. A broken clutch, a stripped tension rod, or a collapsed leg can instantly halt your practice session and force you to spend more money on replacement parts. Investing in a structurally sound stand from the start protects your practice time and ensures your gear survives the initial learning curve.
Core Selection Criteria for Beginner Hi-Hat Stands
Evaluating drum hardware can feel overwhelming due to the sheer variety of specifications and marketing terms used by manufacturers. However, by focusing on a few core mechanical and structural features, you can easily cut through the noise and find a stand that meets your needs. The primary areas to analyze are the leg bracing, the pedal drive mechanism, and the adjustability of the height and spring tension.

These components work together to determine how stable the stand feels on the floor, how smoothly the pedal responds to your foot, and how comfortably you can position the cymbals relative to your body. Understanding these fundamental design elements allows you to make an informed decision based on your physical space, playing style, and budget.
Single-Braced vs. Double-Braced Legs
The tripod base of a hi-hat stand is its primary source of stability, and the legs are typically categorized as either single-braced or double-braced. Single-braced legs feature a single strip of metal supporting each leg of the tripod. This design makes the stand significantly lighter, easier to fold up, and highly portable. If you have a strict budget, need to pack up your gear frequently for lessons, or practice in a space where you must tear down your kit after every session, a single-braced stand can be a practical, lightweight solution.
However, double-braced hardware is generally the safer and more reliable choice for most beginners. Double-braced legs feature two parallel metal strips welded together on each leg, which dramatically increases the structural rigidity of the tripod. This extra metal adds weight, lowering the stand’s center of gravity and making it highly resistant to tipping or wobbling, even when you are learning heavy dynamic accents or playing with aggressive foot techniques. While double-braced stands are heavier to transport, the added stability they provide on the floor is well worth the extra physical effort.
Chain Drive vs. Direct Drive Pedal Action
The drive mechanism is the physical connection that links the footboard to the vertical pull-rod inside the stand’s main tube. The most common design found on beginner and intermediate stands is the chain drive, which uses a single or double bicycle-style chain to pull the rod down when you step on the pedal. Chain drives are highly favored because they offer a traditional, familiar feel with a tiny amount of natural slack. This slight play makes the pedal feel forgiving and intuitive for beginners who are still developing their foot timing. Additionally, chain drives are incredibly durable and easy to maintain or replace if they eventually wear out.
In contrast, direct drive mechanisms use a solid, rigid metal link instead of a chain. This direct connection eliminates all slack, resulting in an incredibly fast, immediate response where the cymbals mimic your foot movement with absolute precision. While this sounds ideal, direct drive pedals can feel stiff and unforgiving to a beginner, as any slight tremor or mistake in your footwork is instantly transferred to the cymbals. Direct drive stands are also typically much more expensive and are generally geared toward advanced players who require extreme speed. For a beginner developing basic timekeeping and clean “chick” sounds, a chain-drive pedal offers the most balanced and supportive learning experience.
Tension Adjustment and Spring Mechanisms
Inside the main housing of the hi-hat stand sits a spring that pushes the pull-rod back up when you release your foot from the pedal. The resistance of this spring determines how much physical effort is required to close the cymbals and how quickly they spring back open. A quality beginner stand should feature an easily accessible, visible tension adjustment knob or collar. This allows you to adjust the pedal resistance on the fly to match your physical strength and playing preferences.
Without an adjustable spring mechanism, you are stuck with whatever default tension the factory set. If that tension is too high, your leg will tire quickly; if it is too low, the pedal will feel mushy, and the top cymbal will lag behind your foot movements, making fast open-and-close patterns nearly impossible. When evaluating a stand, try to test the pedal action to ensure the pull-rod moves smoothly through its housing without any grinding, clicking, or lateral play. Any friction in this mechanism will directly translate to a sluggish feel underfoot.
Matching the Stand to Your Practice Environment
Your physical practice environment should heavily influence the specific features you look for in a hi-hat stand. In the Philippines, many homes and apartments feature hard flooring surfaces such as ceramic tile, polished concrete, or terrazzo. On these smooth surfaces, a hi-hat stand can easily slide away from you as you play. To prevent this, look for a stand equipped with thick, high-quality rubber feet that can grip hard floors effectively. If you plan to practice on a carpeted surface or use a dedicated drum rug, look for a stand that features retractable metal spikes built into the rubber feet, which bite into the carpet fibers to lock the stand firmly in place.
Space constraints are another critical factor to consider, especially if you are setting up your drum kit in a small bedroom or a shared living space. A massive double-braced tripod base can take up a significant amount of floor real estate, making it difficult to position your snare drum stand and drum throne comfortably. You must ensure that the footprint of the hi-hat stand allows you to maintain an ergonomic seated posture, where your knees are bent at slightly more than a ninety-degree angle and your feet rest naturally on the pedals without twisting your hips.
Furthermore, high humidity levels common in tropical climates can accelerate the wear and tear on metal drum hardware. Excess moisture in the air can lead to rust on chrome plating and cause the lubrication inside the spring chamber and chain drive to dry out or attract dust. When setting up your practice space, try to keep your drum kit away from open windows where rain or humid air can directly blow onto the hardware. Regularly wiping down the metal tubes with a dry microfiber cloth and applying a drop of light machine oil to the chain and hinges will keep your stand operating smoothly for years.
Building a Budget-Friendly Shortlist
When browsing online music stores or visiting local instrument shops, it is easy to get distracted by high-end hardware packed with advanced features. To protect your wallet, it helps to establish a clear budget framework. For a reliable, entry-level hi-hat stand that offers genuine structural integrity, you should expect to spend between ₱3,000 and ₱6,000. Stands priced significantly below this range often compromise on metal quality, using thin, brittle castings that can easily crack under pressure or threads that strip after only a few adjustments.
To stay within this budget, you should be prepared to sacrifice premium features that are not essential for a beginner. For example, you do not need memory locks, which are metal collars that clamp onto the tubes to remember your exact height settings for quick setup at gigs. You can also skip adjustable footboard angles, heavy-duty dual-chain drives, and elaborate multi-bearing hinges. While these features are convenient for touring professionals, they do not significantly impact a beginner’s ability to learn basic techniques. Focus your budget entirely on securing a solid double-braced tripod, a smooth single-chain drive, and adjustable spring tension.
If you are building a drum kit from scratch, it is highly worth evaluating the value of bundled hardware packs. Many reputable manufacturers offer packages that include a hi-hat stand, a snare stand, a bass drum pedal, and one or two cymbal stands at a heavily discounted rate compared to buying each piece individually. However, if you only need to replace or upgrade your hi-hat stand, buying individually is the correct path. When ordering online, always verify the seller’s warranty terms, return policies, and shipping protections. Drum hardware is heavy and bulky, so ensure the seller packages the stand securely to prevent bent rods or dented tubes during transit across provinces.
Pre-Purchase Inspection and Compatibility Checklist
Before finalizing your purchase, you must perform a quick compatibility check to ensure the new hi-hat stand will physically integrate with your existing drum kit and cymbals. First, verify the top pull-rod thread size and the included clutch. Standard hi-hat cymbals feature a central hole that fits most modern clutches, but some vintage or specialty cymbals may have slightly smaller holes. Ensure the clutch included with the stand is compatible with your cymbals and features secure locking nuts that won’t slip loose while you play.
Next, check the maximum and minimum height extensions of the stand. Your hi-hat cymbals should ideally sit several inches above your snare drum, allowing your hands to cross over comfortably without your sticks colliding. If you are particularly tall or prefer a high seating position, ensure the stand’s upper tube can extend high enough to accommodate your reach without becoming unstable. Conversely, younger or shorter players must ensure the stand can be lowered sufficiently to maintain a comfortable playing angle.
Finally, consider your future hardware expansion plans. If you think you might want to add a double bass drum pedal to your setup down the road, it is highly beneficial to choose a hi-hat stand with a rotating tripod base. A rotating base allows you to loosen the tripod legs and spin them out of the way while keeping the pedal footboard in its proper position. This creates the necessary physical clearance to place the slave pedal of your double bass drum setup directly next to your hi-hat pedal. If the legs are fixed, you will struggle to position both pedals comfortably, forcing you to stretch your left leg at an awkward, unergonomic angle.
Frequently Asked Questions (FAQ)
Can I use a 2-leg hi-hat stand with a double bass pedal?
Yes, a 2-leg hi-hat stand is specifically designed to accommodate double bass drum pedals. By eliminating the front leg of the traditional tripod, a 2-leg design leaves a wide, open space directly next to the footboard, allowing you to place your double pedal’s slave unit without any physical interference. To maintain stability without the third leg, these stands feature a wider, heavier metal base plate under the footboard that acts as a counterweight. While 2-leg stands are highly convenient for double pedal players, they are often more expensive and heavier than standard 3-leg stands. If you have a 3-leg stand, ensuring it has a rotating leg base is a highly effective and budget-friendly alternative.
How do I stop my hi-hat stand from sliding on a hard floor?
The most effective way to stop a hi-hat stand from sliding on a hard floor is to place your entire drum kit on a dedicated drum rug or a heavy, rubber-backed utility mat. The rug provides a high-friction surface that prevents the stand’s rubber feet from slipping. If your stand is equipped with retractable metal spikes, you can extend them so they bite directly into the carpet fibers, locking the stand in place. If a rug is not an option, ensure the rubber feet on your stand are clean and free of dust, as dirty rubber loses its grip on tile or concrete. You can wipe the feet down with a damp cloth to restore their traction.
Is it worth buying a used hi-hat stand to save money?
Buying a used hi-hat stand can be an excellent way to secure high-quality hardware on a tight budget, but it requires a careful physical inspection. When evaluating a second-hand stand, check the vertical pull-rod to ensure it is perfectly straight; a bent rod will rub against the inner tube, causing a sticky, grinding pedal action. Inspect all the wing nuts, bolts, and height adjustment collars to ensure the threads are not stripped and that they clamp tightly without slipping. Finally, step on the pedal to test the hinge, chain, and spring. Listen closely for any squeaks, clicks, or grinding noises, and look for signs of rust or excessive wear on the chain links.
Community discussion
Share your experience or ask a question. Comments are reviewed before publication.