
A broken or worn-out guitar amplifier handle is a serious hazard that can lead to dropped equipment, costly electronic repairs, and potential personal injury. Because guitar amplifiers—especially vintage tube models—are exceptionally heavy and dense, their handles bear immense physical stress every time they are lifted. Finding the right replacement guitar amplifier handle in the Philippines requires a clear understanding of physical dimensions, load-bearing capacities, and material durability, particularly when dealing with the country’s high tropical humidity and temperature fluctuations.
Selecting a replacement is not merely a matter of finding an option that matches the aesthetic of your amplifier. You must verify precise mounting specifications, hardware compatibility, and structural integrity before making a purchase. This guide provides a comprehensive walkthrough on how to measure your amplifier cabinet, evaluate the best handle materials for your specific use case, source reliable parts locally, and execute a safe, secure installation.
How to Measure Your Amp for a Replacement Handle
To ensure a secure fit, you cannot rely on visual estimation or generic product descriptions. You must measure the precise physical specifications of your current setup before purchasing a new handle. Even minor discrepancies in mounting hole spacing or screw sizes can prevent a successful installation or compromise the structural safety of the handle.
Products mentioned in this guide
![[COD] SHPYHT SPORTS Vintage Style Leather Guitar Amplifier Handle With Screws Used For Guitar Amplifier Speaker Gear Handle Instrument](https://img.lazcdn.com/g/p/cf715ea2f8e616812cd2dffbadd109e2.jpg_400x400q80.jpg_.webp)
![[COD] CISWGE SPORTS Vintage Style Leather Guitar Amplifier Handle With Screws Used For Guitar Amplifier Speaker Gear Handle Instrument](https://img.lazcdn.com/g/p/874432406d02c75c192e06db4153e0a9.jpg_400x400q80.jpg_.webp)
![[COD] EHBqna Vintage Style Leather Guitar Amplifier Handle With Screws Used For Guitar Amplifier Speaker Gear Handle Instrument](https://img.lazcdn.com/g/p/b5107d45d3b3f5c127dcd92dc5e45015.jpg_400x400q80.jpg_.webp)
![[COD] AqToCna Ship within 24 hours 1Pc Black Plastic Speaker Side Handle For Cupboards Amplifier Speaker Case Guitar Replacement Side Durable Sound Handle](https://img.lazcdn.com/g/p/4f7ea2b73b2c28202e5d8e05a3c0d141.jpg_400x400q80.jpg_.webp)
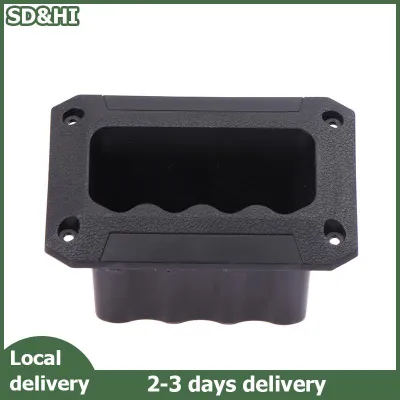
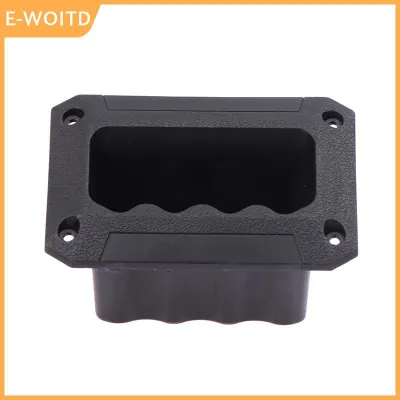
Prices are valid at publication and may change. Please refer to the product page for the latest price.
Measuring Hole Spacing (Center-to-Center Distance)
The most critical measurement is the center-to-center distance between the existing mounting holes on your amplifier cabinet. To measure this accurately, use a precise ruler or a digital caliper. Measure from the exact center of one screw hole to the exact center of the opposite screw hole.
Standard strap handles often feature a flexible metal insert that allows for slight adjustments, but rigid handles, such as dogbone or metal-reinforced designs, require absolute precision. Record this measurement in both millimeters and inches, as replacement parts are manufactured globally and may use either metric or imperial standards. If your replacement handle does not match this distance, you will be forced to drill new holes, which can weaken the cabinet structure.
Checking Screw Sizes, Thread Types, and Lengths
Amplifier cabinets generally utilize one of two mounting hardware systems: wood screws that bite directly into the cabinet walls, or machine screws that thread into metal T-nuts (also known as blind nuts) installed on the inside of the cabinet. You must determine which system your amplifier uses before buying replacement hardware.
If your amplifier uses machine screws, identify the thread type and pitch. American-made amplifiers (such as vintage Fender models) typically use imperial threads like #10-32 UNF, while European and Asian imports (such as Marshall, Orange, or Vox) commonly use metric threads like M5 or M6. Using the incorrect thread pitch will strip the internal T-nuts, requiring a difficult and time-consuming replacement of the internal hardware. Additionally, verify that the screw length matches the thickness of your cabinet wood plus the thickness of the new handle’s mounting plates; screws that are too short will not engage enough threads, while screws that are too long can damage internal chassis components or speaker cones.
Evaluating Cabinet Wood and Weight Capacity
The material of your amplifier cabinet dictates how much weight the mounting points can safely support. High-quality cabinets are constructed from dense birch plywood, which offers excellent screw retention and structural strength. Budget-friendly or modern solid-state amplifiers often use Medium-Density Fiberboard (MDF) or particle board. MDF and particle board are highly susceptible to crumbling, stripping, and moisture damage, meaning they require careful handling and often benefit from backing washers or T-nuts to distribute the load.
When evaluating a replacement handle, calculate the total weight of your amplifier and apply a safety margin of at least 1.5 to 2 times that weight. A standard 15-watt practice amp may only weigh 8 to 10 kilograms, but a dual-speaker tube combo can easily exceed 30 kilograms. When you lift and carry an amplifier, the upward acceleration increases the dynamic load on the handle, meaning a handle rated exactly for the static weight of the amp can fail during transport.
Identifying Mounting Plate Styles
Replacement handles come with various mounting hardware styles, and matching your existing style simplifies the installation process. The most common designs include:
- Standard Straight Strap: A flexible strap with metal end caps (caps or brackets) that cover the mounting screws.
- Dogbone Ends: A molded handle with raised, bone-shaped ends that bolt directly to the cabinet, common on vintage-style amplifiers.
- Recessed Mounts: Metal dish-style handles that are inset into the sides of large cabinets or heavy heads, requiring a specific rectangular cutout in the wood.
Choosing a replacement that matches your original mounting plate style ensures that you can reuse the existing holes and maintain the original look of your amplifier.
Best Types of Replacement Handles for Different Amp Styles
The ideal replacement handle depends on how often you transport your gear, the weight of your amplifier, and the specific environment in which you play. In the Philippines, factors like high humidity and salt air in coastal areas can accelerate the degradation of certain materials, making material selection a key durability factor.

Tolex and Vinyl Strap Handles
Tolex and vinyl strap handles are the most common and cost-effective replacement options for standard combo amplifiers. These handles typically feature a flexible inner core—often reinforced with a thin, flexible spring steel strip—wrapped in a textured vinyl or Tolex sleeve that matches the exterior covering of most classic cabinets.
Pros:
- Highly budget-friendly, with prices generally ranging from ₱250 to ₱600.
- Widely compatible with standard 1×12 and 1×10 combo amplifiers.
- Preserves the classic, clean aesthetic of traditional solid-state and entry-level tube amps.
Cons:
- The vinyl outer sleeve is prone to cracking, peeling, and splitting over time, especially when exposed to UV light, sweat, and high humidity.
- The internal spring steel strip can fatigue and snap under heavy, repeated loads if used on oversized cabinets.
Best Use Cases: Lightweight to medium-weight practice amplifiers, home-use gear, and budget-friendly solid-state combo amps that are not subjected to constant, heavy gigging.
Heavy-Duty Nylon and Rubber Handles
For touring musicians, active gigging players, and owners of heavy tube gear, heavy-duty nylon and molded rubber handles offer the highest level of reliability. These handles are constructed from thick, high-tensile nylon webbing (similar to seatbelt material) or dense synthetic rubber, often featuring ergonomic molded grips that distribute weight evenly across your palm.
Pros:
- Exceptional tensile strength and durability, making them virtually immune to tearing or snapping.
- Highly resistant to sweat, moisture, and extreme humidity, preventing the rot and corrosion that plague leather and metal-capped handles.
- Ergonomic rubber grips provide superior comfort when carrying heavy loads over long distances.
Cons:
- The modern, utilitarian appearance can clash visually with vintage-style, tweed, or boutique amplifier cabinets.
- Synthetic rubber can sometimes become sticky or degrade if exposed to certain chemical solvents or direct sunlight for extended periods.
Best Use Cases: Heavy tube combos, large 2×12 speaker cabinets, road cases, and amplifiers that are frequently loaded in and out of vehicles for live performances.
Genuine Leather and Vintage-Style Handles
If you are restoring a vintage amplifier, upgrading a boutique tube rig, or prioritizing aesthetic authenticity, genuine leather handles are the premium choice. These are crafted from thick, multi-layered cowhide, featuring heavy-duty stitched edges and high-quality metal hardware made of solid brass, nickel, or chrome-plated steel.
Pros:
- Provides an unmatched, premium vintage aesthetic that complements high-end gear.
- Develops a beautiful patina and softens over time, molding comfortably to the shape of your hand.
- Extremely durable and structurally sound when properly maintained.
Cons:
- Higher price point, with quality leather replacements typically starting at ₱1,200 and up.
- Requires regular maintenance and conditioning to prevent the leather from drying, cracking, or growing mold in humid climates.
- Susceptible to water damage if exposed to sudden rain during transport.
Best Use Cases: Boutique tube amplifiers, vintage restorations (such as classic tweed, brownface, or blackface styles), and high-end studio gear where visual and tactile authenticity are paramount.
Where to Source Amp Handles in the Philippines
Finding a high-quality, exact-fit guitar amplifier handle in the Philippines requires navigating specialized music retail channels, as general hardware stores rarely stock these specific components.
Local Specialty Music Shops and Repair Centers
Your first point of contact should be dedicated guitar and amplifier repair shops, particularly in major urban centers such as Metro Manila, Cebu, and Davao. Specialized technicians often stock a variety of aftermarket and OEM replacement parts. Visiting a physical shop allows you to bring your old handle or even the amplifier itself to verify the fit in person. Authorized service centers for major brands like Fender, Marshall, or Peavey can also order official manufacturer replacement parts, though these may carry a premium price.
Online Marketplaces and Guitar Communities
If physical shops do not carry the specific handle you need, online marketplaces and local guitar community groups are excellent alternatives. Look for independent luthiers, custom cabinet builders, and specialized music accessory importers who list their inventory on popular local e-commerce platforms. Additionally, local social media groups dedicated to guitar gear, DIY electronics, and amplifier building are great places to find recommendations for trusted local sellers who import high-quality hardware.
International Parts Suppliers
For rare, vintage, or highly specific boutique handles, you may need to order directly from international guitar parts suppliers. While this guarantees access to specialized inventory, you must factor in shipping times to the Philippines, which can range from two to six weeks, as well as potential import duties and local postal handling fees.
Pre-Purchase Verification Checklist
Before completing your purchase online or in-store, always run through the following verification steps to avoid buying an incompatible part:
- Confirm Exact Dimensions: Ask the seller to provide the exact center-to-center mounting hole distance in millimeters, rather than relying on generic size labels.
- Verify Included Hardware: Check whether the handle package includes matching mounting screws, washers, and T-nuts, or if you will need to source those separately.
- Check Seller Ratings and Reviews: Read feedback from other musicians to verify the material quality and durability of the handle.
- Review the Return Policy: Ensure the seller allows returns or exchanges in case the handle does not fit your cabinet's existing mounting pattern.
Installation Steps and Safety Precautions
Replacing an amplifier handle is a straightforward DIY task, but it must be executed with care. A faulty installation can result in the handle tearing free from the cabinet, dropping your amplifier and causing severe damage to delicate vacuum tubes, transformers, or speaker cones.
Step 1: Preparation and Inspection
Before beginning, unplug your amplifier from the wall outlet to ensure safety. Place the amplifier on a stable, flat surface covered with a soft towel or rug to protect the Tolex or wood finish. Carefully unscrew the old handle and remove the mounting plates.
Inspect the wood surrounding the mounting holes. Look closely for signs of cracking, stripping, or wood rot, which is common in humid tropical environments. If the wood is soft, crumbling, or stripped, the new screws will not hold securely, and you must address the structural integrity of the cabinet before proceeding.
Step 2: Aligning and Securing the Hardware
Position the new handle over the existing mounting holes. If your amplifier uses wood screws, thread them into the holes by hand first to avoid cross-threading. Use a manual screwdriver that perfectly matches the screw head size to prevent stripping the head (cam-out). Avoid using power drills, as they can easily overtighten the screws, stripping the wood fibers or cracking the plastic or metal end caps of the new handle.
If your cabinet uses machine screws and internal T-nuts, ensure the threads align smoothly. If you feel resistance, back the screw out and try again to avoid cross-threading the T-nut. Tighten the screws until they are snug and the mounting plates sit flush against the cabinet. Do not overtighten.
Step 3: Conducting a Controlled Weight Test
Once the handle is installed, do not immediately lift the amplifier to carry it. Perform a gradual, controlled weight test to verify the security of the installation:
- Keep the amplifier close to the ground on a soft surface.
- Grasp the new handle and slowly lift the amplifier just one inch off the ground.
- Hold it in place for 10 to 15 seconds while carefully observing the mounting plates and cabinet wood.
- Listen for any creaking, cracking, or shifting sounds.
- Gently nudge the amplifier side-to-side while suspended to ensure there is no play or movement in the hardware.
If the handle remains perfectly secure and there are no signs of strain, the installation is successful.
Safety Boundary
If you discover that the cabinet wood is soft, rotted, or stripped, or if the mounting holes have enlarged to the point where the screws slip, stop immediately. Do not attempt to patch the holes with simple wood glue or toothpicks for a load-bearing component. If your amplifier requires specialized recessed handle routing or internal cabinet reinforcement, consult a professional amplifier technician or an experienced woodworker to ensure the cabinet is repaired safely.
Frequently Asked Questions (FAQ)
Can I use a generic strap instead of a dedicated amp handle?
Using a generic strap, such as a luggage strap, camera strap, or basic utility webbing, is highly discouraged. Dedicated guitar amplifier handles are engineered with internal steel reinforcement or heavy-duty, low-stretch webbing designed to support concentrated, vertical loads. Generic straps lack the rigid structure needed to keep the amplifier stable while carrying, which leads to excessive swinging and imbalance. Furthermore, generic straps do not feature the specialized, heavy-duty mounting plates required to distribute the weight evenly across the cabinet wood, creating a high risk of the mounting screws tearing out under load.
How do I clean and maintain a leather amp handle?
To extend the life of a genuine leather handle, especially in the humid Philippine climate, you must protect it from moisture, sweat, and mold. Wipe the handle down with a dry, clean microfiber cloth after every gig or practice session to remove hand oils and sweat. Once every few months, apply a small amount of dedicated leather cleaner, followed by a high-quality leather conditioner to keep the hide supple. Avoid using harsh household detergents, multi-purpose sprays, or excessive water, as these will strip the natural oils from the leather, causing it to dry out, crack, and eventually fail under the weight of the amplifier.
Community discussion
Share your experience or ask a question. Comments are reviewed before publication.