
Acquiring your first double pedal is a major milestone for any developing drummer. This hardware upgrade opens up a world of rapid-fire rhythms, complex syncopations, and the driving patterns essential to rock, metal, and progressive music. However, for a beginner in the Philippines, choosing the right equipment involves more than simply picking the most popular brand. It requires balancing mechanical responsiveness, long-term durability under tropical climates, and a realistic budget.
To make a wise investment, you must understand the underlying mechanics of bass drum hardware. A reliable double pedal must offer a stable, predictable response that helps you build consistent muscle memory. Rather than rushing to buy the most expensive professional model or the cheapest unbranded alternative, starting with a sturdy, highly adjustable chain-drive pedal from a recognized manufacturer provides the ideal foundation for your musical journey.
Assessing Your Readiness for a Double Pedal
Before investing in a double pedal, it is crucial to evaluate whether your current physical and technical foundations are ready for this transition. Many beginners rush into double bass playing before mastering the basics of single-pedal control, which can lead to severe technical habits that are difficult to break later. A solid single-pedal technique is the bedrock of all drumming; if your dominant foot cannot reliably execute clean single strokes, controlled doubles, and precise dynamics, adding a second pedal will only compound these physical deficiencies.
Products mentioned in this guide
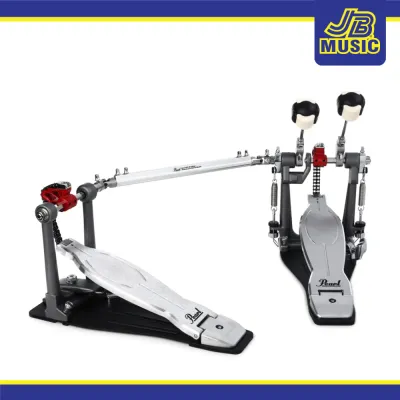
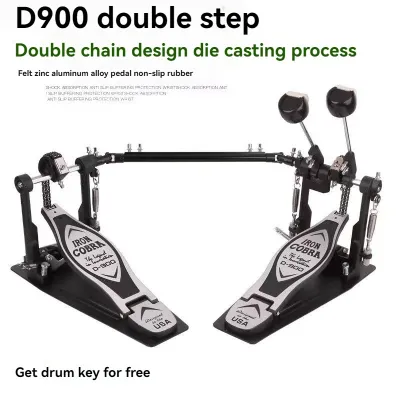
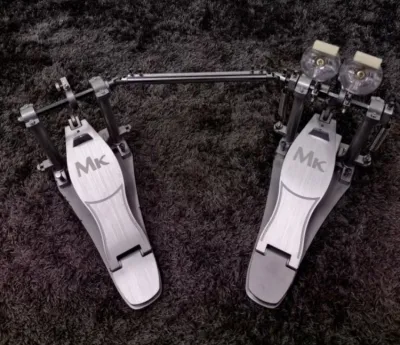
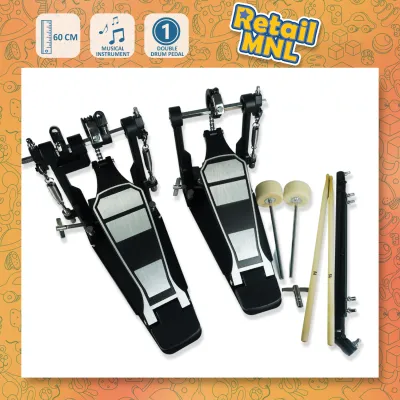
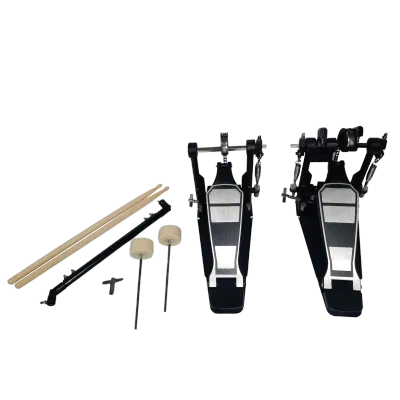
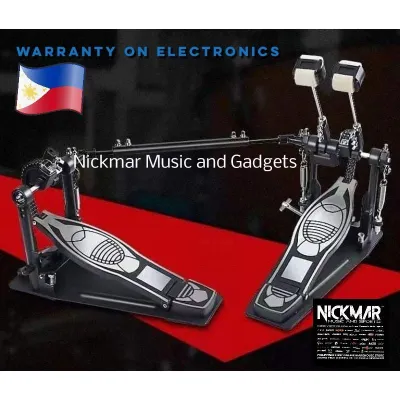
Prices are valid at publication and may change. Please refer to the product page for the latest price.
You can confidently determine your readiness by looking for specific indicators in your daily practice. First, you should be able to maintain a steady, relaxed tempo with your dominant foot while playing basic hand rudiments, such as single and double strokes, without your foot rhythm drifting. Second, your musical goals should actively demand a double pedal. If you are focusing on genres like heavy metal, hard rock, or fusion where double-kick patterns are a structural necessity, then transitioning makes practical sense. However, if you are primarily playing pop, jazz, or classic blues, mastering single-pedal techniques is often a more productive use of your practice time.
Rushing into double-pedal practice without this foundation introduces several technical risks. The most common issue is the development of an uneven, galloping rhythm where your dominant foot does all the heavy lifting and your weaker foot struggles to match its power and timing. This imbalance creates sloppy, uncontrolled rolls instead of a smooth, continuous wall of sound. Additionally, beginners often neglect their hi-hat control once they install a double pedal. By keeping their non-dominant foot permanently parked on the slave pedal, they lose the ability to open, close, and splash the hi-hat cymbals, which is a critical skill for almost every musical style.
Fortunately, there are excellent ways to build your foot coordination before spending money on new hardware. You can practice advanced single-pedal techniques, such as the heel-toe method or the slide technique, on your existing single pedal. These exercises teach your ankle and calf muscles how to execute rapid double strokes with a single foot. Developing this level of control ensures that when you finally introduce a second pedal, your non-dominant foot will have the prerequisite ankle flexibility and strength to catch up quickly.
Key Specifications for a Beginner-Friendly Double Pedal
Understanding the mechanical components of a double pedal is essential for selecting a model that supports your learning curve. Every adjustment point and physical link affects how the pedal responds to your foot, and certain configurations are much more forgiving for beginners than others.

Drive System
The drive system is the physical connection between the footboard and the beater assembly, and it dictates the overall feel and speed of the pedal. There are three primary drive designs available:
- Chain Drive: This system uses a metal bicycle-style chain to pull the cam and swing the beater. It is the industry standard for a reason. Chain drives offer a highly predictable, slightly heavy, and familiar physical response. For beginners, a single-chain drive is lightweight, highly responsive, and cost-effective. A double-chain drive adds extra lateral stability, preventing the footboard from twisting during intense play, and offers superior long-term durability. A chain drive is universally considered the most practical starting point for new players.
- Direct Drive: This design replaces the chain with a solid, rigid metal link. Because there is no slack or flex, direct-drive pedals are incredibly fast and transfer energy instantaneously. However, they are highly unforgiving of imperfect technique. Any slight wobble or nervous twitch of your foot is immediately transferred to the drumhead, which can make it very difficult for a beginner to develop a steady, consistent stroke.
- Belt Drive: Using a strap made of reinforced nylon, Kevlar, or leather, belt drives provide a very smooth, quiet, and floating feel. While some professional drummers prefer this frictionless response, many beginners find that it lacks the punchy, physical feedback of a chain drive, making it harder to feel where the pedal is in its physical arc.
Cam Shape
The cam is the curved wheel that the drive chain or belt wraps around, and its shape determines how the beater accelerates during your stroke. Cams generally fall into two categories:
- Round Cams (Linear): A round cam maintains a perfectly consistent radius from the pivot point throughout the entire stroke. This means the relationship between your foot movement and the beater's travel is linear and predictable. It is an excellent tool for beginners because it teaches a balanced, natural control of dynamics.
- Offset Cams (Eccentric): An offset cam features an irregular, non-circular shape. As you press the footboard down, the chain rolls over a changing radius, which causes the beater to accelerate rapidly just before it strikes the drumhead. This design provides a physical boost of speed and power at the very end of the stroke, which can help beginners achieve a punchy sound while they are still building up their leg and ankle strength.
Adjustability
A beginner-friendly pedal must be highly adjustable to accommodate your growing physical strength and changing technique. The three most critical adjustment points to look for are:
- Spring Tension: This controls how quickly the pedal rebounds after a stroke. Beginners should look for a pedal with an easy-to-use locking spring mechanism. You should start with a medium spring tension—too loose, and the pedal will feel sluggish; too tight, and your leg muscles will fatigue rapidly as they fight the resistance.
- Beater Angle: This adjustment determines how far back the beater sits from the drumhead at rest. A wider angle allows you to generate more volume and power but requires more physical effort. A shallower angle allows for quicker, lighter strokes. Look for a pedal that allows you to adjust the beater angle independently of the footboard height.
- Footboard Height: Adjusting the angle of the footboard helps align the pedal with your natural ankle posture. This is crucial for preventing joint strain and fatigue during long, repetitive practice sessions.
Slave Pedal Connection
The slave pedal connection, or the linkage shaft, is the metal rod that connects your left pedal to the primary beater assembly on the right side. This is often the weakest link on cheap double pedals. If the universal joints on this shaft are loose or poorly constructed, they introduce “backlash”—a physical lag where your left foot presses the pedal, but the beater does not move immediately. To ensure smooth power transfer and a balanced feel between both feet, look for a solid, adjustable steel linkage shaft with high-quality, tightly sealed universal joints.
Setting a Realistic Budget in the Philippines
Navigating the financial aspect of buying drum hardware requires balancing upfront costs with long-term durability. In the Philippine market, drum hardware is subject to import duties and shipping costs, which can cause retail prices to fluctuate. However, the market generally divides double pedals into two distinct price brackets for developing players.
The entry-level bracket typically ranges from ₱6,000 to ₱12,000. Within this price range, you can find highly reliable single-chain or light double-chain pedals from reputable international brands. These pedals feature solid steel base plates, dependable spring assemblies, and adjustable linkage shafts. They are designed to withstand daily practice sessions and are perfect for beginners who want a reliable tool that will not hinder their physical development.
The mid-tier bracket ranges from ₱12,000 to ₱25,000. Moving into this category introduces heavy-duty double-chain drives, more sophisticated bearing designs, highly precise universal joints, and often a molded hardshell carrying case. Investing in a mid-tier pedal is an excellent choice if you have the budget, as these pedals are durable enough to transition with you from the bedroom practice space to live gigs and recording studios.
It is highly tempting for beginners to purchase extremely cheap, unbranded double pedals, which are often sold on online marketplaces for under ₱3,000. However, these products carry significant hidden costs. They are almost always manufactured using low-grade pot metals, weak springs, and unsealed sleeve bearings that quickly develop play, squeaks, and mechanical friction. Furthermore, these cheap models often lack solid steel base plates, relying instead on thin wire radius rods to keep the pedal stable. Under intense play, these rods flex and slide across the floor, making consistent practice impossible.
Perhaps the most significant risk of cheap, unbranded hardware is the absolute lack of replacement parts. If a spring snaps, a screw strips, or a universal joint breaks on an unbranded pedal, you will likely have to discard the entire unit. Conversely, investing in a reputable brand ensures that you can easily source individual replacement springs, beaters, and screws from local music stores, saving you significant money and frustration over time.
Recognized Entry-Level Double Pedal Series to Explore
When researching the market, focusing on established, widely recognized pedal series from reputable manufacturers is a safe and reliable approach. The following series serve as excellent structural examples of what to look for, each offering a distinct design philosophy and mechanical feel.
Tama Iron Cobra 200 Series
This series is engineered using the same basic mechanical architecture as Tama’s legendary professional-grade Iron Cobra 900. It features a single-chain drive and a Power Glide offset cam, which provides a fast, aggressive response at the end of the stroke. The Iron Cobra 200 is widely praised for its rugged durability and smooth action, making it an exceptional option for beginners who want a heavy-duty feel that is well-suited for rock and metal drumming.
Pearl Demonator Series
Pearl’s entry-level double pedal stands out due to its unique interchangeable cam system. Out of the box, it features a round, linear feel, but it includes a removable eccentric cam insert that can instantly transform it into an aggressive, high-acceleration pedal. This versatility is incredibly valuable for a beginner, as it allows you to experiment with different mechanical feels as your technique evolves. It also features a longboard-style footboard, which provides a larger surface area that is highly beneficial for practicing modern foot techniques like the heel-toe method.
DW 2000 and 3000 Series
Drum Workshop (DW) is famous for producing highly robust, heavy-duty hardware. The DW 2000 is a streamlined, single-chain pedal that offers a classic, solid feel. The DW 3000 series steps up to a dual-chain drive and a heavy steel base plate. DW pedals are generally known for their substantial, weighted feel. While some players find them slightly heavier to play, this resistance is excellent for building foundational leg strength and precise control during your early years of practice.
Yamaha DFP7210 Series
Yamaha takes a streamlined, highly efficient approach to hardware design. This series features a lightweight single-chain drive and a simple, incredibly reliable adjustment mechanism. The footboards are smooth and lightweight, offering a very fast, natural, and unencumbered feel. It is an excellent choice for players who prefer a quick, light response and want a pedal that is easy to pack up and transport to rehearsals.
Before making a final choice, remember that specific model numbers, exact specifications, and retail prices in PHP fluctuate constantly due to manufacturing updates and local import realities. You should always verify current availability and exact specifications with local dealers. Avoid looking for a single “correct” option; instead, try to test these different series in person to see which mechanical feel aligns best with your physical comfort and musical goals.
Purchasing Channels and Pre-Checkout Verification
To ensure a safe purchase and secure reliable long-term support, you must choose your buying channels carefully. In the Philippines, the safest route is to purchase from authorized local musical instrument distributors and established physical music stores located in major commercial hubs. Buying in person allows you to physically inspect the hardware, test the spring tension, and feel the weight of the pedal before handing over your money.
If you prefer to buy online, stick strictly to official brand flagship stores or verified authorized dealer pages on major e-commerce platforms. Avoid purchasing from unauthorized third-party sellers or gray-market importers. While gray-market sellers may offer slightly lower prices, their products often lack official local warranty coverage. If a critical component like a universal joint or a hinge fails, you will have to pay out of pocket for repairs or replacement parts.
Before finalizing your purchase, use this comprehensive pre-checkout verification checklist to ensure your package is complete:
- Pedal Units: Confirm that the package contains both the master pedal (with the dual-beater assembly) and the slave pedal.
- Linkage Shaft: Verify that the extendable metal connecting rod is included and that both universal joints rotate smoothly without any grinding or physical play.
- Beaters: Ensure the package includes two matching beaters (typically dual-sided felt and plastic beaters).
- Drum Key and Tools: Check for the inclusion of a standard drum key and any specialized Allen wrenches required for adjusting the pedal components.
- Carrying Case: Verify if the specific model bundle includes a padded carrying bag or hardshell case, as some brands sell these separately.
Initial Setup and Routine Maintenance
Once you bring your new double pedal home, taking the time to set it up correctly and establish a routine maintenance schedule will ensure optimal performance and protect your investment.
Initial Setup
Begin by placing the master pedal flat on the floor and sliding its hoop clamp onto the bottom hoop of your bass drum. Secure the clamp tightly, but be careful not to over-tighten, especially on wooden hoops, as this can crush the wood fibers. Use a rubber hoop protector if your pedal does not have built-in rubber padding. Next, position your hi-hat stand slightly to the left to make room for the slave pedal. Place the slave pedal where your left foot rests naturally when sitting at the kit.
Connect the linkage shaft to both pedals. Make sure to tighten the key bolts securely onto the flat spots machined into the shaft; tightening them onto the round sections can cause the shaft to slip during play. Adjust both beaters so they are at the exact same height and angle, aiming for a distance of about 5 to 6 inches from the drumhead at rest. Finally, set the spring tension on both pedals to a moderate, equal level to ensure a balanced feel.
Routine Maintenance
The tropical climate and high humidity in the Philippines present unique challenges for metal drum hardware. High humidity, combined with acidic sweat from intense practice sessions, can quickly lead to rust and corrosion on steel components. To prevent this, always wipe down the footboards, chains, and linkage shaft with a clean, dry microfiber cloth after every practice session.
Regularly inspect all screws, memory locks, and key bolts to ensure they have not vibrated loose during play. Apply a small drop of lightweight machine oil (such as 3-in-One oil) or dedicated bicycle chain lubricant to the pedal bearings, hinges, and universal joints every few months. Avoid using heavy household greases, which attract dust and grit, or WD-40, which acts as a degreaser and can strip the factory-applied lubrication from your bearings.
Safety and Limits
It is important to know when to stop adjusting and seek professional assistance. If you encounter a stripped screw thread, a bent linkage shaft, or a cracked casting, do not attempt to force the parts back together or use improper tools. Forcing a cross-threaded bolt can permanently ruin the pedal’s aluminum or steel threads. If you hear an unusual grinding noise coming from inside a sealed bearing, or if a spring snaps, contact the manufacturer’s local distributor or take the pedal to a qualified technician at an authorized music store for professional repair.
Frequently Asked Questions (FAQ)
Can I use a standard double pedal on an electronic drum kit?
Yes, standard acoustic double pedals are physically compatible with most electronic drum kits, provided the electronic bass drum pad or tower is wide enough to accommodate two beaters. You must, however, pay close attention to the type of beaters you use. While plastic or wood beaters are perfectly safe, felt beaters should never be used on mesh drumheads. The rough surface of the felt creates high friction against the mesh, which can quickly wear down and tear the expensive mesh head. If your pedal has dual-sided beaters, always rotate them to the plastic side when playing on mesh pads.
How long does it typically take to learn double bass drumming?
Developing clean, controlled, and fast double bass drumming is a long-term physical process that typically takes several months to a year of consistent daily practice. While you may be able to play basic, slow patterns within a few weeks, building true foot independence, muscular endurance, and high-speed coordination requires patience. You must focus on slow, deliberate practice with a metronome at comfortable tempos, ensuring that both your dominant and non-dominant feet produce perfectly even, balanced strokes before attempting to increase your speed.
Community discussion
Share your experience or ask a question. Comments are reviewed before publication.