
To start beatboxing with a beatbox drum pad setup in the Philippines, the best choice depends on whether you want to produce beats on a computer or perform live without one. For absolute beginners, a MIDI pad controller is the most affordable and flexible entry point, while a standalone percussion pad or a compact loop station offers a portable, computer-free setup. Choosing the right device requires balancing your budget in Philippine Pesos (₱), your current computer setup, and whether you want to trigger pre-recorded vocal samples or loop your voice in real time.
Understanding Beatbox Drum Pads: What Do You Actually Need?
Modern beatbox drum pads serve as physical interfaces that bridge the gap between human vocal percussion and electronic music production. In the contemporary music landscape, a “beatbox drum pad” is rarely a single, uniform type of instrument. Instead, it refers to a range of devices, including MIDI pad controllers, electronic sample triggers, and hardware loop stations. These devices allow you to assign your own vocal sounds—such as a recorded throat bass, a sharp mouth snare, or a synthesized kick—to physical, velocity-sensitive pads that play the sound instantly when tapped.
Before purchasing any gear, you must define your primary use case by distinguishing between studio production and live performance. If your goal is to sit at a desk, arrange tracks, and edit your beats in detail, you will rely heavily on a Digital Audio Workstation (DAW) on your computer. In this studio environment, the drum pad acts as a controller, sending data to your computer rather than producing sound itself. Conversely, if you want to perform live on stage, busk on the streets, or practice in areas where carrying a laptop is impractical, you require a standalone unit with its own internal audio outputs and sound engine.
Products mentioned in this guide
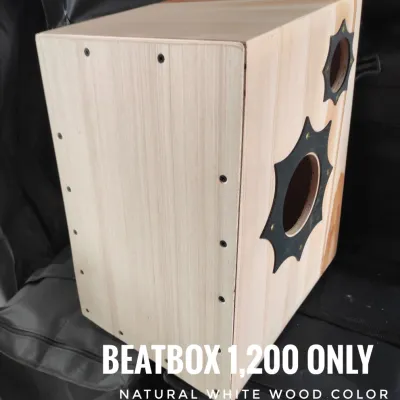
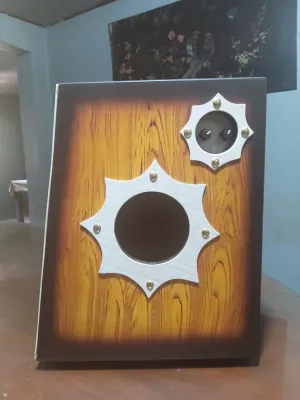
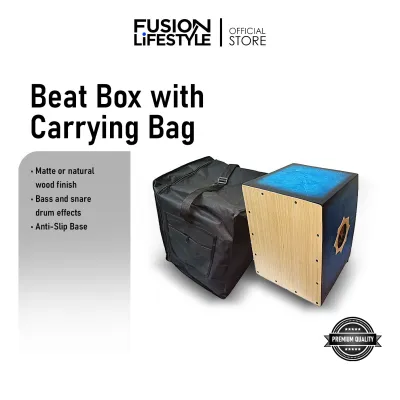
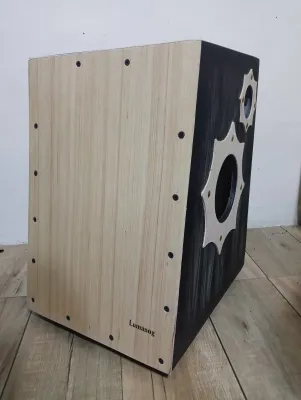
Prices are valid at publication and may change. Please refer to the product page for the latest price.
Assessing your existing equipment is a crucial step that prevents unnecessary spending. If you already own a relatively modern laptop or desktop computer and a pair of studio headphones, your entry barrier is remarkably low. A simple USB-powered MIDI pad controller will integrate seamlessly into your setup without requiring additional hardware. However, if you do not own a computer, or if your laptop lacks the processing power to run music software without lag, investing in a self-contained, standalone drum pad or loop station is the more logical, albeit more expensive, path.
Understanding how experienced beatboxers utilize these pads will help you visualize your own workflow. Many artists use drum pads to trigger “vocal chops”—short, edited snippets of their own singing or beatboxing that can be played rapidly to create complex melodies. Others use them to layer rhythmic loops, building a full drum kit sound using only their voice as the source material. By mapping your unique vocal textures to these physical pads, you can execute finger-drumming routines that would be physically impossible to perform with your mouth alone in a single take.
Key Features to Evaluate in an Entry-Level Pad
Pad Sensitivity and Velocity Response: The tactile feel of the pads is the most critical factor in how natural your beatboxing sounds when translated to electronic triggers. Velocity response refers to how a pad detects the force of your strike; a highly sensitive pad will play a quiet, subtle sound when tapped lightly and a loud, aggressive sound when struck hard. For beatboxers, this dynamic range is essential for mimicking natural vocal delivery, allowing you to transition smoothly from soft, breathy hi-hats to heavy, punchy kick drums. When evaluating entry-level gear, prioritize pads that allow you to customize the velocity curves to match your natural finger-drumming strength.

Connectivity Options: A drum pad’s utility is defined by its inputs and outputs, which dictate how it connects to the rest of your gear. For MIDI controllers, a reliable USB connection is mandatory for transmitting data to your computer or mobile device. If you opt for a standalone pad, you must look for standard 1/4-inch (6.35mm) audio outputs, which allow you to connect the device directly to external amplifiers, PA systems, or audio interfaces. Additionally, a dedicated headphone jack (either 3.5mm or 1/4-inch) is indispensable for silent practice sessions at home, ensuring you do not disturb others while perfecting your routines.
Power Supply: The way a drum pad receives power directly impacts its portability and suitability for different environments. Many entry-level MIDI controllers are “bus-powered,” meaning they draw all necessary electrical power directly from the host computer’s USB port. This eliminates the need for extra cables, making them highly portable and easy to set up anywhere. Standalone units and advanced loop stations, however, feature heavy internal processors and sometimes built-in speakers, requiring a dedicated external power adapter. When using these standalone units, verify the manufacturer’s exact specifications regarding voltage and current requirements to avoid damaging the sensitive internal circuitry.
Software Bundle and Compatibility: Hardware is only half of the equation for beginners, especially when choosing a MIDI controller. Many reputable manufacturers bundle their hardware with entry-level versions of popular DAWs, premium sample libraries, or proprietary editing software. These bundles provide immense value, saving you from having to purchase expensive software separately. Before buying, check the manufacturer’s product page to verify which software licenses are included, and ensure they are compatible with your operating system. Additionally, check if the software requires specific regional activation or internet verification steps during installation.
Types of Drum Pads for Beatbox Beginners: Finding Your Category
The market for beatbox-friendly drum pads is diverse, catering to different creative workflows and technical preferences. To find the right fit, you should understand the three primary categories of devices available: MIDI controllers, standalone percussion pads, and loop stations.
MIDI Pad Controllers (Grid and Pad Layouts)
MIDI pad controllers are the most common and cost-effective entry point for beginners who plan to use a computer. These devices typically feature a grid layout, most commonly a 4×4 grid of 16 square pads, accompanied by various knobs, faders, and buttons. They do not contain any internal sounds; instead, they function by sending MIDI (Musical Instrument Digital Interface) data to your computer, telling your software which note to play, how hard it was struck, and how long it was held.
This category is highly favored by studio-based producers and home hobbyists. Because the sound processing is handled entirely by your laptop or desktop, these controllers can be incredibly compact, lightweight, and affordable. They allow you to control virtual drum racks, trigger pre-recorded vocal samples, and launch clips within your DAW with physical, tactile feedback that a computer keyboard simply cannot replicate.
However, the reliance on an external host device is also their primary limitation. A MIDI pad controller is completely silent on its own; it cannot produce sound without being connected to a computer, tablet, or smartphone running compatible music software. If you plan to perform live without carrying a laptop, or if you prefer a plug-and-play experience that does not involve troubleshooting software drivers, a MIDI controller may not be the ideal choice for your workflow.
Standalone Electronic Percussion Pads
Standalone electronic percussion pads are self-contained instruments equipped with internal sound engines, onboard memory, and physical audio outputs. Unlike MIDI controllers, these units can generate sound independently, allowing you to plug in your headphones or connect directly to a speaker system and start playing immediately. They often feature larger, more durable rubber pads designed to be struck with either hands or drumsticks.
For beatboxers who want to transition to live performance or busking, standalone pads offer unparalleled convenience and reliability. A key feature to look for in this category is the ability to load custom WAV samples via an SD card or USB flash drive. This capability allows you to record your own vocal basslines, sound effects, and drum hits, edit them on a computer, and then import them directly into the pad’s internal memory for live triggering.
The trade-offs for this independence are typically higher costs and more rigid hardware limitations. Standalone units in the entry-level price bracket often have limited onboard storage capacity, requiring you to manage your sample library carefully. Additionally, editing sample start times, pitch, and effects directly on the device often requires navigating small, low-resolution screens and complex menu systems, which can be tedious compared to using computer software.
Compact Loop Stations and Grooveboxes
Loop stations and grooveboxes represent a distinct category that blends sample triggering with real-time audio recording and looping. Instead of merely playing back pre-recorded sounds, these devices allow you to record your voice live through a microphone, loop it instantly, and then layer additional vocal percussion, basslines, and melodies on top. Many modern loop stations designed for tabletop use feature built-in pads that can double as sample triggers or loop control buttons.
If your goal is to build complex, multi-layered arrangements live on stage using only your voice, a loop station is far more suitable than a standard drum pad. These devices are the backbone of modern live beatboxing, enabling solo performers to sound like full bands in real time. They often include built-in vocal effects, such as pitch correction, delay, and distortion, which can dramatically transform your vocal sounds.
The primary challenge of loop stations is their steep learning curve. Mastering the timing required to start and stop loops precisely with your hands or feet takes significant practice, and managing multiple loop tracks simultaneously can be overwhelming for absolute beginners. Additionally, because they require high-quality audio inputs, you will need to factor in the cost of a decent microphone and XLR cables to get the most out of the device.
Getting Started: Setup and Sample Mapping for Beatboxers
Once you have selected your drum pad, the first step to creating music is establishing an ergonomic sample map. For a standard 16-pad grid, a common layout is to place your primary rhythmic elements on the bottom row, where your fingers can easily access them. For example, assign your heaviest kick drum to pad 1 (bottom left), your primary snare to pad 2, and your closed hi-hat to pad 3. This setup allows you to execute basic beats comfortably using your index and middle fingers, leaving the upper rows free for melodic vocal chops, bass hits, and secondary percussion.
Adjusting the velocity curves of your pads is essential to ensure the hardware responds accurately to your personal playing style. If you find that you have to strike the pads incredibly hard just to get a decent volume, you should access your device’s settings menu or companion editing software to select a more sensitive velocity curve. Conversely, if your sounds are constantly playing at maximum volume even with light taps, lowering the sensitivity will restore the dynamic range necessary for expressive performances.
Managing audio latency is a critical technical hurdle when using MIDI controllers connected to a computer. Latency is the short delay between the physical moment you tap a pad and the actual sound coming out of your speakers. To minimize this delay, you must configure your DAW’s audio settings. On Windows computers, utilizing a dedicated ASIO audio driver is highly recommended, while macOS users should ensure their buffer size is set as low as possible—ideally between 64 and 128 samples. Lowering the buffer size reduces latency but increases the load on your computer’s CPU, so you must find a balance where the audio remains clean and free of pops or clicks.
Developing an organized system for your custom sample banks will save you countless hours of frustration as your library grows. Group your sounds into cohesive folders labeled by genre, tempo, or specific performance routines. When building a kit, try to keep your sample volumes consistent across all pads so that one sound does not unexpectedly overpower the others. Labeling your custom WAV files clearly with descriptive names—such as vocal kick drum or throat bass—will make loading and mapping your sounds a seamless process.
Buying Considerations and Local Setup in the Philippines
Purchasing electronic music gear in the Philippines requires careful navigation of local retail channels to ensure you receive genuine products and valid warranties. While international online marketplaces are convenient, buying from authorized local music distributors in major metropolitan areas is highly recommended. Purchasing through these official brick-and-mortar stores or their verified online storefronts ensures that your investment is protected by a local manufacturer’s warranty, allowing you to seek repairs or replacements without paying exorbitant international shipping fees.
Power compatibility is a critical safety consideration that must not be overlooked. The electrical grid in the Philippines operates on a 220V standard at 60Hz. If you purchase a standalone drum pad or loop station that includes an external power adapter, you must verify that the adapter’s input specification explicitly lists compatibility with 220V power. Using a 110V power adapter imported from other regions without a proper step-down transformer can permanently damage your device’s internal components and void your warranty. If you want to avoid power compatibility issues entirely, choosing a USB-powered MIDI controller is an excellent, low-risk alternative.
When shopping online, you must exercise caution to avoid counterfeit products, gray-market imports, or refurbished units disguised as brand-new. Always check the seller’s credentials, look for official brand badges on local e-commerce platforms, and read customer reviews carefully. Be skeptical of prices that seem significantly lower than the standard retail average, as these often indicate unauthorized sellers who cannot provide after-sales support. If a listing lacks clear specifications or warranty details, contact the seller directly to verify the product’s origin before making a purchase.
Finally, when planning your budget in Philippine Pesos (₱), remember to account for the essential accessories required to complete your setup. An entry-level MIDI controller might seem highly affordable, but you may also need to purchase high-quality TRS cables to connect your audio interface to speakers, or a high-endurance, high-speed SD card if you are using a standalone pad that loads custom samples. If you plan to record your own voice to create custom samples, budgeting for a basic dynamic microphone and a pop filter is also necessary. Factoring in these additional costs from the beginning will prevent unexpected expenses and ensure you have everything needed to start beatboxing immediately.
Frequently Asked Questions (FAQ)
Here are answers to some of the most common questions beginners have when choosing and setting up a beatbox drum pad in the Philippines.
Can I use a beatbox drum pad with my smartphone or tablet?
Yes, many modern MIDI pad controllers can connect to smartphones and tablets using a USB OTG (On-The-Go) adapter or an Apple Camera Connection Kit. This setup allows you to trigger sounds using mobile music production apps and DAWs on the go. However, you must verify the power requirements of your specific controller; some bus-powered pads draw more electrical current than a mobile device can safely provide, requiring you to use a powered USB hub to prevent battery drain or connection drops.
Do I need an audio interface if I buy a standalone drum pad?
An audio interface is not required if you only plan to use your standalone drum pad for live performances, practicing with headphones, or connecting directly to a physical amplifier or PA system. However, if you want to record the high-quality internal sounds of your standalone pad directly into a computer DAW with professional fidelity, an audio interface is highly recommended. The interface converts the analog audio signals from your pad’s 1/4-inch outputs into a clean digital format that your computer can record without latency or background noise.
How much onboard memory do I need for custom beatbox samples?
Because beatbox samples—such as vocal kicks, snares, and short vocal chops—are typically very short, truncated audio files, they require very little digital storage space. A single high-quality, mono WAV sample lasting less than a second often uses less than 100 kilobytes of memory. Consequently, even an entry-level standalone pad with a modest 16MB to 64MB of internal user memory can easily store hundreds of custom sounds, which is more than enough to build multiple complete, highly detailed drum kits for your routines.
Community discussion
Share your experience or ask a question. Comments are reviewed before publication.