
Starting your journey into beatbox-style electronic music production can feel overwhelming given the sheer variety of music gear available. In the Philippines, where the local music scene is highly creative and diverse, choosing the right tool depends entirely on your specific goals. If you want to capture your own vocal rhythms, build complex instrumental backing tracks, or practice finger-drumming, different devices will serve you best.
The term “beatbox drum machine” can refer to three distinct categories of hardware: loop stations, pad samplers, and dedicated drum synthesizers. Beginners often struggle to find the right entry point because these devices require completely different workflows. Understanding these fundamental differences before making a purchase ensures you do not waste money on overly complex gear that does not fit your performance style.
How to Choose the Right Beatbox Drum Machine as a Beginner
To narrow down the market, you must first define your primary creative goal. Are you looking to perform live vocal looping, build beats in a bedroom studio, or simply practice rhythm? A device that is excellent for one of these tasks may be highly frustrating or completely useless for another.
Products mentioned in this guide
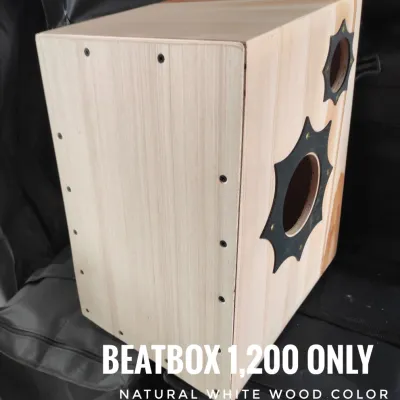
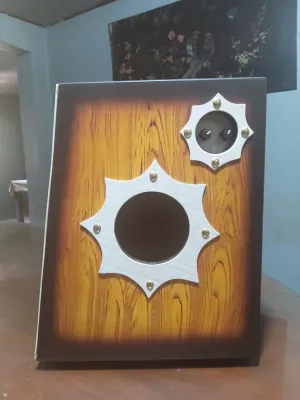
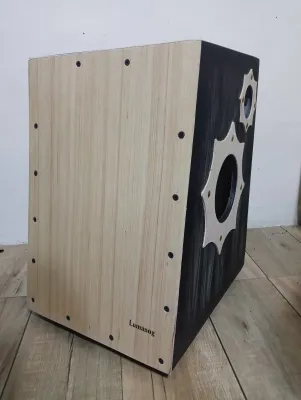
Prices are valid at publication and may change. Please refer to the product page for the latest price.
For live vocal looping, hands-free control and real-time audio manipulation are essential. You need a device that can capture your voice instantly through a microphone and layer it repeatedly. In contrast, bedroom production requires precise editing tools, step sequencers, and deep sound design capabilities, which are typically operated by hand rather than foot.
As a beginner, look for a device that offers an intuitive workflow and immediate out-of-the-box functionality. You should not have to buy multiple external accessories, such as preamps or external mixers, just to hear your first beat. Immediate accessibility keeps the learning process fun and prevents early frustration.
Additionally, physical durability is a critical factor, especially in the tropical climate of the Philippines. High humidity and ambient heat can affect sensitive electronic components and rubberized performance pads over time. Choosing robust, well-constructed hardware from reputable brands ensures your gear survives both travel and local environmental conditions.
Rather than searching for a single “best” overall device, evaluate your personal workflow preferences. Some musicians thrive on tactile, screen-free interfaces with dedicated knobs, while others prefer visual feedback from bright, detailed displays. Identifying your user profile first makes it much easier to select the perfect hardware.
Main Types of Electronic Percussion Devices for Beatboxers
Navigating the music store can be confusing when everything is labeled as a drum machine or a beat maker. To help you make sense of the hardware landscape, we can categorize these electronic percussion instruments into three primary types. Each type serves a distinct purpose, offers a unique workflow, and suits different performance environments.

Loop Stations and Multi-Track Loopers
Loop stations are designed specifically for real-time recording, overdubbing, and manipulation of audio signals. For vocal beatboxers, these devices are the ultimate performance tools because they allow you to build an entire track using only your voice as the instrument. You record a bassline, layer a snare over it, add a vocal melody, and control the playback of each track individually.
Because these units rely on vocal input, having a dedicated microphone input is absolutely essential. Look for devices that feature XLR or TRS combo jacks and built-in phantom power (+48V). Phantom power is critical if you plan to use a high-quality condenser microphone, which captures vocal transients and low-end bass frequencies much more accurately than standard dynamic microphones.
Hands-free operation is another key consideration for live performers. While many loopers are tabletop units designed to be operated with your hands, they often feature ports for external footswitches or MIDI controllers. This allows you to trigger loops, switch tracks, or apply vocal effects with your feet while keeping your hands free to play other instruments or engage with the audience.
However, loop stations do have notable limitations that beginners should keep in mind. They excel at capturing and layering live audio, but they generally lack deep internal sound engines or complex step-sequencing tools. If you do not want to use your own voice or external instruments to generate sounds, a standalone looper will feel empty and limited.
Samplers with Performance Pads
Samplers with performance pads bridge the gap between live performance and studio beat production. Instead of synthesizing sounds from scratch, these devices allow you to import or record audio snippets—such as drum hits, vocal chops, or ambient noises—and assign them to physical pads. You then trigger these sounds in real-time by striking the pads with your fingers.
The core workflow revolves around velocity-sensitive rubber or mesh pads. These pads detect how hard you strike them, translating your physical force into volume and expression. This makes pad samplers incredibly popular for finger-drumming, allowing beatboxers to blend their vocal performances with highly responsive electronic drum kits.
For beginners, a sampler with a built-in microphone is highly valuable. This feature allows you to sample sounds on the go without needing to carry external cables or microphones. You can snap your fingers, tap a table, or record a quick vocal sound, instantly edit the waveform on the screen, and assign it to a pad to start building a beat.
Despite their versatility, samplers carry a steeper learning curve than simple loopers. You will need to spend time managing audio files, editing start and end points of samples, and organizing your sound libraries. Understanding file formats, storage limits, and memory management is essential to getting the most out of these powerful production tools.
Digital and Analog Drum Synthesizers
Dedicated drum synthesizers focus on generating electronic drum sounds internally rather than recording live vocals or playing back pre-recorded audio samples. These devices are ideal for producing backing tracks, learning rhythm structures, or practicing your timing alongside a steady, customizable beat. They are the classic “drum machines” of the electronic music world.
The defining feature of a drum synthesizer is its step sequencer. This interface allows you to program beats by placing drum hits on a grid of steps (usually 16 steps). Many modern drum machines also feature “parameter locks,” which let you change the pitch, decay, or effects of a specific drum hit on a single step, creating highly complex, evolving rhythmic patterns.
When choosing a drum synthesizer, you will encounter the choice between analog and digital engines. Analog synthesizers use physical electrical circuits to generate raw, warm, and highly tactile sounds, which you can shape using dedicated knobs. Digital drum machines, often referred to as ROMplers, use digital samples to offer a wider variety of realistic acoustic kits and classic electronic sounds.
While drum synthesizers are incredibly powerful for rhythmic composition, they are rarely used as standalone tools for vocal beatboxers. They do not allow you to record your voice or loop live vocal performances. Instead, think of them as highly capable rhythm partners or studio tools to generate the foundation of your tracks.
Essential Features to Compare for Beginner-Friendly Use
When comparing different electronic percussion devices, technical specifications can quickly become confusing. To make an informed decision, focus on a few essential features that directly impact how you will use the gear on a daily basis.
- Audio Inputs and Outputs: For beatboxers, the quality and type of audio inputs are paramount. Standard line inputs (1/4-inch) are designed for instruments like guitars or keyboards, which output a much stronger signal than microphones. If you want to connect a professional vocal microphone, you must look for a device with a dedicated XLR input or a combo jack. Additionally, check for a built-in microphone preamp with adjustable gain to ensure your vocals are clean and free of background hiss.
- Pad Sensitivity and Velocity: If you select a pad-based sampler or drum machine, the physical quality of the pads is critical. Look for pads that offer both velocity sensitivity (volume changes based on strike force) and pressure sensitivity, often called aftertouch. High-quality pads allow for highly expressive performances, letting you play ghost notes, rolls, and dramatic crescendos naturally. Cheap, stiff pads can cause finger fatigue and make your beats sound robotic and flat.
- Workflow and Interface: The layout of the buttons, knobs, and screens dictates how quickly you will learn to use the device. Some hardware relies heavily on "menu-diving," requiring you to navigate multiple sub-menus on a tiny screen to change basic settings. Other devices offer a "one-knob-per-function" design, where every major parameter has a physical control. For beginners, a more tactile, hands-on interface generally leads to a faster and more enjoyable learning process.
- Power and Portability: Consider where you plan to use your device. If you want to busk on the streets, practice in local parks, or travel frequently, look for a device that can run on AA batteries or a USB power bank. If you only plan to use the gear in a dedicated home studio, a standard AC power adapter is perfectly fine. Keep in mind that battery-powered units offer unmatched freedom but may have shorter operating times when running intensive features like phantom power.
- Connectivity: Ensure your chosen device can communicate with your existing gear. USB connectivity is standard on most modern hardware, allowing you to transfer files easily and use the device as an audio interface with your computer. If you plan to expand your setup in the future, look for physical MIDI ports (either 5-pin DIN or 3.5mm TRS MIDI). These ports allow you to synchronize your drum machine with external synthesizers, keyboards, or loopers perfectly in time.
Recommended Device Categories for Different Beginner Goals
To help you navigate your options, let us match specific beginner profiles with the most suitable hardware categories. This allows you to focus on the gear that aligns with your creative vision.
For the Live Performer If your goal is to stand on a stage, capture your voice, and build massive wall-of-sound arrangements in real-time, you should focus on multi-track tabletop loop stations. Look for models designed specifically for vocalists and tabletop performers. These units feature dedicated XLR microphone inputs with phantom power, built-in vocal effects (like pitch correction, delays, and reverbs), and large, easily accessible buttons for track control. They also support external foot controllers, allowing you to manage your loops hands-free while maintaining an energetic stage presence.
For the Bedroom Producer If you prefer to sit at a desk, chop up samples, and compose highly detailed beats, a standalone pad-based sampler is your best choice. These devices act as complete production studios in a single box. Look for units that offer robust sample-editing software, built-in sequencers, and seamless integration with Digital Audio Workstations (DAWs) on your computer. This setup allows you to record samples, arrange complete songs, and polish your tracks without needing to constantly look at a computer screen.
For the Budget-Conscious Learner If you are on a tight budget or simply want to test the waters before investing heavily, consider entry-level digital drum machines or MIDI pad controllers. Entry-level drum machines offer a cost-effective way to learn the basics of step sequencing and rhythm design. Alternatively, a MIDI pad controller is highly affordable because it does not generate any sound on its own. Instead, it must be connected to a computer, tablet, or smartphone running a software sampler or DAW. This is an excellent, low-cost path if you already own a capable computer or mobile device.
Selection Caveat Please note that specific model availability, firmware versions, and retail pricing in Philippine Pesos (PHP) fluctuate constantly due to global supply chains and local import fees. Rather than targeting a single specific model, use these category profiles to filter the current stock at your local music stores. Always read recent user reviews and check the manufacturer’s website for the latest firmware updates before making your final decision.
Buying Guide and Verification Checklist in the Philippines
Purchasing electronic music gear in the Philippines requires a bit of local knowledge to ensure you get authentic, reliable products that are fully compatible with your home setup.
- Authorized Dealers: Always purchase your gear from established local musical instrument retailers, official brand flagship stores, or verified local distributors. While importing devices directly from overseas online marketplaces might seem cheaper initially, it carries significant risks. Buying locally ensures you receive authentic hardware, avoid counterfeit products, and gain access to reliable customer support.
- Voltage and Power Compatibility: Before plugging in your new device, verify its power requirements. The standard electrical supply in the Philippines is 220V at 60Hz. Many electronic devices imported directly from Japan or the United States are designed for 110V systems. Plugging a 110V power adapter directly into a Philippine wall outlet will permanently damage the adapter and potentially ruin your expensive gear. Always check the label on the power brick; if it does not state "Input: 100-240V," you will need to purchase a compatible local power adapter or a step-down transformer.
- Warranty and Support: Electronic music gear can occasionally experience hardware failures, especially with intensive use of physical pads and buttons. Local authorized distributors provide warranties that cover repairs or replacements within the country. International warranties are rarely honored by local service centers, meaning you would have to ship your device back to the country of origin at your own expense for any repairs.
- Pre-purchase Checks: When buying in-store, ask the sales representative to unbox the unit and let you test it before paying. Check the physical responsiveness of all performance pads, ensure the knobs turn smoothly, and verify that all inputs and outputs are functional. If buying online from a verified distributor, immediately inspect the package upon arrival. Ensure all included accessories—such as power adapters, USB cables, and quick-start guides—are present in the box, and verify if the device requires a specific SD card class for optimal performance.
Frequently Asked Questions (FAQ)
Do I need an external audio mixer for live beatboxing?
It depends entirely on the inputs available on your electronic percussion device. If your drum machine or sampler only features standard 1/4-inch line inputs, you cannot plug a professional XLR vocal microphone directly into it. In this scenario, an external audio mixer or a dedicated microphone preamp is required to boost the microphone’s signal to line level and provide phantom power if you are using a condenser mic. A small, portable mixer also gives you precise control over your vocal volume and EQ before the signal reaches your looper or the venue’s PA system.
Is a MIDI pad controller a good alternative to a standalone sampler?
A MIDI pad controller is an excellent, budget-friendly alternative, but it functions very differently from a standalone sampler. MIDI controllers do not contain internal sound engines or processors; they only send control data to an external device. To make sound, you must connect the controller to a computer, iPad, or smartphone running music software. While this setup is highly customizable and cost-effective, it is generally less reliable for live stage performances in the Philippines due to the risk of software crashes, operating system updates, or audio latency issues compared to dedicated standalone hardware.
Community discussion
Share your experience or ask a question. Comments are reviewed before publication.