
Choosing the right drum set for your child requires balancing their physical height, developmental stage, and your household’s living space. While age is a helpful starting point, physical measurements like height and reach are the true indicators of a proper fit. A kit that is too large can cause physical strain, poor posture, and frustration, while one that is too small may limit their progress as they grow. This guide breaks down how to match drum set dimensions, configurations, and types to your child’s age, height, and your home environment, ensuring they have the right tools to develop their rhythm and coordination safely.
When introducing a child to percussion, the initial excitement can quickly fade if the instrument feels uncomfortable or physically demanding to play. Drumming is a highly physical activity that coordinates all four limbs simultaneously. If a child has to stretch excessively to reach a cymbal or struggle to keep their feet flat on the pedals, they will quickly tire or develop improper playing habits that are difficult to correct later. By understanding the key differences between acoustic and electronic options, and knowing how to measure your child for a proper ergonomic fit, you can make an informed investment that supports their musical journey for years to come.
How to Match Drum Set Dimensions to Your Child's Height
Many parents make the mistake of buying a drum set based solely on the age range printed on the box. However, children grow at vastly different rates, making physical height and inseam length far more reliable indicators for determining proper drum throne height and pedal reach. Before looking at specific models, measure your child’s height and compare it to the physical specifications of the drum kit. A proper fit ensures that the child can sit comfortably, maintain balance, and execute strokes with natural body movements.
Products mentioned in this guide
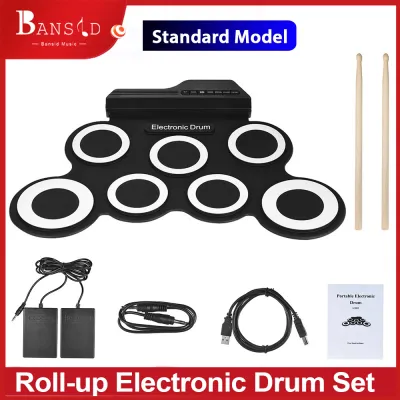
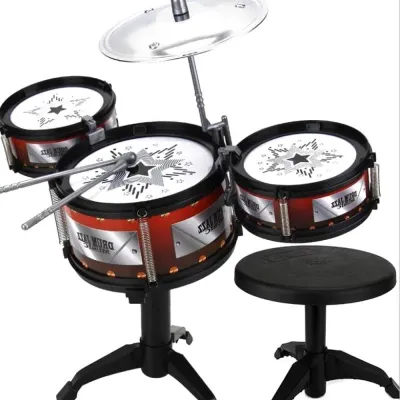
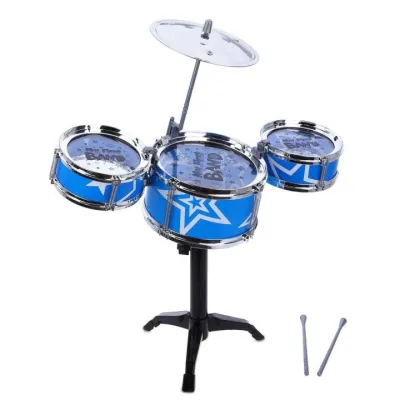
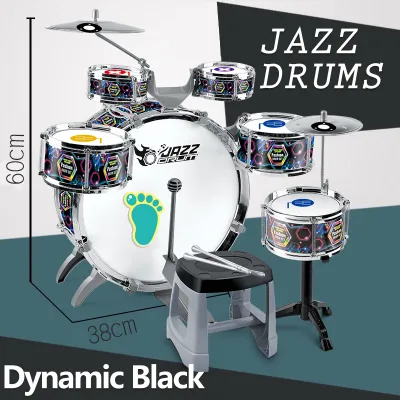
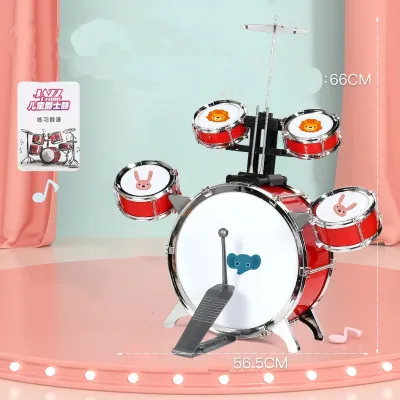
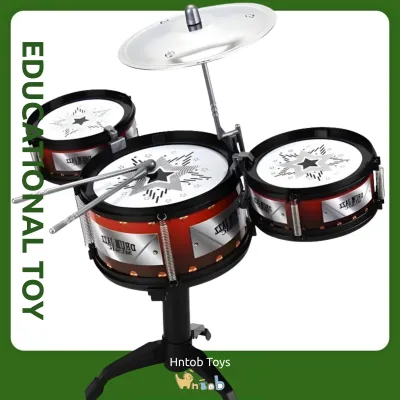

Prices are valid at publication and may change. Please refer to the product page for the latest price.
The foundation of all drumming ergonomics is the drum throne. To check for a proper fit, have your child sit on the throne and adjust the height so that their thighs are parallel to the floor or angled slightly downward. This position creates an angle of roughly 90 to 100 degrees at the hips and knees. If the throne is too low, their knees will point upward, putting unnecessary pressure on the lower back; if it is too high, their feet will dangle, making it impossible to operate the foot pedals effectively.
Once the throne height is set, verify that your child’s feet can rest flatly on the floor and easily reach both the kick drum pedal and the hi-hat pedal. They should be able to press the pedals down fully without having to slide forward on the seat, stretch their legs to the limit, or balance on their tiptoes. If they must stretch to reach the pedals, the drum set is too large, and they will struggle to maintain a stable core while playing, which can lead to muscle fatigue and poor timing.
Next, evaluate the height of the snare drum and the angle of your child’s arms. The snare drum should be positioned roughly one to two inches above your child’s beltline when they are seated. When holding the drumsticks, their elbows should be bent at a comfortable 90-degree angle, with their shoulders relaxed and down. If the snare drum is positioned too high, the child will be forced to raise their shoulders and elbows, leading to tension in the neck and upper back. Conversely, if the snare is too low, they will hunch over the drum, which can cause long-term posture issues.
Acoustic vs. Electronic Drum Sets: Which Type Fits Your Home?
Deciding between an acoustic and an electronic drum set is one of the most significant choices a parent must make. Both types have distinct advantages and limitations regarding space, noise, and maintenance, especially when considering your specific living environment. Understanding how each type fits into your home will help you choose an instrument that your child can practice on regularly without causing household or neighborhood disruption.

Acoustic drum sets have a substantial physical footprint and require a dedicated, permanent setup area. A standard acoustic kit typically needs a space of at least 1.5 by 1.5 meters to accommodate the drums, stands, throne, and the player. Because acoustic drums cannot be easily folded or packed away, they are best suited for homes with dedicated music rooms, spacious living areas, or garages. Additionally, in tropical climates with high humidity, the wooden shells of acoustic drums can warp, and the metal hardware can rust if kept in damp, unventilated spaces. If you choose an acoustic kit, ensure it is placed in a well-ventilated room away from direct sunlight and extreme moisture.
Electronic drum sets offer a much more compact and flexible footprint. Many electronic kits are built on lightweight, adjustable racks that can be folded flat and stored in a closet or tucked against a wall when not in use. This makes them highly suitable for smaller homes, townhouses, or condominiums where space is at a premium. Furthermore, electronic components are generally less susceptible to the structural warping caused by humidity, though they should still be protected from dust and direct exposure to moisture.
Noise management is another critical factor, particularly in shared housing or densely populated residential areas. Acoustic drums are naturally loud, easily exceeding 90 decibels during normal play, which can quickly lead to noise complaints from neighbors. Electronic kits solve this issue by allowing the player to plug in headphones, keeping the sound of the drum samples confined to the user’s ears. However, parents should be aware that electronic kits are not completely silent; the physical impact of the drumsticks on rubber or mesh pads, along with the thumping of the kick pedal, can create low-frequency vibrations that travel through concrete floors. Placing a thick, dense rug or a foam isolation mat under the electronic kit can help dampen these vibrations.
The tactile feedback and skill transfer also differ between the two types. Acoustic drumheads provide a natural rebound and dynamic sensitivity that help a child develop proper stick control, hand strength, and nuance. Electronic kits equipped with mesh drumheads mimic this natural rebound closely and are highly recommended over cheaper rubber pads. Rubber pads tend to feel stiff and can cause wrist fatigue during extended practice sessions, whereas mesh heads can be tensioned with a drum key to match the feel of a real acoustic drum, facilitating a smoother transition to acoustic instruments in the future.
Recommended Drum Configurations by Age and Skill Level
As children grow and develop their motor skills, their musical needs change. Introducing a complex, full-sized drum kit to a young beginner can be overwhelming and counterproductive. Selecting a drum configuration that matches your child’s developmental stage ensures they can focus on building fundamental skills without being distracted by unnecessary components.
Toddlers and Preschoolers (Ages 2–5)
For toddlers and preschoolers, the primary goal is to foster a love for music, develop basic hand-eye coordination, and explore simple rhythm patterns. At this stage, a simple 3-piece junior drum set is highly recommended. A typical 3-piece configuration consists of a small bass drum, a snare drum, and a single mounted tom-tom, along with a small cymbal. This simplified layout keeps the child’s focus on basic beat-making without overwhelming them with too many choices or requiring complex coordination between all four limbs.
The hardware for this age group must be lightweight and low-profile. Toddlers do not have the physical strength or reach to operate heavy, adult-sized stands. Low-profile stands allow the drums to be positioned close to the ground, matching the child’s natural seated height. Ensure that the stands are stable enough to withstand energetic play but light enough that they do not pose a serious tipping hazard if bumped.
Safety is paramount when selecting instruments for very young children. Traditional metal cymbals can be heavy, loud, and may have sharp edges that pose a risk to small fingers. For toddlers, look for kits that feature soft, low-volume plastic or rubber cymbals, or replace metal cymbals with soft percussion alternatives. This not only protects your child’s hands and hearing but also keeps the overall volume of the instrument at a level that is comfortable for the entire household.
Early Elementary (Ages 6–9)
As children enter early elementary school, their physical coordination, attention span, and spatial awareness improve significantly. This is the ideal stage to transition to a scaled-down 5-piece junior drum set. A standard 5-piece configuration includes a bass drum, a snare drum, two rack toms, a floor tom, a pair of hi-hat cymbals, and a crash or ride cymbal. This layout mirrors a full-sized adult kit, allowing the child to learn standard drum patterns and transitions while working with dimensions scaled to their smaller body size.
Using smaller drum diameters is crucial for this age group. For example, a junior kit with a 16-inch bass drum allows the rack toms to be mounted much lower than they would be on a standard 22-inch bass drum. This lower positioning ensures that children with shorter arms and legs can reach all the drums and cymbals comfortably without having to stretch or adopt awkward angles. It also teaches them proper spatial awareness and muscle memory as they move their sticks from one drum to another.
Because children grow rapidly between the ages of six and nine, the adjustability of the drum hardware is a key consideration. When purchasing a junior kit, verify that the included drum throne and stands offer a wide range of height adjustments. A highly adjustable throne will allow the kit to grow alongside your child over several years, saving you from having to purchase a completely new set as soon as they experience a growth spurt.
Pre-Teens and Older (Ages 10+)
By the time a child reaches age ten, they have usually developed the physical strength, limb length, and coordination required to play a full-sized instrument. For pre-teens and older children who show a serious, ongoing interest in drumming, upgrading to a standard 5-piece acoustic or electronic drum set is the logical next step. Full-sized kits feature standard drum diameters, such as a 20-inch or 22-inch bass drum, a 14-inch snare drum, and standard-sized cymbals, providing the authentic playing experience needed for advanced study and ensemble playing.
As older children play with more physical power and dynamic range, upgrading to heavier-duty hardware becomes essential. Lightweight junior stands will wobble, slide across the floor, or strip their adjustment threads under the impact of stronger, more energetic strokes. Look for double-braced hardware stands that offer maximum stability and can securely support standard-weight cymbals. Sturdy hardware ensures that the drums and cymbals remain locked in place during intense practice sessions, preventing distractions and potential damage to the equipment.
Additionally, pay close attention to the quality of the kick drum pedal. Junior pedals are often too small for older children’s feet and lack the robust construction required for rapid, powerful footwork. A standard-sized kick drum pedal with a solid steel base plate, an adjustable tension spring, and a heavy-duty felt or plastic beater is necessary to withstand heavier impacts. Verifying that the pedal can be adjusted to match your child’s foot size and playing style will help them develop proper bass drum technique and speed.
Essential Specs and Safety Checks Before Purchasing
Before finalizing your purchase, it is important to conduct a thorough quality and safety check on the drum set and its components. Because drumming involves repetitive, high-impact movements, ensuring the structural integrity and stability of the equipment is vital for preventing injuries and ensuring a positive learning experience.
First, inspect the weight capacity and base stability of the drum throne. The throne must support your child’s weight securely while they move their arms and legs. Look for thrones with double-braced legs and thick, non-slip rubber feet that grip the floor firmly. Avoid lightweight, single-braced stools that wobble or tilt when the child leans forward, as a tipping throne can lead to painful falls and discourage a young beginner from practicing.
Second, verify that all hardware stands, wingnuts, and pedals feature secure locking mechanisms. When tightened, the stands should hold their positions firmly without slipping or collapsing under the weight of the drums or the force of the drumstick strikes. Run your hands carefully over the metal hardware to check for any sharp exposed edges, rough welds, or poorly finished joints. Smooth, well-manufactured hardware prevents accidental scratches and cuts during setup, adjustment, and teardown.
Finally, confirm exactly what accessories are included in the package. Many drum sets are sold as ‘shell packs,’ which consist only of the wooden drum shells and do not include cymbals, stands, pedals, a throne, or drumsticks. Read the product specifications carefully to avoid unexpected surprises. If essential accessories are not included, be sure to factor them into your total budget in ₱. For example, you may need to purchase a pair of lightweight 7A drumsticks (which are thinner and easier for smaller hands to grip than standard 5A sticks), a sturdy drum throne, and a pair of comfortable closed-back headphones if you are purchasing an electronic drum set.
Frequently Asked Questions (FAQ)
At what age should a child start taking formal drum lessons?
While children can explore rhythm instruments at any age, formal drum lessons typically yield the best results around ages 6 to 7. At this stage, children have developed the necessary attention span, fine motor skills, and physical coordination to handle structured instruction, read basic notation, and operate pedals and sticks simultaneously. Parents can consult a local music teacher to assess their child’s physical readiness and interest before committing to formal lessons.
Do I need to buy a separate drum throne for a junior kit?
Many entry-level junior drum sets come bundled with a basic, lightweight stool. While convenient, these bundled stools often lack robust height adjustment mechanisms, adequate padding, or double-braced stability. If your child practices regularly or for sessions longer than fifteen minutes, upgrading to a dedicated, adjustable, double-braced drum throne is highly recommended to support proper spinal alignment and prevent fatigue.
How can I reduce the noise of an acoustic drum set in an apartment?
To minimize the sound of an acoustic kit in a shared living space or apartment, you can install mesh drumheads and low-volume cymbals, which reduce acoustic volume by up to 80 percent. Additionally, placing the entire drum set on a thick, dense rug or a DIY isolation platform (constructed from interlocking foam tiles or sturdy wooden boards) helps absorb low-frequency vibrations from the bass drum pedal, preventing the sound from traveling through concrete floors to neighboring units.
Community discussion
Share your experience or ask a question. Comments are reviewed before publication.